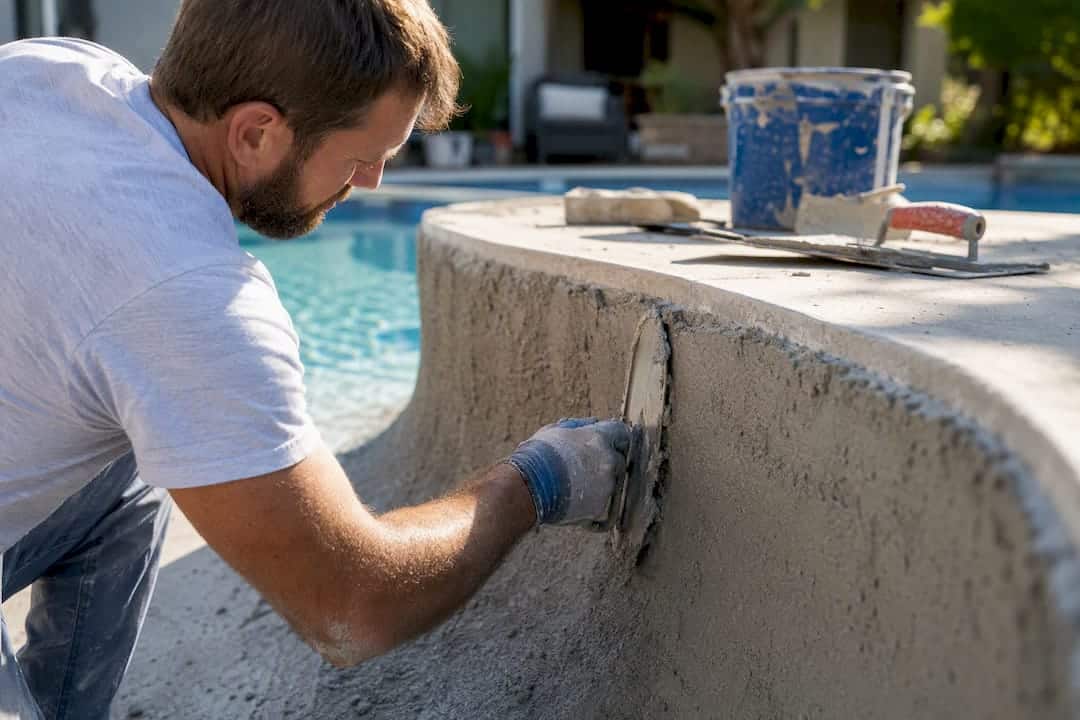
Small, localized scale or a few raised nodules can usually be smoothed with DIY methods. Etching, pervasive roughness across the shell, hollow-sounding areas, or nodules that keep coming back mean that you need resurfacing, not another patch. The National Plasterers Council ties most of this damage back to water chemistry that sits outside balanced ranges for too long, and the Langelier Saturation Index (LSI) is the tool that tells you how aggressive or scale-forming your water actually is. If the surface is beyond a spot fix, a specialist like Classic Marcite can assess it and quote a permanent finish.
Before you touch a sanding stone or a chemical, run this quick triage:
- Test your water chemistry (pH, alkalinity, calcium hardness) and calculate LSI.
- Tap or knock on rough spots to check for a hollow sound underneath.
- Photograph every rough zone, close up and from a distance, for reference.
- Keep swimmers, especially kids and bare feet, out of the roughest areas until you know the cause.
Pro Tip: Take your photos in direct sunlight and at a low angle. Raking light makes pitting and exposed aggregate far easier to spot than an overhead shot.
Once you’ve done that, you’ll know whether to grab a DIY checklist or request a quote from a resurfacing pro.
Key Takeaways
Small scale or isolated nodules respond to DIY smoothing, while pervasive etching, hollow sounds, or repeated repairs mean the finish needs full resurfacing.
| Point | Details |
|---|---|
| Diagnose before treating | Test water chemistry, tap for hollow sounds, and photograph rough zones before choosing a fix. |
| DIY has real limits | Pumice, patching, and careful acid washing work only on isolated scale or small chips. |
| Match finish to lifespan | Marcite plaster runs 7 to 10 years; pebble finishes often last 15 to 20 years. |
| Chemistry prevents recurrence | Keep LSI near 0.0 to +0.3 and test pH, alkalinity, and hardness on a regular schedule. |
| Get a written quote | Compare warranty, substrate repair, and materials before hiring, and consider Classic Marcite for marcite or pebble resurfacing in Central Florida. |
Table of Contents
- How to Diagnose a Rough Pool Surface
- Short-Term DIY Fixes for Minor Roughness
- Which Permanent Resurfacing Option Fixes Roughness for Good?
- What Happens During a Professional Resurfacing Job?
- How Do You Keep a Pool Surface From Getting Rough Again?
- DIY or Hire a Pro? A Quick Decision Checklist
- Do Climate and Hard Water Make Roughness Worse?
- When Is Resurfacing Actually Worth the Investment?
- What to Ask for in a Resurfacing Quote
- Sources
How to Diagnose a Rough Pool Surface
A reliable diagnosis takes about 20 minutes and tells you almost everything you need before calling anyone.
- Visual map the pool: waterline, steps, benches, and deep end separately. Roughness concentrated at the waterline usually points to scale; roughness spread everywhere points to etching or general erosion.
- Tactile test each area. Scale feels like sandpaper or crusty buildup you can sometimes chip with a fingernail. Nodules feel like small hard bumps rising above the surface, a sign of aggregate pushing through worn plaster.
- Hollow-sound test. Tap the shell with a hard object. A dull, hollow echo signals delamination, plaster separating from the substrate, which no surface treatment fixes.
- Leak check. Watch your water level over 24 to 48 hours (bucket test) to rule out a structural leak feeding the deterioration.
Match severity to likely fix:
- Minor spot (a few nodules or a small chipped patch): candidate for DIY smoothing or a small patch.
- Moderate area (rough patches covering more than a section of wall or floor): often patchable, but get a chemistry test first.
- Pervasive roughness or hollow sound anywhere: resurfacing territory.
Before calling a contractor, run pH, total alkalinity, and calcium hardness tests, calculate LSI, note the rough area as a rough percentage of total surface, and bring your photos and water-loss notes. That package turns a vague phone call into an accurate quote.
Short-Term DIY Fixes for Minor Roughness
DIY smoothing only makes sense when your diagnosis points to scale, a few isolated nodules, or a small chip, and there’s no hollow sound or active leak. If any of those red flags showed up in your inspection, skip ahead to resurfacing.
- Brush and circulate first. A stiff pool brush and a few days of full-time filtration often knock down light scale buildup before you touch anything abrasive.
- Pumice stone or fine sanding pad for isolated calcium scale or small nodules. Work wet, in small circular motions, and rinse frequently to check progress.
- Spot patching with pool-grade plaster or epoxy compound for small chips or divots. Classic Marcite’s patching guide walks through prep, mixing, and cure time, and it’s worth reading before you buy materials, since patch color and texture will vary slightly from the surrounding surface.
- Acid washing, only when etching is minor and localized, using diluted muriatic acid, full PPE (goggles, gloves, acid-resistant boots), and ventilation. Never mix acid with chlorine products, and never attempt this without proper protective gear.
Tools to have on hand: pumice stone, pool-grade epoxy or plaster patch compound, acid-resistant gloves and goggles, a stiff-bristle brush, and a test kit.
Pro Tip: Test any acid treatment on a small, hidden spot, like behind a ladder or under a return jet, and wait 24 hours. Over-aggressive acid washing thins plaster and can make etching worse instead of better.
These fixes buy time. They don’t reverse the underlying wear, and repeating them across a full pool usually costs more than one properly planned resurfacing job.
Which Permanent Resurfacing Option Fixes Roughness for Good?
When roughness covers a wide area, keeps returning, or the surface is delaminating, patching stops being a rational option. Full resurfacing resets the entire shell with a new finish, and the finish you choose determines how smooth it stays and for how long; for more details on material finishes and climate effects, see Smooth Face Blocks: A Homeowner’s Guide to Modern Hardscaping.
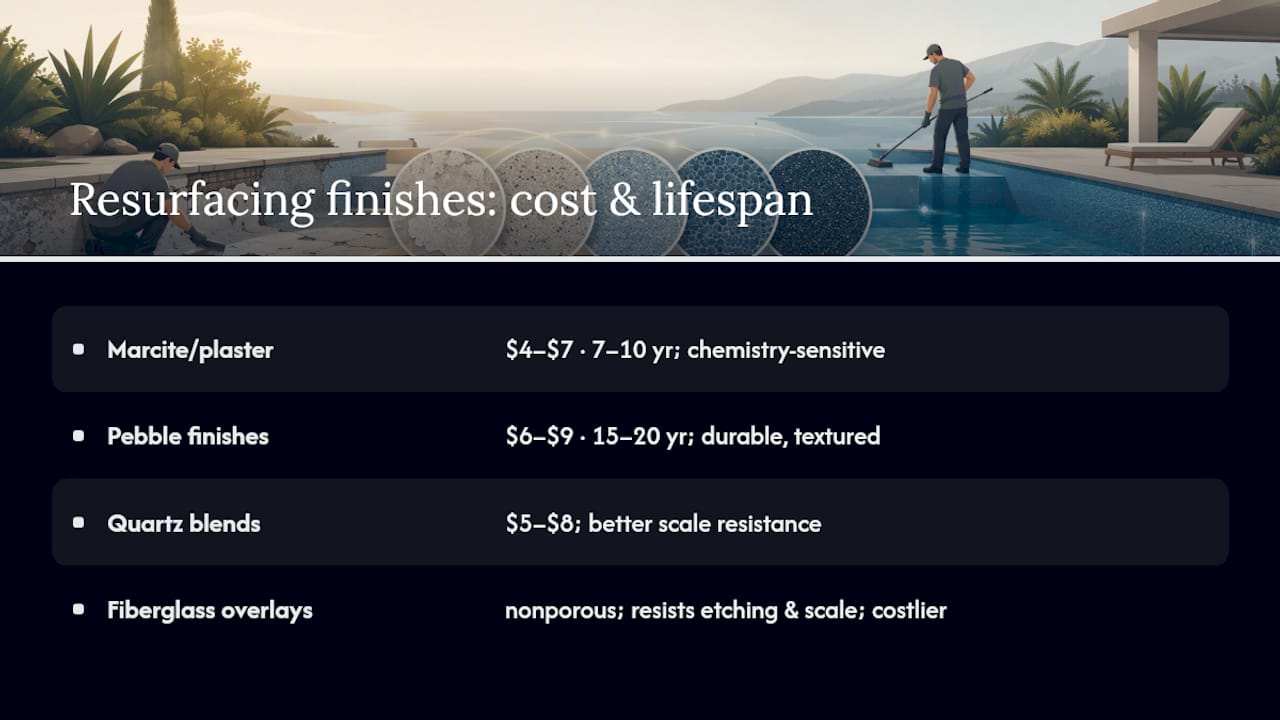
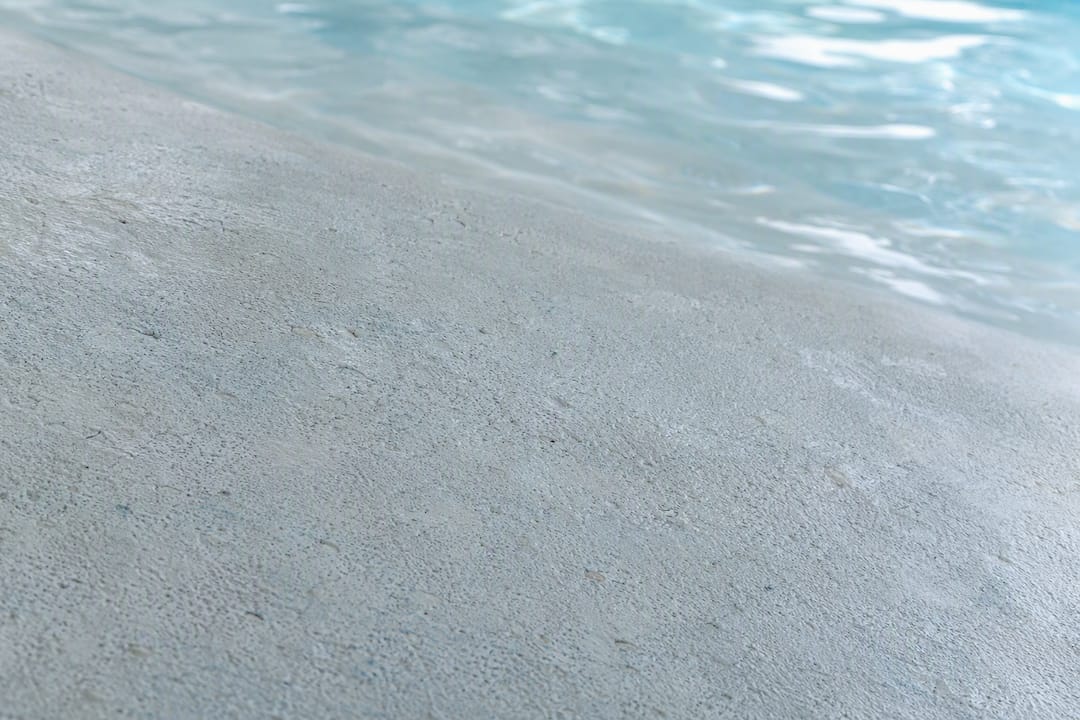
Marcite/plaster is the traditional white or tinted cement finish. It’s the most affordable option, typically $4 to $7 per square foot, but it’s also the most chemistry-sensitive: aggressive water etches it faster than any other finish, and a plain plaster finish generally lasts 7 to 10 years before roughness returns.
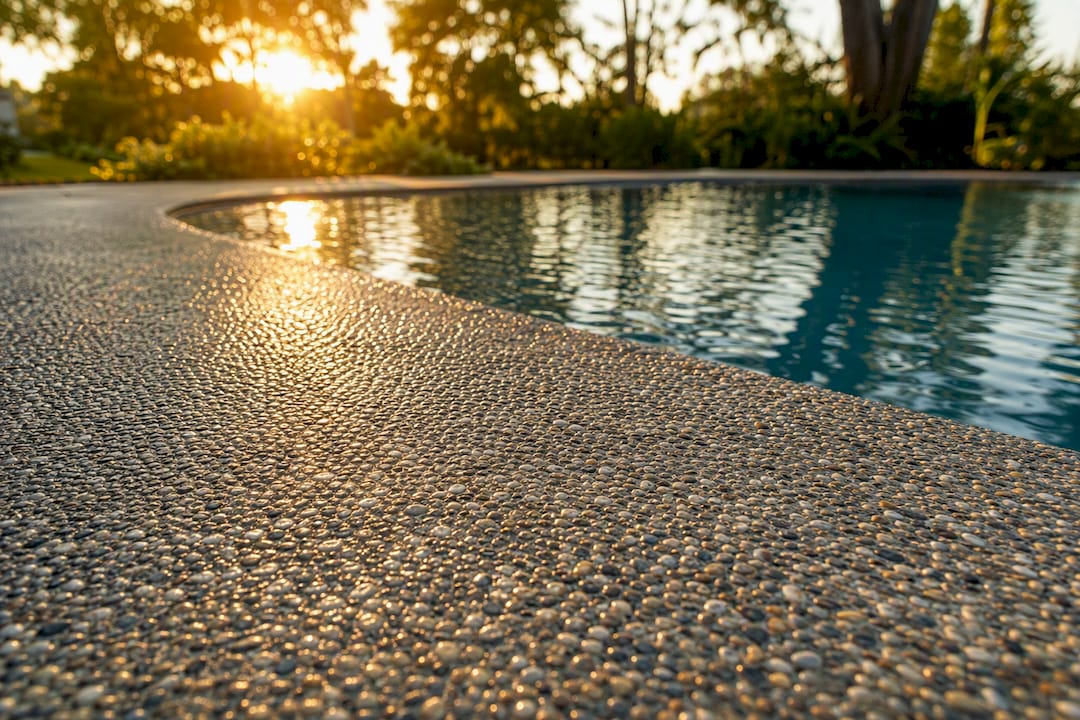
Pebble finishes, like Pebble TecAE, embed natural aggregate in a cement binder for a durable, textured but comfortable surface. Expect $6 to $9 per square foot and a lifespan often stretching 15 to 20 years with proper chemistry, making it a strong choice for owners who don’t want to think about resurfacing again for a long time.
Quartz blends sit between the two, offering better scale resistance than plain plaster at a moderate cost premium, roughly $5 to $8 per square foot.
Fiberglass overlays create a nonporous, glass-smooth shell that resists both etching and calcium scale better than cement-based finishes, though they cost more upfront and require specific substrate prep.
For homeowners prioritizing roughness resistance and swimmer comfort, pebble finishes and marcite plaster remain the two most proven options, and they’re the finishes Classic Marcite installs and stands behind across its Florida service area.
What Happens During a Professional Resurfacing Job?
A resurfacing job follows a predictable sequence, and knowing it helps you spot a rushed or incomplete quote.
- Site visit and estimate, including a chemistry test, surface inspection, and measurement of affected area.
- Leak remediation, if your water-loss test flagged a problem, handled before any cosmetic work begins.
- Surface prep, grinding or chipping out the old finish down to a sound substrate.
- Structural repair, patching cracks or rebuilding damaged areas with hydraulic cement before the new finish goes on.
- Finish application, plaster, pebble, or quartz, applied in a single continuous pour for consistent texture.
- Cure and refill, typically 24 to 48 hours before initial water fill, with a structured startup chemistry schedule over the following 7 to 10 days.
A solid quote itemizes materials, labor, substrate repairs, warranty terms, and startup chemistry service. Watch for red flags: no written warranty, a vague one-line scope, or “surprise” charges once demolition starts. Those are the jobs that run over budget and over schedule.
How Do You Keep a Pool Surface From Getting Rough Again?
Balanced water is the single most effective long-term protection against both scaling and etching, more effective than any repeat treatment you can apply after the fact, according to NPC guidance on interior finishes. The goal is keeping your LSI close to neutral, roughly 0.0 to +0.3, which signals water that’s neither aggressively dissolving your finish nor depositing scale on it.
A short maintenance routine keeps you inside those numbers:
- Test pH and chlorine two to three times weekly; test alkalinity and calcium hardness monthly.
- Test more frequently during pool startup, spring opening, or after any large water addition.
- Brush the entire surface weekly to prevent scale from bonding before it starts.
- Correct chemistry gradually. Large single-dose adjustments swing LSI hard in one direction and stress the finish.
DIY or Hire a Pro? A Quick Decision Checklist
Base the call on hard facts, not gut feeling. Weigh area affected, whether you heard a hollow sound, active water loss, the finish’s age, and how many times you’ve already patched it.
- Under 5% of the surface, no hollow sound, no water loss: DIY smoothing is reasonable.
- Moderate area, plaster over 10 years old, or a second repair attempt: get a professional quote before spending more on patch materials.
- Any hollow sound, active leak, or widespread etching: skip DIY entirely and call a resurfacing specialist.
When you do call contractors, ask directly:
- How many years of experience do they have installing your chosen finish?
- What warranty do they offer, and what does it actually cover?
- How do they handle substrate repair before applying the new finish?
- Can they provide references from jobs at least three to five years old?
Red flags include vague answers about warranty length, pressure to upgrade finishes mid-quote, and any contractor unwilling to show past work. A cheap patch job that fails in 18 months costs more than a properly done resurfacing job that lasts a decade or longer.
Do Climate and Hard Water Make Roughness Worse?
Your local water supply and climate do more to accelerate surface roughness than most homeowners realize. In hard water regions, tap water arrives already loaded with dissolved calcium, which pushes calcium hardness toward the high end of the target range before you’ve added a single chemical. That makes scale formation almost automatic unless you actively manage LSI with lower alkalinity or occasional partial drain-and-refill cycles.
Climate compounds the problem in a different way. High heat accelerates chlorine demand and evaporation, both of which concentrate dissolved minerals in the water over time. Pools that run through long, hot swim seasons see faster mineral concentration than pools that close for winter, since there’s less natural dilution from rain and refill water. Heavy rain events bring their own risk: a sudden influx of soft, low-alkalinity rainwater can swing chemistry toward the aggressive, etching side of the LSI scale within days if you don’t retest and rebalance promptly.
Freeze-thaw cycles matter less in warm climates, but where they do occur, they stress plaster’s cement matrix and open hairline cracks that eventually catch scale or aggregate. Even without freezing, intense UV exposure and consistently high water temperatures gradually break down the surface bonding in cement-based finishes faster than in shaded or seasonally used pools.
None of this is a reason to panic. It’s a reason to test water more often if you’re in a hard water region or run your pool through a long hot season, since the maintenance window for catching an imbalance before it damages the finish is shorter than most owners expect.
When Is Resurfacing Actually Worth the Investment?
Homeowners who’ve patched the same plaster three or four times over a decade usually end up spending more than a full resurfacing job would have cost upfront. In our experience, a shell over 10 years old with widespread etching or a pool that’s had two or more prior spot repairs is past the point where patching makes financial sense. A durable finish like pebble aggregate costs more per square foot going in, but it buys a decade or more of not thinking about your pool’s texture at all, which is the actual value most owners are paying for.
What to Ask for in a Resurfacing Quote
Once you’ve decided a patch won’t cut it, the quote itself is where good jobs get separated from expensive mistakes. Ask for a written scope covering substrate repair, the exact finish material, warranty length and coverage, and a realistic cure-and-refill timeline.
Classic Marcite has resurfaced more than 100,000 pools across Central Florida, including residential backyards, commercial properties, resorts, and hotels, and remains the largest Pebble Tec® applicator in the region. That kind of volume means the crew has already seen your specific version of rough, whether it’s waterline scale, widespread etching, or a plaster shell that’s simply aged out.
If you’re ready to move past patching, request a free estimate and include photos of the rough areas, rough measurements of the affected surface, and a short description of when you first noticed the texture change. For homeowners in the Orlando area, start with Classic Marcite’s Orlando resurfacing page to see service details and request a quote directly.
Sources
- National Plasterers Council tech bulletin: Swimming pool interior finishes — chemical etching