
Most American pools in Orlando and Jacksonville face resurfacing needs every 8 to 12 years due to heavy use and changing weather. If you’re a homeowner planning to refresh your pool, tackling these projects can feel intimidating. Understanding each step clearly can help you avoid costly mistakes and extend your pool’s life. Learn how the right preparation transforms your pool’s durability and beauty while protecting your property and investment.
Table of Contents
- Step 1: Drain the Pool and Remove Debris
- Step 2: Inspect and Repair Pool Structure
- Step 3: Clean and Strip Old Surface
- Step 4: Mask and Protect Surrounding Areas
- Step 5: Verify Surface Readiness for Resurfacing
Quick Summary
| Key Insight | Explanation |
|---|---|
| 1. Drain and clean the pool | Ensure the pool is completely drained and free from debris to prepare for resurfacing. |
| 2. Inspect for structural damage | Conduct a thorough inspection to detect and repair any structural weaknesses before resurfaces. |
| 3. Strip old surface materials | Properly clean and remove the old finish to create a suitable base for the new material. |
| 4. Protect surrounding areas | Use barriers and coverings to safeguard adjacent spaces from debris or damage. |
| 5. Verify surface readiness | Check the pool surface for cleanliness and suitability before applying the new finish. |
Step 1: Drain the Pool and Remove Debris
Preparing your pool for resurfacing starts with completely draining and thoroughly cleaning the surface. This critical first step ensures your new pool finish will adhere correctly and look stunning. Pool skimmers play a crucial role in maintaining water clarity before you begin the draining process.
To drain your pool effectively, start by disconnecting electrical equipment like pumps and heaters. Use a submersible pump placed at the pool’s lowest point to remove water systematically. When discharging the water, follow local guidelines to protect drainage systems and prevent potential environmental damage. This means releasing water slowly into sanitary sewers and ensuring the water is free from chemicals or large debris.
Once drained, use a sturdy push broom and industrial vacuum to remove all remaining debris. Pay special attention to corners, steps, and areas around fixtures where dirt and calcium deposits tend to accumulate. Remove loose tiles, repair any visible cracks, and clean the surface thoroughly to create an ideal base for resurfacing.
Pro tip: Rent a wet vacuum specifically designed for pool surfaces to ensure you remove every last bit of dust and small particulates before resurfacing begins.
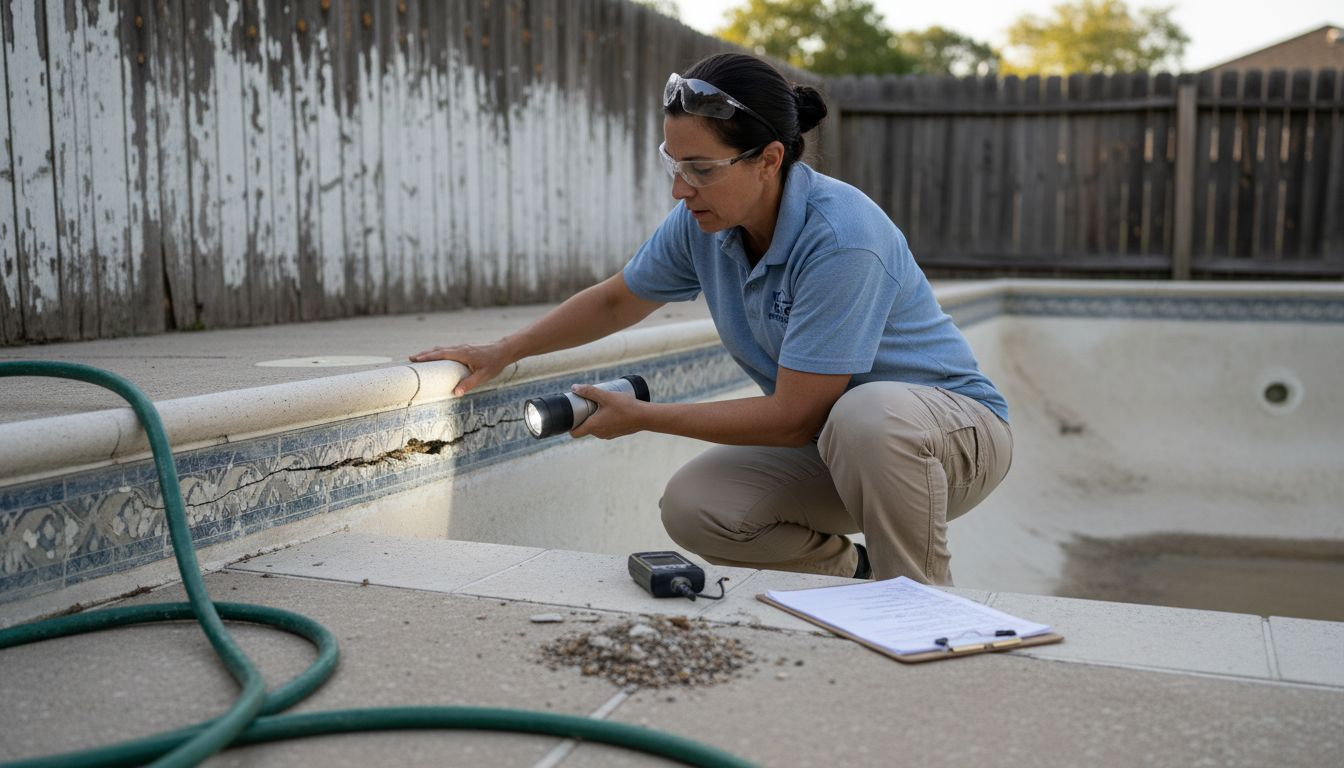
Step 2: Inspect and Repair Pool Structure
Before resurfacing your pool, a comprehensive structural inspection is crucial to ensure a successful renovation. Local health authorities recommend thoroughly documenting and reviewing the pool’s structural integrity to identify potential issues that could compromise the new surface.
Your inspection should focus on several key areas. Check the reinforcing steel, plumbing systems, main drains, and electrical connections to confirm they meet safety standards. Look for signs of structural damage such as cracks, chips, or areas of deterioration in the pool shell. Pay special attention to the waterline area, corners, and around fixtures where wear and tear are most common. Use a flashlight and magnifying glass to spot subtle imperfections that might not be immediately visible.
If you discover any structural issues, address them immediately before proceeding with resurfacing. Small cracks can be repaired with specialized pool repair compounds, while more significant damage might require professional intervention. The goal is to create a smooth, stable surface that will support your new pool finish and prevent future problems.
Pro tip: Take high-resolution photographs of any structural issues you find to help professionals provide accurate repair recommendations and cost estimates.
Step 3: Clean and Strip Old Surface
Prepping your pool for resurfacing requires a meticulous approach to cleaning and removing the existing surface. Thoroughly stripping the old finish is crucial to expose a clean substrate that will support the new pool surface material.
Effective pool cleaning involves multiple stages including removing biological contaminants like algae through comprehensive brushing and shock treatments. Begin by using a heavy-duty wire brush to scrub the entire pool surface aggressively. Focus on removing loose paint, epoxy, and any accumulated debris. Utilize specialized pool stripping chemicals designed to break down existing finishes without damaging the underlying structure. Work systematically from the pool floor to the walls, ensuring you cover every square inch with thorough mechanical and chemical cleaning.
After initial stripping, rinse the surface completely and inspect for any remaining residue or imperfections. You may need to repeat the stripping process in areas with stubborn buildup. The goal is to create a completely clean, texture-ready surface that will allow optimal adhesion for your new pool finish.
Pro tip: Rent a professional grade pressure washer with adjustable settings to help remove the final layers of old surface material more efficiently and evenly.
Compare common surface contaminants and removal methods for pool resurfacing:
| Contaminant Type | Risk to New Finish | Best Removal Method | Special Consideration |
|---|---|---|---|
| Calcium deposits | Poor adhesion | Acid wash, wire brushing | Focus on corners and fixtures |
| Algae and biofilm | Weak surface bonding | Shock treatment, scrubbing | Repeat treatment if persistent |
| Paint/epoxy residue | Bonding failure | Chemical stripper, sanding | Use non-damaging chemicals |
| Loose debris/dust | Surface imperfections | Wet vacuum, pressure wash | Use HEPA filter for small particles |
Step 4: Mask and Protect Surrounding Areas
Safety barriers are critical during pool resurfacing to prevent debris contamination and protect adjacent property. Your goal is to create a comprehensive protective zone that shields landscaping, deck areas, and nearby structures from potential damage during the resurfacing process.
Secure the pool area with appropriate fencing and protective coverings to minimize unintended access and prevent chemical or physical debris exposure. Start by laying down heavy-duty plastic sheeting around the pool perimeter, extending at least 10 feet from the pool edge. Use professional grade masking tape to secure the edges, ensuring complete coverage of decking, surrounding plants, and any nearby equipment. Cover outdoor furniture, grills, and other movable items with thick plastic tarps or move them completely away from the work zone.
Pay special attention to sensitive areas like electrical outlets, landscaping features, and adjacent structures. Use painter’s tape and rosin paper to protect surfaces that cannot be moved. Create a clear work zone that allows professionals ample space while minimizing potential for accidental damage.
Pro tip: Take digital photographs of the surrounding area before beginning masking to create a reference for returning everything to its original placement.
Step 5: Verify Surface Readiness for Resurfacing
Surface preparation standards require a comprehensive assessment to ensure the pool shell is perfectly conditioned for a new finish. Your final inspection will determine whether the surface is truly prepared for resurfacing and capable of supporting a durable, long lasting pool finish.
Structural integrity verification involves carefully examining the pool shell for cleanliness, smoothness, and the absence of potential bonding barriers. Use a bright work light and magnifying glass to inspect every square inch of the surface. Check for any remaining loose material, hairline cracks, or areas of uneven texture. Measure surface moisture content using a professional moisture meter to confirm optimal conditions for new surface application. Run your hands carefully over the entire surface to feel for any imperfections that might not be immediately visible.
If you discover any questionable areas during your inspection, do not proceed with resurfacing. Minor imperfections can be addressed through targeted repairs or additional preparation techniques. Your goal is to create a perfectly smooth foundation that will support the new pool surface and ensure maximum longevity.
Pro tip: Document your surface inspection with high resolution photographs from multiple angles to provide a comprehensive record for your pool professionals.
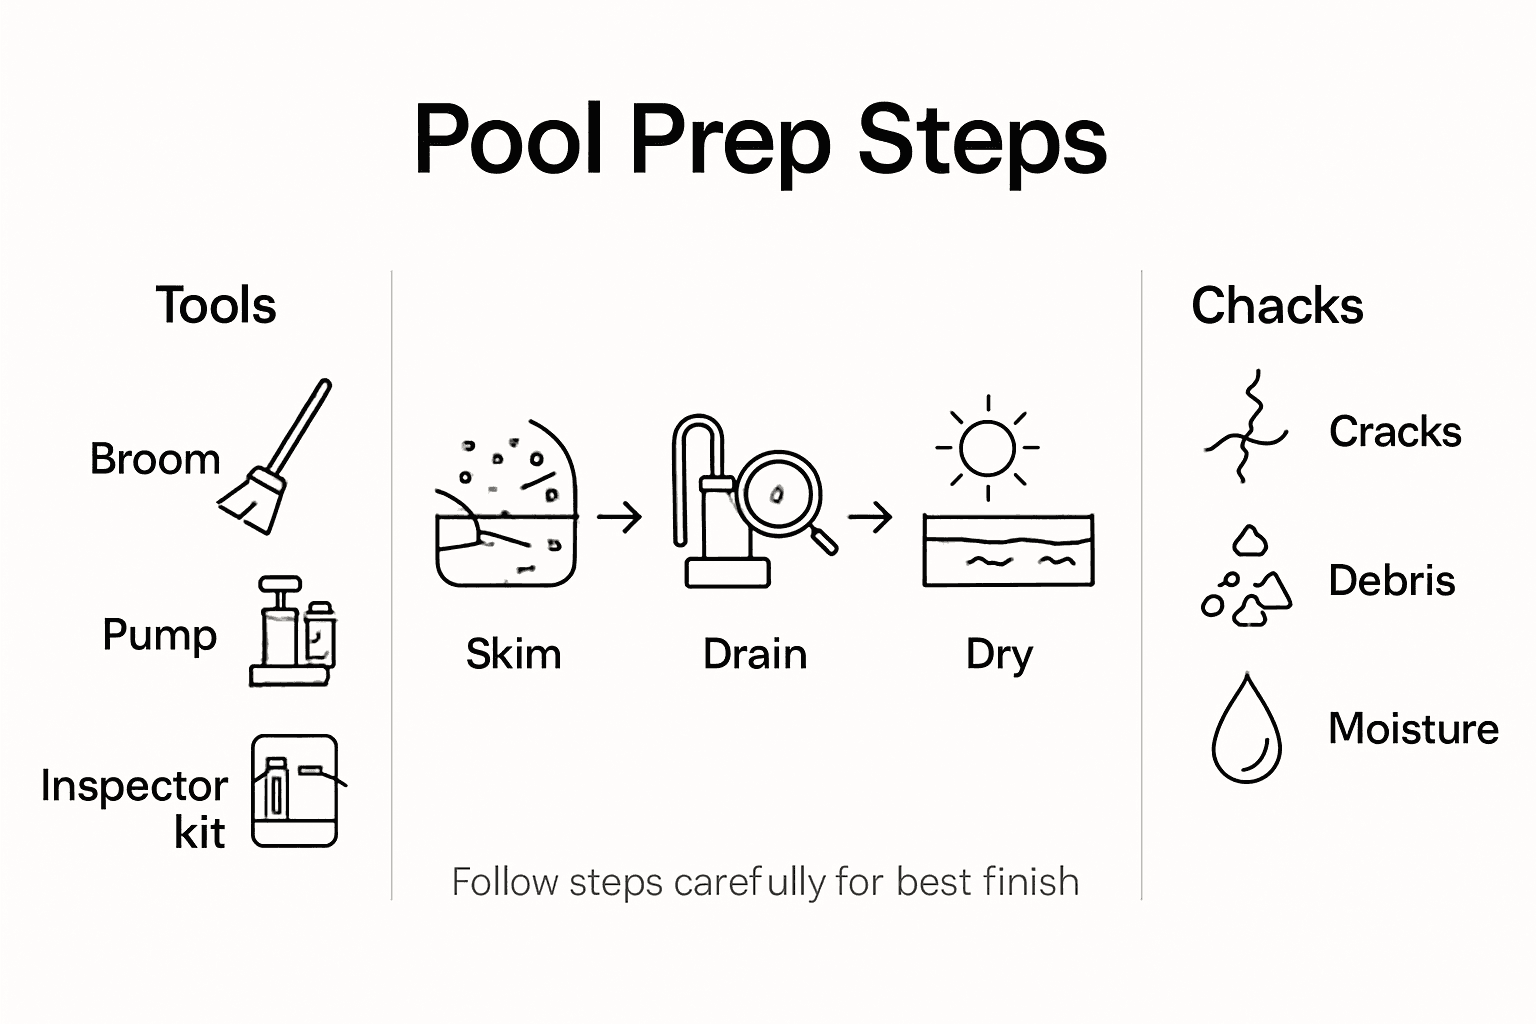
Here’s a summary of key steps and tools for pool surface preparation:
| Step | Main Objective | Essential Tools | Professional Tip |
|---|---|---|---|
| Drain and Remove Debris | Ensure clean, dry surface | Submersible pump, industrial vacuum | Rent a wet vacuum |
| Inspect and Repair | Address structural weaknesses | Flashlight, magnifying glass, repair kit | Photograph issues for reference |
| Clean and Strip Surface | Remove old finish and contaminants | Wire brush, stripping chemicals, pressure washer | Use adjustable pressure washer |
| Mask and Protect | Prevent damage to surroundings | Plastic sheeting, masking tape, tarps | Photograph area layout |
| Verify Surface Readiness | Confirm ideal resurfacing conditions | Moisture meter, work light | Document with high-res photos |
Prepare Your Pool for Resurfacing with Confidence and Expert Support
Properly preparing your pool surface for resurfacing is the key to lasting beauty and durability. This detailed guide reveals common challenges like removing old finishes, inspecting structural integrity, and protecting surrounding areas to achieve flawless results. If you are facing complex pool preparation or want to ensure perfect surface readiness for Pebble Tec® or other premium finishes, expert assistance is essential. Avoid costly mistakes such as poor adhesion or hidden structural problems that can shorten your pool’s lifespan.

Trust Classic Marcite, Central Florida’s leading pool renovation specialists since 1988. With over 100,000 projects completed, we handle everything from precise surface prep to high-quality pool resurfacing and remodeling. Our comprehensive services guarantee your pool will not only look stunning but also withstand Florida’s weather year-round. Don’t wait until small issues grow into expensive repairs—visit Classic Marcite today for a free estimate and take the first step toward your ideal pool transformation.
Frequently Asked Questions
What is the first step to prep my pool for resurfacing?
Start by completely draining the pool and removing all debris. Use a submersible pump to drain the water and then clean the surface thoroughly to ensure proper adhesion of the new finish.
How do I inspect my pool for structural issues before resurfacing?
Conduct a visual inspection of the pool shell, focusing on cracks, chips, and structural integrity. Use a flashlight and magnifying glass to identify subtle imperfections and address any problems before proceeding with the resurfacing.
What are the best methods to clean and strip the old surface?
Use a heavy-duty wire brush to scrub the pool surface and apply specialized stripping chemicals to break down existing finishes. This process should be systematic, ensuring that you cover every area for a completely clean surface ready for the new finish.
How can I protect my surrounding area during the resurfacing process?
Create a protective barrier around the pool by laying down heavy-duty plastic sheeting and securing it with masking tape. Cover or move nearby outdoor furniture and landscaping features to prevent damage from debris and chemicals during resurfacing.
How do I verify that my pool surface is ready for resurfacing?
Perform a thorough inspection to check for cleanliness, smoothness, and moisture levels using a moisture meter. Address any imperfections or lingering contaminants before applying the new pool finish to ensure optimal bonding and durability.
What tools do I need for preparing my pool for resurfacing?
Essential tools include a submersible pump, industrial vacuum, wire brush, stripping chemicals, and a moisture meter. Gather these tools to ensure a successful surface preparation process before resurfacing.
