
TL;DR:
- Pool leaks vary by type, including shell cracks, fitting failures, plumbing issues, and electrical breaches, each requiring tailored repairs. Proper diagnosis, preparation, and material selection help ensure long-lasting fixes, especially under Florida’s climate challenges. While some minor repairs are DIY feasible, complex leaks and structural issues necessitate professional intervention to prevent further property damage.
You wake up on a Saturday morning, coffee in hand, and notice your pool water is noticeably lower than it was two days ago. No storm rolled through. The kids haven’t been splashing around all week. That sinking feeling is real, and so is the potential damage building beneath the surface. The good news: fixing a pool leak does not have to be a guessing game. With a structured, professional workflow, Orlando and Jacksonville homeowners can diagnose the source accurately, repair it correctly the first time, and keep their pool looking and performing at its best for years to come.
Table of Contents
- Understanding pool leak types and their impact
- What you need to start: Tools, materials, and safety
- Step-by-step workflow to fix common pool leaks
- Troubleshooting and avoiding common mistakes
- What DIY pool repair guides don’t tell you: Our expert perspective
- Classic Marcite: Your Florida pool repair and renovation partner
- Frequently asked questions
Key Takeaways
| Point | Details |
|---|---|
| Classify leaks first | Correct identification of leak type ensures you select the most effective repair. |
| Use the right tools | Having proper equipment prevents safety issues and repair delays. |
| Follow a clear workflow | Structured steps yield better, longer-lasting results than random fixes. |
| Avoid common mistakes | Recognizing common errors keeps you from wasting time and money. |
| Know when to call pros | Professional help is crucial for major or hidden leaks to protect your investment. |
Understanding pool leak types and their impact
Before you reach for a patch kit or call the first number you find online, you need to know exactly what kind of leak you are dealing with. Pool leaks are not all the same, and treating one type like another is one of the fastest ways to waste money and time.
There are four primary categories of pool leaks:
- Shell or structural leaks: Cracks or gaps in the pool shell itself, usually caused by ground movement, Florida’s freeze-thaw cycles, or material aging.
- Fitting leaks: Failures at the points where pipes, lights, and returns connect to the shell. Gaskets degrade over time, especially in Florida’s intense sun and heat.
- Plumbing leaks: Breaks, corrosion, or joint failures in the underground pipes that move water between your pool, pump, and filter equipment.
- Electrical component leaks: Breaches around light niches or conduit entry points where water finds a path through compromised seals.
Each of these affects your pool differently. Shell cracks threaten the long-term structural integrity of the whole vessel. Left alone, water infiltrates the gunite or plaster beneath the surface, accelerating the common causes of pool cracks and leading to far more expensive repairs down the road. Fitting leaks tend to be slow and sneaky, often mistaken for normal evaporation. Plumbing leaks underground can quietly erode soil beneath your deck, causing shifting and instability. Electrical leaks carry obvious safety risks on top of water loss.
“Repair strategy should be selected by leak source classification (shell/structural vs fittings vs plumbing vs electrical components), because the most durable fix differs by component.”
That quote sums up why classification matters so much. A patch that works perfectly on a surface crack will do absolutely nothing for an underground pipe failure.
| Leak type | Warning signs | Risk level if ignored |
|---|---|---|
| Shell/structural | Visible cracks, staining around cracks | High: structural failure |
| Fittings | Slow loss, wet spots near returns | Medium: worsens over time |
| Plumbing | Sudden significant loss, soggy yard | High: soil erosion, deck damage |
| Electrical | Tripped breakers, loss near light niches | Critical: safety hazard |
Our full guide to pool leak fixes walks through diagnostic techniques for each type in detail. Knowing which category you are dealing with sets the entire repair strategy.
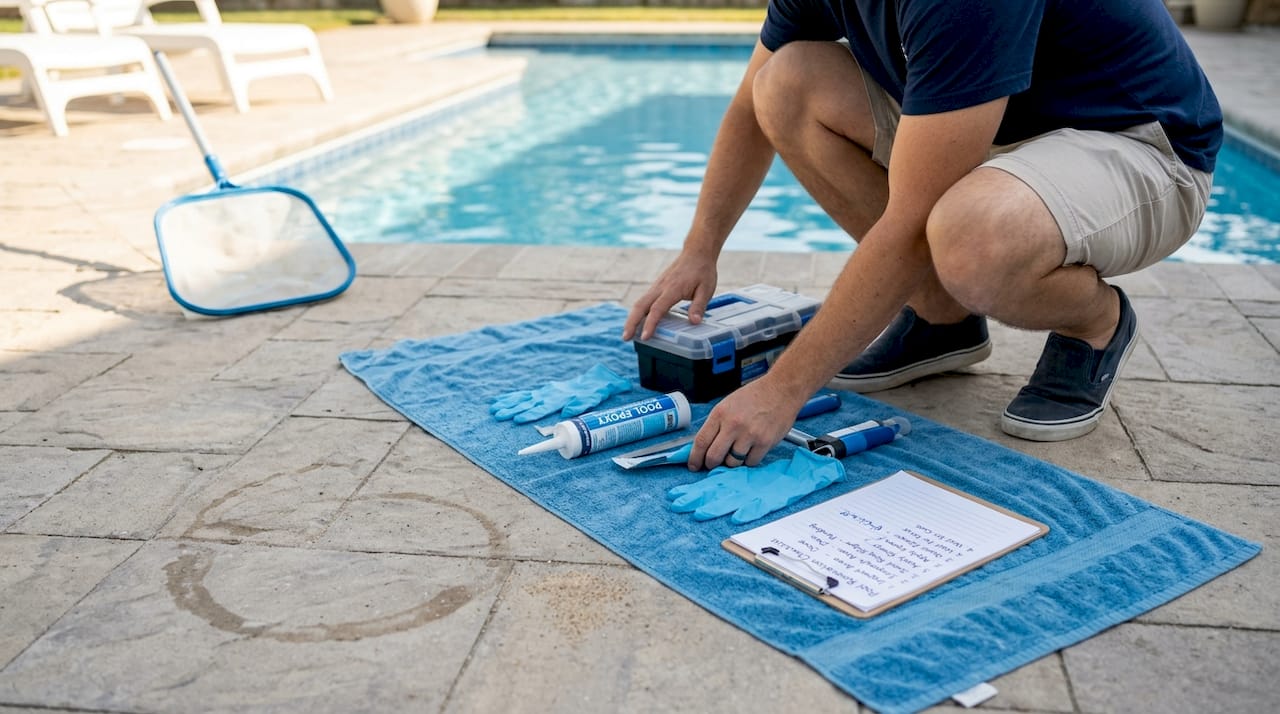
What you need to start: Tools, materials, and safety
Once you have identified the source of your pool leak, gathering the right equipment is your next crucial step. Walking in unprepared means mid-repair trips to the hardware store, mistakes, and potentially unsafe conditions.
Here is what you need for each major leak type:
For shell and structural crack repairs:
- Underwater epoxy or two-part pool patch compound
- Hydraulic cement for active water intrusion
- Wire brush and chisel for surface preparation
- Waterproof gloves and eye protection
- Pool-safe bonding agents for plaster or Pebble Tec® finishes
For fitting and return leaks:
- Replacement gaskets and o-rings (sized to your specific fittings)
- Pool-grade silicone sealant
- Screwdrivers and fitting wrenches
- Pipe thread tape
For plumbing leak repairs:
- Pipe locating tools (or a professional leak detection service)
- PVC pipe sections, couplings, and primer
- Pressure testing equipment
- Appropriate shovels if excavation is needed
“Shell cracks may use epoxy injection or hydraulic cement patching; underground plumbing may require pipe repair/replacement or lining; light niche/conduit resealing may involve electrical considerations.”
Florida pools face unique challenges that homeowners in other states do not. Humidity accelerates the breakdown of adhesives and sealants left in storage. Materials like standard epoxy can cure incorrectly if applied during high afternoon heat. Always store repair compounds below 90 degrees Fahrenheit, which means keeping them indoors rather than in a garage or shed during summer months. Local building codes in both Orlando and Jacksonville may also require permits before you excavate around underground plumbing, so check before you dig.
Pro Tip: Before starting any repair involving the pool’s electrical system, including light niches or conduit entry points, shut off the pool’s circuit breaker completely. Water and electricity are an immediately dangerous combination, and no repair is worth skipping that step.
Knowing your limits matters here. Our structural crack repair solutions guide can help you assess whether the damage you are seeing requires a licensed contractor. For smaller surface issues, the DIY crack repair guide gives you a thorough rundown of what you can tackle safely at home.
| Repair type | Can a homeowner DIY? | Professional required? |
|---|---|---|
| Minor surface crack patch | Yes, with right materials | No |
| Fitting gasket replacement | Yes, for accessible fittings | No |
| Underground plumbing break | Rarely | Almost always |
| Electrical component leak | No | Always |
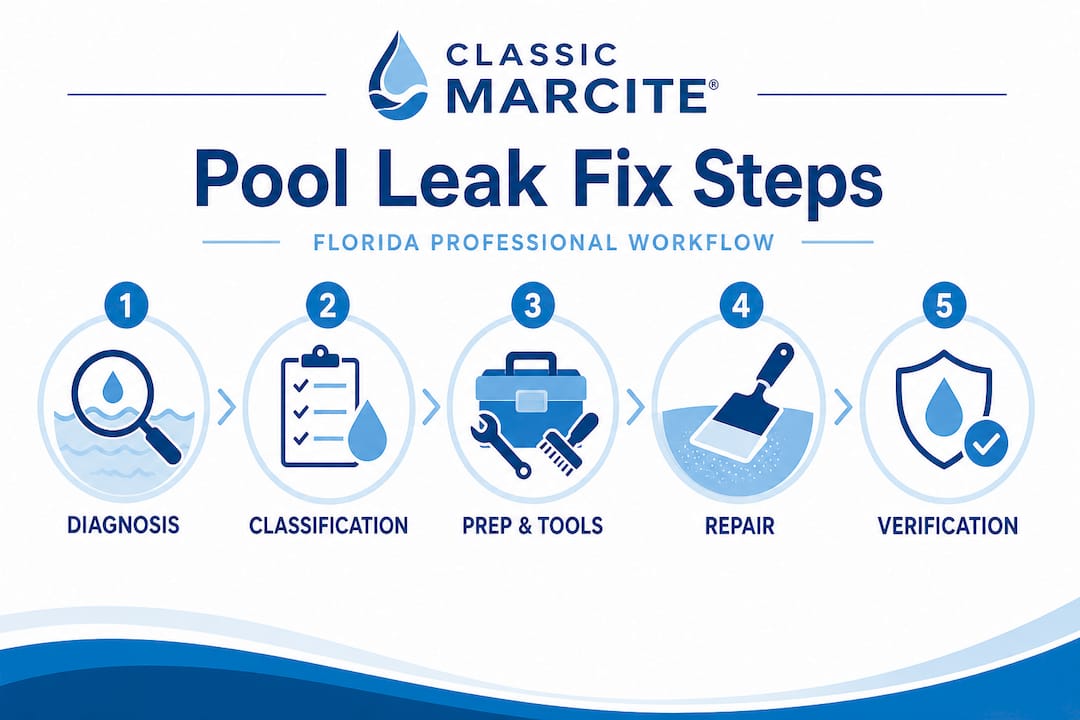
Step-by-step workflow to fix common pool leaks
With the right gear in hand, you can tackle the repair efficiently and confidently by following tested steps. Skipping ahead in this workflow is where most mistakes happen.
Step 1: Diagnosis. Confirm you have a leak and estimate its rate. The bucket test is reliable: fill a bucket with pool water, set it on a step, mark both water levels, and check after 24 hours. If the pool drops more than the bucket, you have a leak beyond normal evaporation.
Step 2: Classification. Use the guide above to pinpoint the type. Check fittings, lights, and the visible shell first since these are the easiest to assess before investigating underground plumbing.
Step 3: Preparation. Clean and prep the repair area thoroughly. For shell cracks, that means brushing out loose material, undercutting the crack edges slightly to give the patch compound a better grip, and drying the surface as much as possible. For fittings, drain the water level below the fitting before starting.
Step 4: Repair. Apply the appropriate fix based on your leak classification.
- Surface crack: Pack the cleaned crack with underwater epoxy or hydraulic cement, smooth flush with the surrounding surface, and allow full cure time per the manufacturer’s instructions (typically 24 to 48 hours).
- Fitting replacement: Swap out gaskets, apply silicone sealant where specified, and reassemble fittings to proper torque. Do not overtighten, as this cracks the fitting housing.
- Plumbing reroute: After locating the break via pressure testing, cut out the damaged section, and install a repair coupling or new pipe segment with proper primer and cement. For complex underground breaks, pipe lining (inserting a flexible liner inside the existing pipe) is often a better solution than full excavation.
Step 5: Verification. This is the step most people rush. After repairs are complete and cured, refill the pool to proper level and repeat the bucket test for a full 24 to 48 hours. Check for moisture around fitting repairs and observe the equipment pad for drips or pressure drops. Timely leak repair is not just about saving water; it protects your property’s value and structural stability.
Pro Tip: After a plumbing repair, run the system for several minutes and physically inspect every accessible joint and connection. Pressure-test the repaired line before backfilling any excavation.
| Step | Action | Key success factor |
|---|---|---|
| Diagnosis | Bucket test, visual inspection | Accurate measurement |
| Classification | Identify leak type | Correct category |
| Preparation | Clean, prep repair area | Thorough surface work |
| Repair | Apply correct material/method | Right product for leak type |
| Verification | Retest and monitor | Full 24-48 hour check |
Our examples of Florida pool repairs page shows real outcomes from this exact workflow. For ongoing water loss concerns, the guide on how to stop pool water loss covers additional factors beyond leaks, like evaporation rates and equipment-driven losses.
One important distinction: a DIY patch is often temporary when the real cause is underground plumbing. If you patch a surface crack and water loss continues, you have not solved the actual problem.
Troubleshooting and avoiding common mistakes
Even with great instructions, certain pitfalls trip up both DIY and professional pool owners. Here is how to navigate the most common ones specific to Florida pools.
Incomplete diagnosis is the biggest mistake. You find a visible crack, patch it, and assume you are done. But two weeks later the water is low again. This usually means there is a second leak source, or the visible crack was a symptom of a deeper plumbing issue. Always complete a full post-repair verification before closing the job.
Rushing the prep work. Epoxy and pool patch compounds bond to clean, properly prepared surfaces. Applying patch material over algae, mineral scale, or loose plaster dramatically reduces adhesion and shortens the repair’s life. In Florida’s humid environment, surfaces also need to be as dry as possible before applying most adhesives.
- Never apply underwater epoxy in water that is actively flowing through the crack
- Do not skip the undercutting step when repairing hairline cracks
- Avoid using non-pool-grade caulks or sealants near water fittings
- Do not assume a low water level is always a leak (check for evaporation and splash loss first)
Quick-fix mentality on plumbing leaks. Wrapping a leaking underground pipe with waterproof tape is not a repair. DIY patching is often temporary when the root cause is underground, and temporary fixes tend to fail at the worst possible times, including after you have already refilled and balanced the pool chemistry.
Electrical errors. This one is not about inconvenience. Improper resealing of light niches or conduit penetrations can create a genuine electrocution risk. If your leak is near any electrical component, do not attempt a DIY fix. Pull the breaker, call a licensed professional, and do not use the pool until the repair is certified.
Pro Tip: Take photos before and after every repair. If a leak returns, those photos help a professional diagnose whether the patch failed or a new leak developed elsewhere.
Upgrade your materials. Florida’s heat, UV exposure, and chemical-heavy water accelerate material degradation faster than in most other states. Using pool-grade, UV-stable compounds is not optional here, it is the baseline. Cheap materials that work fine in a Northern climate may last less than one season in Central Florida.
For ongoing prevention beyond leak repairs, the pool issue prevention tips resource covers maintenance practices that reduce the frequency and severity of leaks over time.
What DIY pool repair guides don’t tell you: Our expert perspective
Here is something worth saying plainly: most leak repair guides focus on the mechanics of the fix and skip the part where the homeowner realizes three months later that the leak is back, or worse, that the original repair masked a bigger structural problem.
After working on more than 100,000 pools across Florida since 1988, we have seen a consistent pattern. Homeowners who attempt DIY repairs for genuinely minor surface issues often succeed. A small crack in a plaster surface, a leaking fitting gasket, a loose return fitting. These are manageable for a careful, patient homeowner with the right materials.
But the calls we get most often are from people who patched something, were confident it worked, and are now facing a repair that costs significantly more than it would have at the start. Why? Because the wrong fix allowed water to continue infiltrating the shell or eroding the soil beneath the deck, and now there is real structural damage to address alongside the original leak.
The uncomfortable truth is that a structured, professional workflow is not about distrust of homeowners. It is about the fact that pool systems are interconnected. A shell crack and a plumbing leak can coexist and feed each other. Treating one without the other is like fixing a roof leak by replacing one shingle when the flashing is the real problem.
What makes the difference is combining local expertise with quality materials and rigorous verification. Professional pool repair in Florida is not just about technical skill. It is about recognizing the specific conditions that accelerate pool wear in this climate and responding to them with materials and methods built to last here.
DIY works. Sometimes. But knowing when to stop and call in professionals is itself a skill, and it is one the most successful pool owners we know have mastered.
Classic Marcite: Your Florida pool repair and renovation partner
When your pool leak has been properly repaired, or when you realize the issue runs deeper than a surface patch can solve, the next step is talking to a team that has handled every variation of this problem across Central and Northeast Florida.

Classic Marcite has been restoring and renovating Florida pools since 1988, with over 100,000 pools resurfaced across Orlando, Jacksonville, and beyond. Whether you need professional pool repair services for a persistent structural leak, are exploring durable pool resurfacing options to give your pool a fresh, long-lasting interior, or are ready to plan a complete pool remodeling guide project, we bring the experience and materials to get it done right. Contact us today for a free estimate and take the guesswork out of your pool’s next chapter.
Frequently asked questions
How do I tell if my pool leak is structural or plumbing-related?
Structural leaks often show visible cracks in the pool shell or staining around fractures, while plumbing leaks typically cause sudden significant water loss with no surface cracks and sometimes a wet or spongy yard near underground lines.
Does a quick patch for a pool crack last?
Quick DIY patches work well for minor surface cracks but are generally not permanent when the root issue is deeper structural damage or underground plumbing, since DIY patching is often temporary in those cases.
Can pool leaks damage my property if ignored?
Yes. Untreated pool leaks can erode soil beneath your pool deck, undermine the shell’s structural support, and even affect your home’s foundation or landscaping, making prompt leak repair a matter of property protection, not just pool maintenance.
Is it always better to call a professional for pool leaks?
Not always. Minor surface cracks and accessible fitting replacements are reasonable DIY projects, but plumbing leaks and major shell damage require professional expertise to ensure the repair is both complete and long-lasting.