
Cracks in your pool can quickly become more than just an eyesore, especially when you live in Orlando or Jacksonville where pool weather lasts nearly year-round. Addressing these issues early keeps your pool safe, prevents water loss, and avoids the high costs of professional resurfacing. By focusing on pool crack assessment and careful cleaning, you can tackle repairs confidently and extend your pool’s life without breaking the bank.
Table of Contents
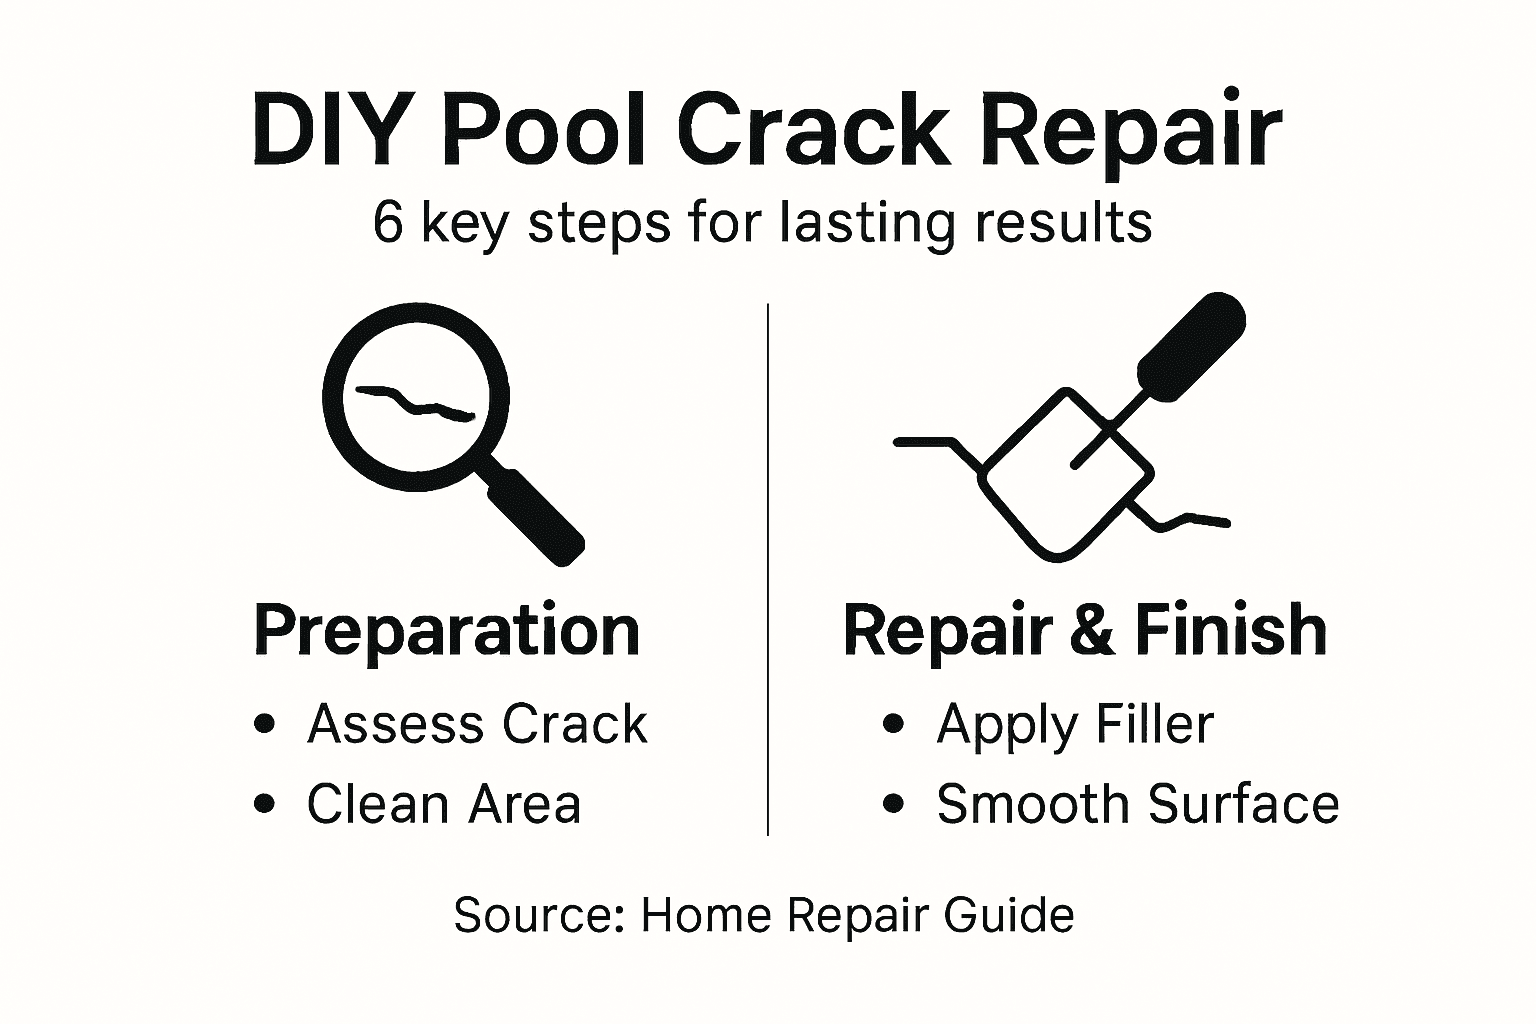
- Step 1: Assess Pool Crack Severity and Location
- Step 2: Prepare the Pool Surface for Repair
- Step 3: Clean and Dry the Crack Area Thoroughly
- Step 4: Apply Pool Crack Repair Materials Effectively
- Step 5: Smooth and Cure the Repaired Surface
- Step 6: Inspect Repair for Leaks and Durability
Quick Summary
| Key Takeaway | Explanation |
|---|---|
| 1. Assess Crack Severity | Evaluate width, length, depth, and location to determine repair needs. Document each crack’s specifics for planning. |
| 2. Prepare the Surface | Clean all debris and ensure the area is dry. Proper preparation prevents future repair failures. |
| 3. Thoroughly Clean Cracks | Remove contaminants with a wire brush and ensure complete drying to enhance material adhesion. |
| 4. Apply Repair Materials Properly | Use the correct technique and tools for injection, ensuring complete filling of the cracks without air pockets. |
| 5. Conduct a Detailed Inspection | After repairs, check for leaks and durability to confirm the repair’s effectiveness and prevent future issues. |
Step 1: Assess Pool Crack Severity and Location
Understanding the type and extent of pool cracks is crucial for effective repair. By carefully examining your pool’s surface, you can determine whether a simple patch will suffice or if more extensive work is required. Pool crack assessment involves evaluating several key factors that indicate the damage’s potential impact.
To assess pool crack severity, you’ll want to inspect the crack’s characteristics using a systematic approach. Look for these critical indicators:
- Width and length of the crack
- Location relative to pool structure
- Crack depth and pattern
- Signs of water seepage or structural movement
Pool cracks can be categorized based on their fatigue crack growth characteristics, which help predict potential progression. Hairline cracks less than 1/8 inch wide are typically cosmetic, while larger cracks might signal significant structural issues.
Carefully document each crack’s precise measurements and location for accurate repair planning.
Pay special attention to cracks near tile lines, along steps, or in high-stress areas like corners. These locations often indicate more serious underlying problems that require immediate professional evaluation. Measure crack dimensions using a precise ruler or digital caliper for accuracy.
Here’s a quick summary comparing common pool crack types and their repair priorities:
| Crack Type | Typical Location | Urgency of Repair | Recommended Response |
|---|---|---|---|
| Hairline | Near tile lines | Low | Cosmetic patch |
| Structural | Corners, steps | High | Professional repair |
| Fatigue | Bottom surface | Medium | Close monitoring |
| Expansion | Along pool wall | High | Immediate evaluation |
Pro tip: Take clear, well-lit photographs of each crack from multiple angles to help professionals assess the damage more effectively.
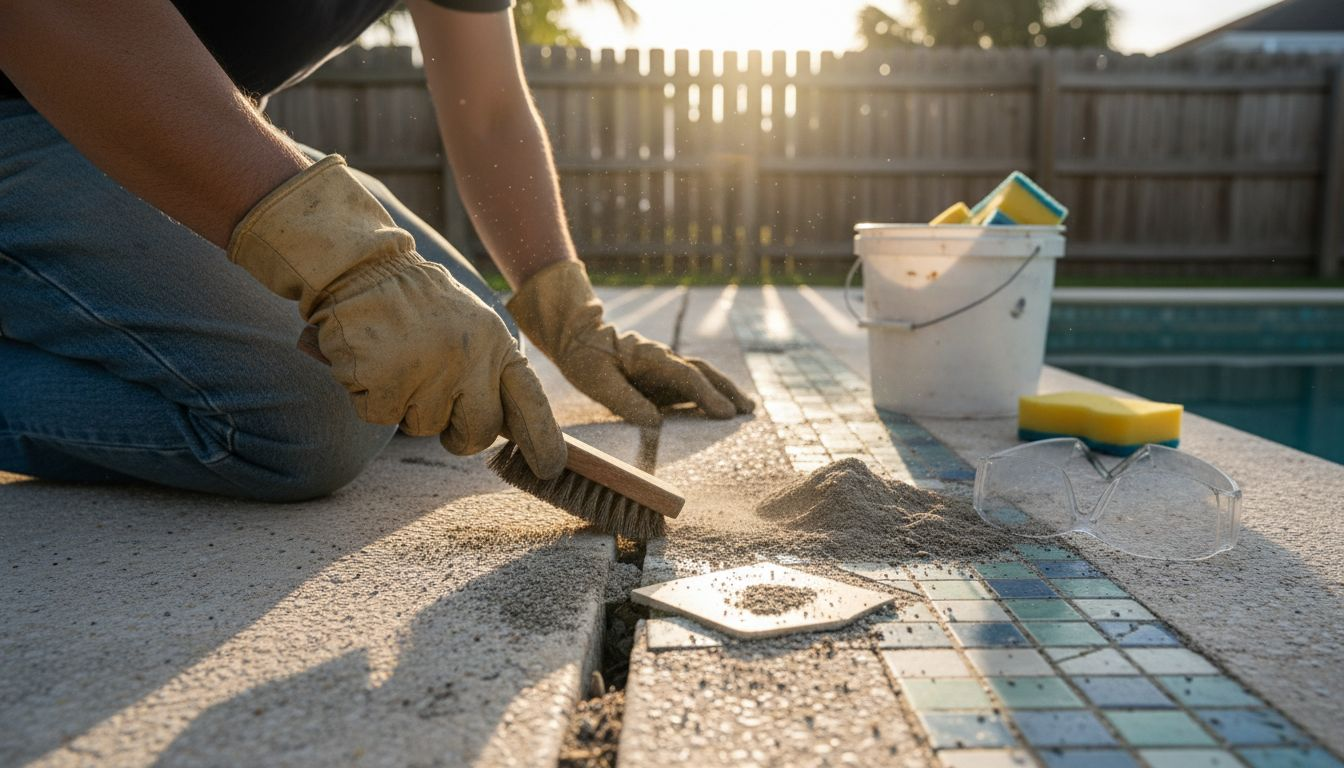
Step 2: Prepare the Pool Surface for Repair
Successful pool crack repair begins with meticulous surface preparation, which sets the foundation for a durable and effective restoration. Your goal is to create an optimal environment that ensures the repair materials adhere properly and provide long-lasting results.
Start by thoroughly cleaning pool surfaces and checking maintenance conditions. This involves several critical steps:
- Remove all debris and loose material around the crack
- Drain the pool to a level below the damaged area
- Clean the crack and surrounding surface using a wire brush
- Remove any existing pool chemicals or residue
- Ensure the surface is completely dry before proceeding
Proper surface preparation is the key to preventing future repair failures.
Carefully inspect the cleaned area for additional damage or structural issues that might require professional assessment. Mechanical surface preparation involves using tools like wire brushes, grinders, or sandblasters to create a rough texture that helps repair materials bond effectively.
Pro tip: Use compressed air or a shop vacuum to remove the finest dust particles after initial cleaning, ensuring maximum adhesion for your repair materials.
Step 3: Clean and Dry the Crack Area Thoroughly
Cleaning and drying the pool crack area is a critical step that determines the success of your repair process. Maintaining proper pool hygiene ensures that your repair materials will bond effectively and create a long-lasting solution.
Your cleaning process should include these essential steps:
- Use a stiff wire brush to remove loose debris
- Scrub the crack area thoroughly with a specialized pool cleaning solution
- Rinse the area completely with clean water
- Use a wet-dry vacuum to remove all standing water
- Allow the area to dry completely using fans or natural air circulation
Moisture is the enemy of successful pool crack repair – complete dryness is non-negotiable.
Mechanical cleaning requires careful attention to detail. Wear protective gloves and safety glasses while working, and ensure you remove all contaminants that could interfere with the repair materials’ adhesion. Pay special attention to removing any algae, calcium deposits, or chemical residues that might prevent a proper seal.
Pro tip: Use a moisture meter to confirm the surface is completely dry before applying any repair compound, as even small amounts of hidden moisture can compromise your repair.
Step 4: Apply Pool Crack Repair Materials Effectively
Successfully repairing pool cracks requires precision and the right approach to applying repair materials. Epoxy injection techniques are critical for ensuring a durable and long-lasting pool surface repair that prevents future water damage.
Your application process should follow these essential guidelines:
- Choose the appropriate epoxy or repair compound for your specific crack type
- Use a low-pressure injection method for best results
- Apply repair material slowly and consistently
- Ensure complete crack filling without air pockets
- Use specialized tools like injection ports or syringes for precise application
Consistent and careful application is key to creating a seamless, strong repair.
Crack injection techniques require careful preparation and steady hand movements. Start by installing injection ports at regular intervals along the crack, spacing them approximately 8-12 inches apart. Begin injecting the repair compound from the lowest port, working upward and maintaining steady, consistent pressure to ensure complete penetration.
Pro tip: Work in small sections and allow each area to cure partially before continuing to the next, which helps prevent overflow and ensures maximum material penetration.
Step 5: Smooth and Cure the Repaired Surface
After applying repair materials, transforming the repaired area into a seamless pool surface requires careful smoothing and curing techniques. Waterproofing membrane standards emphasize the critical nature of proper surface finishing to ensure long-term durability.
Your surface smoothing and curing process should include these key steps:
- Allow initial repair compound to set partially
- Use specialized smoothing tools like trowels or putty knives
- Apply light, even pressure while smoothing
- Remove any excess repair material
- Create a surface flush with surrounding pool area
Patience during the smoothing process determines the quality of your final repair.
Surface finishing techniques require a delicate touch and careful attention to detail. Work methodically across the repaired area, using smooth, consistent strokes to blend the repair compound seamlessly. Avoid applying excessive pressure that might disrupt the material’s integrity or create uneven surfaces.
Pro tip: Use a slightly damp sponge for final smoothing to achieve an ultra-smooth finish without disturbing the repair compound’s structure.
Step 6: Inspect Repair for Leaks and Durability
After completing your pool crack repair, a comprehensive inspection is crucial to ensure the repair’s effectiveness and long-term performance. Leak detection techniques provide critical insights into the structural integrity of your repair work.
Your inspection process should include these comprehensive steps:
- Fill the pool to normal water level
- Mark water level and monitor for 24-48 hours
- Check for any visible water loss
- Inspect repaired area for signs of continued moisture
- Perform pressure testing on repaired section
- Examine surrounding areas for potential secondary damage
Thorough inspection determines the success of your repair and prevents future complications.
Leak verification methods require systematic and patient evaluation. Use specialized tools like moisture meters and pressure testing equipment to detect even minor inconsistencies. Pay close attention to the repaired crack, looking for subtle signs of water seepage or structural weakness that might not be immediately apparent.
For quick reference, here is a summary of specialized tools used at different stages of the pool crack repair process:
| Repair Stage | Recommended Tool | Purpose |
|---|---|---|
| Surface Cleaning | Wire brush | Removes debris and residue |
| Drying | Wet-dry vacuum | Eliminates standing water |
| Crack Injection | Injection syringe | Precise application of compounds |
| Smoothing | Putty knife/trowel | Creates seamless surface finish |
| Inspection | Moisture meter | Verifies dryness and integrity |
Pro tip: Conduct your inspection during different times of day to account for temperature variations that might affect repair visibility and performance.
Professional Pool Crack Repairs That Last
Cracking pool surfaces can quickly become a homeowner’s biggest headache. From spotting hairline fractures near tile lines to managing deep structural cracks in corners and steps, the challenge is clear: you need a reliable, long-lasting repair solution that protects your pool and home investment. While DIY steps like cleaning, drying, and epoxy injection are essential, the complexity of assessing fatigue crack growth and ensuring proper surface bonding often require expert craftsmanship and specialized materials.

At Classic Marcite, we understand the frustration of cracking pools and the importance of precision repairs. With over 100,000 pools resurfaced across Orlando and Jacksonville since 1988, our team specializes in transforming damaged pool interiors using premier products like Pebble Tec®. Our expert services include comprehensive pool resurfacing, remodeling, and repairs that go beyond temporary fixes to deliver durable, weather-resistant finishes. Don’t let cracks lead to costly water loss or structural damage. Visit Classic Marcite to schedule your free estimate today and experience trusted pool renovation backed by decades of craftsmanship. Explore how our solutions can restore your pool’s integrity at Classic Marcite and learn more about our trusted pool resurfacing techniques here.
Take action now to protect your investment and enjoy a flawless pool surface year-round.
Frequently Asked Questions
How do I assess the severity and location of a pool crack?
To assess the severity and location of a pool crack, measure the crack’s width, length, and depth. Look for signs of water seepage and check the crack’s proximity to high-stress areas like corners or steps. Document your findings for a clear repair plan.
What steps should I take to prepare the pool surface for repair?
Start by draining the pool below the cracked area and cleaning the surface thoroughly. Remove any debris, loose material, and chemicals, ensuring the area is completely dry before applying repair materials.
How can I effectively clean and dry the crack area?
Use a stiff wire brush to clean out the crack and surrounding area, then rinse it with clean water. Remove any standing water with a wet-dry vacuum, and allow the area to dry completely to ensure the best adhesion for repair materials.
What are the best methods for applying pool crack repair materials?
Choose the right repair compound for your crack type and use a low-pressure injection method for application. Make sure to fill the crack completely without leaving any air pockets to ensure a strong repair.
How do I inspect the repaired area for leaks and durability?
After the repair, fill the pool to its normal water level and monitor for any visible water loss over 24-48 hours. Check for moisture around the repaired area and conduct pressure testing to confirm repair integrity before resuming regular use.
What tools do I need for DIY pool crack repair?
Essential tools for DIY pool crack repair include a wire brush for cleaning, a wet-dry vacuum to remove water, injection syringes for applying compound, and smoothing tools like putty knives for finishing the surface. Gather these tools to streamline the repair process.
Recommended
- What Is Pool Tile Repair And Why It Matters
- DIY Pool Remodeling Guide For Stunning Results
- Pool Deck Repair Process: Step-by-Step Guide For Success
- How To Patch Pool Plaster: Step-by-Step Guide For Homeowners
- Pool Refinishing Windermere FL
- Pool Renovation Winter Park FL
- Swimming Pool Remodeling The Villages FL
