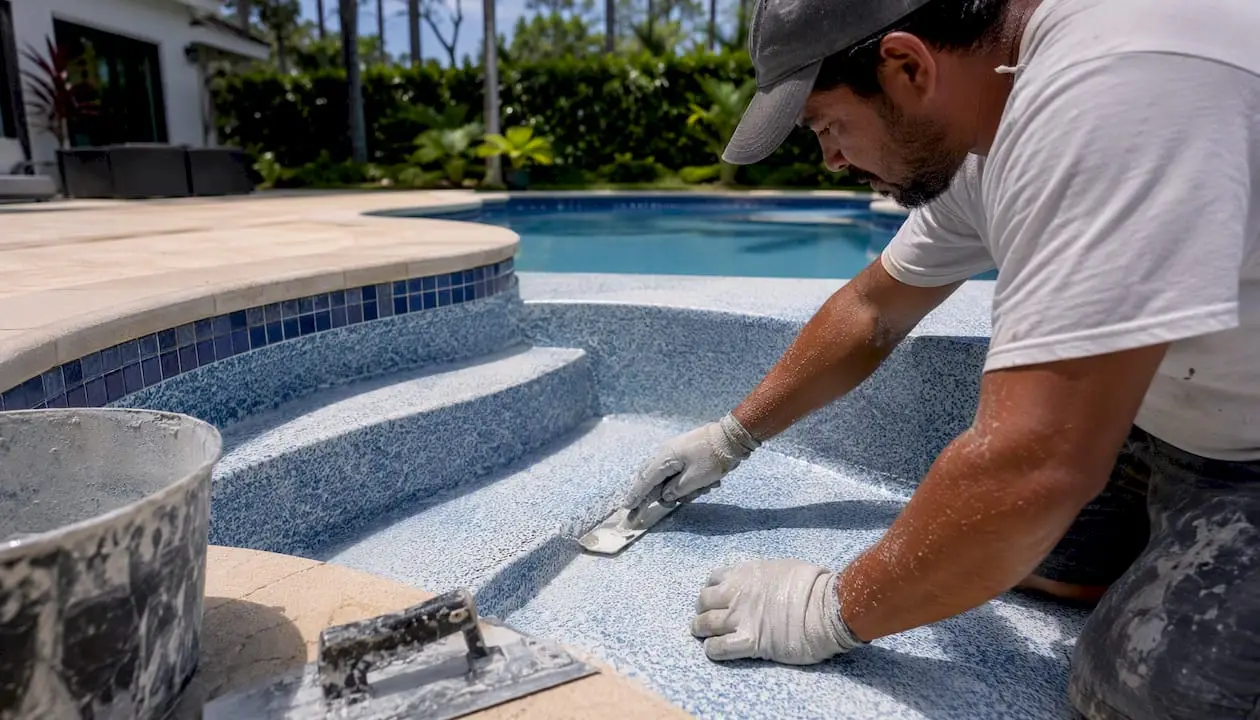
For most homeowners, the best pool step resurfacing options fall into five families: porcelain or natural stone tile, pebble/aggregate finishes (like Pebble Tec®), epoxy/resin coatings (including DIY kits such as Olympic Step Renew), textured pool paint, and retrofit vinyl or rubber treads. For the longest lifespan and best resale value, a professionally installed aggregate or tile finish wins outright. For a budget-conscious refresh on fiberglass or thermoplastic steps, a well-executed epoxy kit is a practical short-term fix. Classicmarcite, Central Florida’s largest Pebble Tec® applicator, handles the full range from structural repair through finished surfaces.
Your options at a glance:
- Tile or natural stone: Highest durability, best long-term value, requires skilled installation
- Pebble/aggregate (Pebble Tec® style): Professional-grade, slip-resistant, 15–25 year lifespan
- Epoxy/resin kits (Olympic Step Renew style): DIY-friendly on thermoplastic, fiberglass, and some concrete steps
- Textured pool paint: Lowest cost, shortest lifespan, best for temporary refresh
- Vinyl or rubber treads: Fast retrofit, good slip resistance, suited to vinyl-lined or thermoplastic steps
Key Takeaways
The right pool step resurfacing material depends on your substrate first, your budget second, and your tolerance for future maintenance third.
| Point | Details |
|---|---|
| Match material to substrate | Concrete steps suit tile or pebble; thermoplastic and fiberglass steps suit epoxy kits or retrofit treads. |
| Structural repair comes first | Voids, active cracks, or moving steps must be fixed before any surface finish is applied. |
| Cure time is non-negotiable | Epoxy kits require roughly 3 days at 75°F before refilling; cutting this short causes premature failure. |
| Add anti-slip measures | Broadcast silica into wet epoxy coats, or specify DIN R11+ tile, to meet basic wet-surface safety standards. |
| Classicmarcite for long-term results | As Central Florida’s largest Pebble Tec® applicator, Classicmarcite integrates structural repair and professional finishing for 15–25 year outcomes. |
Table of Contents
- What are the main pool step resurfacing options?
- How do epoxy kits and DIY coatings actually perform?
- Why tile and stone steps last longer than coatings
- What structural repairs must happen before you resurface?
- How do you make resurfaced pool steps slip-resistant?
- How do you choose the right material and decide between DIY and a pro?
- Why professional resurfacing is often the best long-term choice
- What the most common DIY failures actually look like
- Classicmarcite: professional pool step resurfacing in Central Florida
- Sources
What are the main pool step resurfacing options?
Pool steps take more abuse than any other surface in the water. Feet scrape them daily, pool chemicals attack them constantly, and freeze-thaw cycles crack them from below. Choosing the wrong material for your substrate is the single most common reason a resurfacing job fails within two or three seasons.
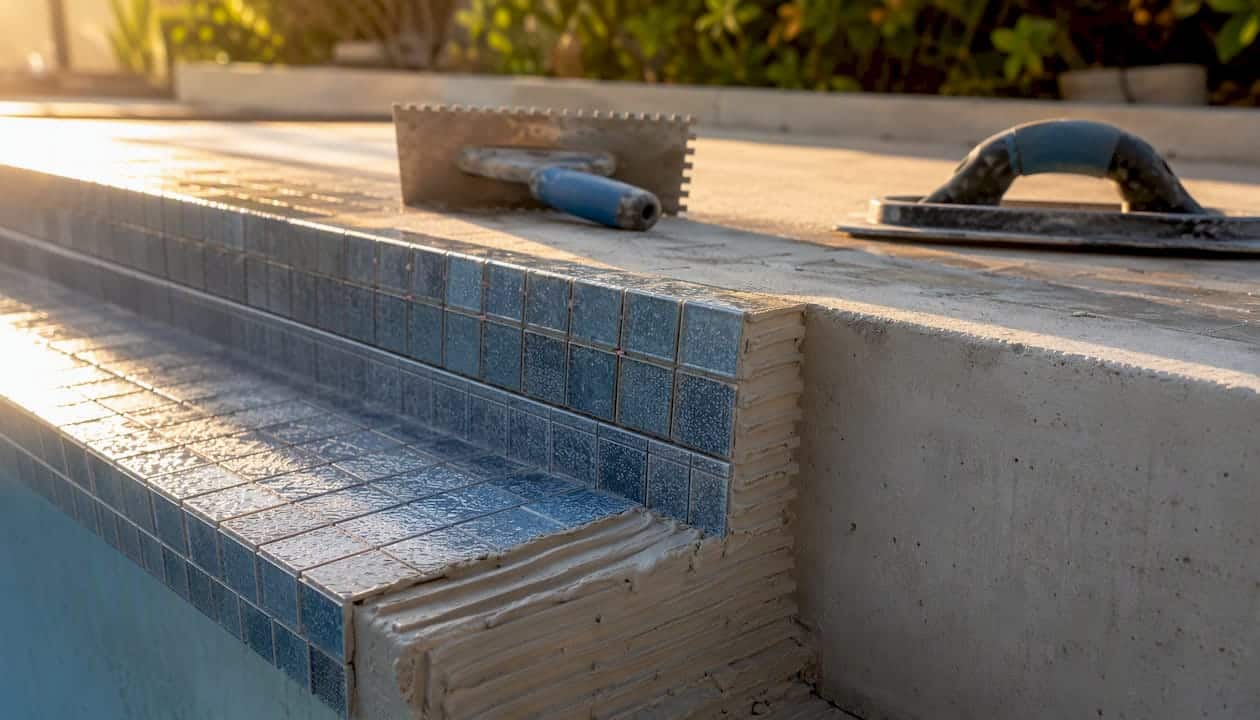
Tile and natural stone
Porcelain and quarry tile are the gold standard for concrete and shotcrete steps. Natural stone (travertine, slate, bluestone) adds visual appeal but requires sealing and carries higher maintenance. Glass mosaic tile works well for risers and accents but is generally too slippery for treads unless a textured or matte glaze is specified.
Pebble and aggregate finishes
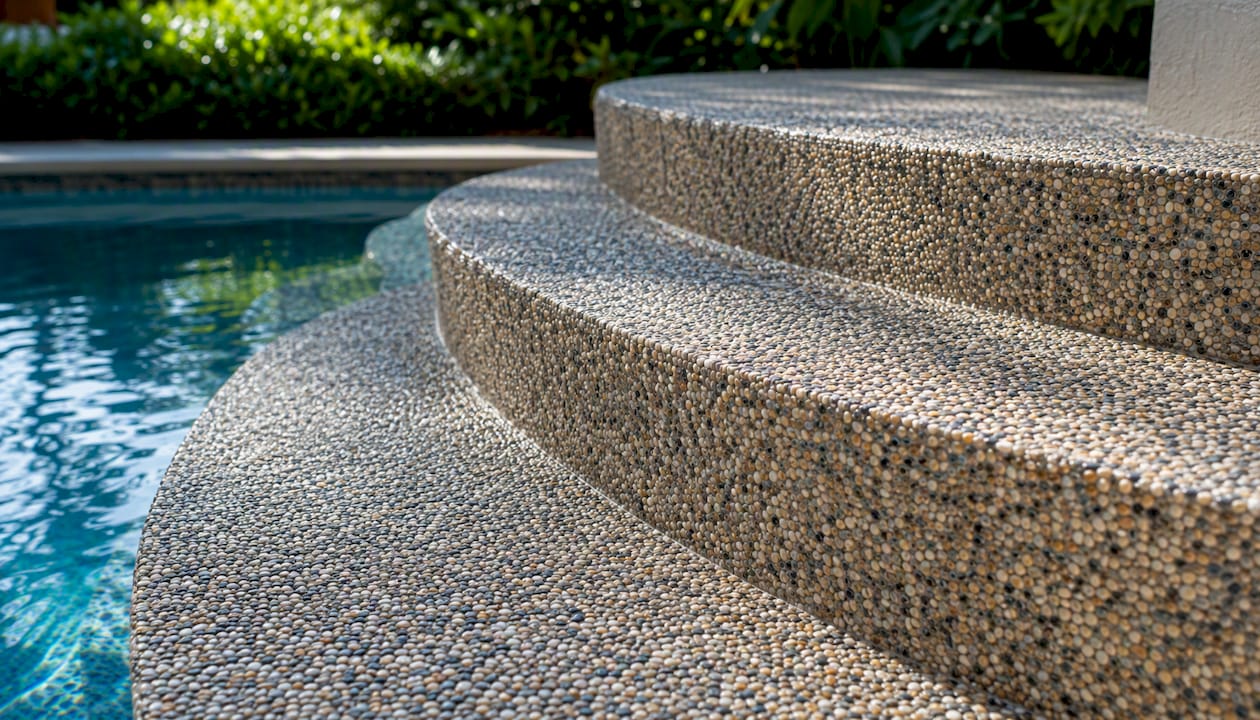
Pebble Tec® and similar aggregate systems bond directly to concrete or shotcrete shells. The exposed pebble surface is naturally textured, which means built-in slip resistance without additives. These finishes are applied by certified installers and are not a DIY option. The durability of pebble finishes is well-documented, with properly installed systems lasting well over a decade.
Marcite and plaster
Marcite (white Portland cement plaster) is the traditional pool interior finish and works on concrete steps as part of a full pool resurfacing. It’s smooth, affordable, and widely available, but it’s softer than aggregate finishes and typically needs replastering every 7–12 years. Colored quartz plaster extends that range.
Epoxy and resin coatings
Two-part epoxy coatings, including kit products like Olympic Step Renew, are designed for thermoplastic, acrylic, and fiberglass steps. They bond well to these substrates when properly prepped and provide a hard, waterproof surface. Contractor-grade epoxy systems offer longer pot lives and thicker film builds than consumer kits. Neither replaces a structural repair.
Textured pool paint
Chlorinated rubber and acrylic pool paints are the most affordable option and the easiest to apply. They also have the shortest lifespan, typically 2–5 years before peeling or fading. Best used as a stopgap or on steps that will be fully replaced soon.
Vinyl and rubber treads
Retrofit treads snap or adhere over existing steps. They’re the fastest solution for vinyl-lined pools or thermoplastic steps where adhesion for coatings is uncertain. They add immediate slip resistance but don’t address cosmetic damage to the step body itself.
Substrate-to-material quick map:
| Substrate | Best-fit finishes |
|---|---|
| Concrete/shotcrete | Tile, pebble/aggregate, marcite, epoxy |
| Fiberglass steps | Epoxy/resin coatings, refinishing, tile (with prep) |
| Thermoplastic steps | Epoxy kits, vinyl/rubber treads |
| Vinyl-lined steps | Vinyl treads, AquaBond-type adhesive repairs |
Pro Tip: Compare total cost of ownership, not just the sticker price. A tile installation that costs three times more upfront than an epoxy coating often pays for itself within a decade because it needs no recoating, while coatings may need reapplication every 3–7 years.
How do epoxy kits and DIY coatings actually perform?
The Olympic Step Renew kit is a complete, homeowner-friendly system that includes a surface cleaner, epoxy patching compound, two-part epoxy coating, anti-slip silica, and application tools. It’s designed specifically for thermoplastic, acrylic, and fiberglass pool steps, which covers the majority of above-ground and many in-ground step inserts.
Success with any epoxy kit depends almost entirely on prep and timing. The coating itself is sound; the failures happen before the first drop of epoxy hits the surface.
What the kit includes and what to expect
- Cleaner/degreaser: Removes algae, oils, and calcium deposits that prevent adhesion
- Patching compound: Fills chips and small surface cracks (not structural voids)
- Two-part epoxy coating: High-solids formula that bonds to the substrate when mixed correctly
- Anti-slip silica: Broadcast onto the wet coat to create texture
- Rollers and brushes: Sized for step geometry
Technical specs to know before you start
Manufacturer instructions specify surface-prep steps, mixing ratios, pot life, and cure times. Key figures homeowners should plan around:
| Parameter | Typical range |
|---|---|
| Mix ratio | Per manufacturer spec (usually 1:1 by volume) |
| Pot life after mixing | Approximately several dozen minutes at typical temperatures |
| Dry to touch | Several hours at 75°F |
| Light foot traffic | About one day |
| Safe to fill pool | After several days at typical temperatures |
Temperature matters more than most homeowners expect. Working above 85°F cuts pot life dramatically, sometimes to under 20 minutes, which causes lap marks and adhesion failures. In Florida summers, early morning application is the only realistic window.
Application checklist
- Drain and dry steps completely (48–72 hours minimum)
- Clean with the included cleaner; rinse thoroughly
- Scuff-sand glossy surfaces with 80-grit to open the substrate
- Fill chips with patching compound; allow full cure
- Mix epoxy components per the ratio and stir for the full recommended time
- Apply first coat with a short-nap roller; work in sections to respect pot life
- Broadcast anti-slip silica while the coat is still wet
- Allow full cure before applying a second coat if specified
- Wait the full fill time (roughly 3 days at 75°F) before refilling
Safety note: Two-part epoxy systems contain solvents and reactive hardeners. Work with ventilation, wear nitrile gloves and eye protection, and keep the work area away from open flames. Dispose of mixed waste per local regulations.
For a deeper look at surface prep before any coating, the pool prep guide from Classicmarcite covers the steps that most DIYers skip.
Why tile and stone steps last longer than coatings
Tile wins on longevity because the material itself is inert. The technical guidance for pool step tile recommends porcelain and quarry tiles specifically because of their low absorption and high durability, and calls out PEI rating and DIN slip-resistance ratings as the two specs homeowners should request before purchasing.
Tile specs that matter
- PEI rating: Porcelain Enamel Institute wear rating; for pool steps, PEI 4 or 5 is appropriate
- Water absorption: Specify ≤ 0.5% for in-pool surfaces; this is the threshold that separates true porcelain from lower-grade ceramic
- DIN R rating: German slip-resistance standard widely referenced for wet surfaces; R11 or higher is the target for pool step treads
- Tile size: Smaller mosaic tiles (2″×2″ or 1″×1″) create more grout lines, which improves grip; large-format tiles need a textured or matte surface
Installation checklist
- Apply a waterproofing membrane to the step substrate before setting tile
- Use a flexible, polymer-modified thinset rated for submerged applications
- Use a flexible, sanded grout or epoxy grout rated for pool use
- Slope treads slightly (1/8″ per foot minimum) toward the pool for drainage
- Leave expansion joints at corners and transitions
- Individual tiles can be replaced without disturbing the full installation
Cost vs. lifetime: Tile costs more upfront than coatings, but near-zero maintenance and a service life measured in decades make it the lower-cost option over a 15–20 year horizon. Coatings that need reapplication every 3–7 years accumulate labor and material costs that often exceed the original tile installation price.
What structural repairs must happen before you resurface?
Resurfacing over a damaged substrate is the most expensive mistake a pool owner can make. A new coating or tile applied over a cracked, hollow, or undermined step will fail within one season, and the underlying problem will be worse and more expensive to fix the second time.
AquaBond’s repair manual documents three main repair approaches for vinyl-lined pool steps, and the same triage logic applies across substrates.
Three repair methods and when to use each
- Dry crack repair: Grind the crack open to a V-profile, clean thoroughly, apply structural epoxy adhesive, and fill with a compatible patching compound. Works for surface cracks with no movement and no void beneath.
- Sand slurry and foam injection: For steps where the backfill has washed away or settled, high-density spray foam combined with a sand slurry re-establishes support under the tread before patching. This technique is standard practice for fiberglass steps with voids and prevents the step from flexing under load after resurfacing.
- Tread replacement: When a tread is cracked through, delaminated, or structurally compromised, replacement is the only durable fix. AquaBond documents both dry and underwater tread replacement using adhesive systems. Underwater replacement is possible with the right adhesive but is significantly more complex than dry work.
Red flags that require a professional assessment
- Steps that flex or rock when you stand on them
- Visible gaps between the step and the pool shell
- Persistent water loss that tracks to the step area
- Cracks that reopen within weeks of patching
- Large hollow sound when you tap the tread surface
Specialist repair providers note that in-place professional repairs restore steps at a fraction of full replacement cost, with some pools returning to service in roughly 48 hours. Full inground stair replacement can be costly, making early structural repair a financially sound choice.
When to skip DIY entirely: Structural voids that connect to the pool shell, active leaks through step cracks, or steps that have shifted position are all situations where a professional structural assessment is required before any surface work begins.
How do you make resurfaced pool steps slip-resistant?
Slip resistance on pool steps isn’t optional. Wet feet on a smooth surface create real injury risk, and a resurfacing project that ignores tread texture has missed half the job.
Anti-slip options by finish type:
- Epoxy/resin coatings: Broadcast anti-slip silica (aluminum oxide or quartz) into the wet coat. The silica embeds and creates a gritty texture that persists through the coating’s life. Most kits include silica; contractor-grade systems allow you to control broadcast density.
- Tile: Specify a matte or textured glaze, or choose a mosaic format where grout lines provide grip. DIN R11 is the minimum target for wet step surfaces; R12 or R13 is appropriate for commercial or high-traffic applications.
- Pebble/aggregate finishes: The exposed aggregate surface is inherently textured. No additive is needed.
- Vinyl/rubber treads: Most are molded with a ribbed or diamond-plate pattern that provides immediate grip.
- Textured pool paint: Some formulations include silica in the paint itself; others allow broadcast application.
Pro Tip: Address step-edge visibility at the same time you address slip resistance. A contrasting tile nosing or a colored grout line at the tread edge makes the step depth visible underwater, which reduces misstep injuries as much as surface texture does.
Safety checklist for resurfaced steps
- Test tread texture with wet bare feet before refilling the pool
- Confirm drainage: water should not pool on treads
- Mark step edges with a contrasting color or nosing tile
- Check anti-slip media coverage for gaps or thin spots
- Schedule an annual inspection of tread surface and edge markings
How do you choose the right material and decide between DIY and a pro?
The right choice depends on four variables: your step substrate, your budget, how long you want the finish to last, and whether structural damage is present.
Decision framework by substrate and goal
- Concrete or shotcrete steps, long-term goal: Tile or pebble/aggregate finish, professionally installed. These substrates support the weight and bond strength these materials require.
- Fiberglass steps, DIY-friendly budget: Two-part epoxy coating or kit. Confirm the step is structurally sound first; foam injection may be needed for voids.
- Thermoplastic steps, quick refresh: Epoxy kit (Olympic Step Renew style) or retrofit vinyl/rubber treads. Thermoplastic manufacturer documentation notes that properly designed coextruded steps resist delamination, but surface prep is still critical.
- Vinyl-lined steps, surface damage only: AquaBond-type adhesive repair followed by vinyl tread installation.
- Any substrate, structural damage present: Professional assessment and repair before any resurfacing.
Cost and longevity reference
- Textured pool paint: Lowest material cost; recoat every 2–5 years
- Epoxy/resin kit: Moderate material cost; realistic lifespan of several years with good prep
- Marcite/plaster: Contractor-installed; typically 7–12 years before replastering
- Tile: Higher upfront cost; service life of 20+ years with proper installation
- Pebble/aggregate: Professional installation; 15–25 year lifespan
For a detailed breakdown of what drives the final price, the cost factors guide from Classicmarcite covers labor, material, and prep variables.
Questions to ask any contractor
- What is your experience with the specific finish I’m requesting (Pebble Tec®, marcite, tile)?
- How do you handle structural voids or cracks found during prep?
- What waterproofing system do you use under tile?
- What is the cure time before I can refill, and what are the temperature constraints?
- Do you pull permits for this work in my municipality?
- What warranty do you offer on materials and labor?
DIY is reasonable when: The steps are structurally sound, the substrate is thermoplastic or fiberglass, the damage is cosmetic, and you can control working temperature and allow full cure time.
Hire a pro when: Structural voids or active leaks are present, the substrate is concrete requiring bonded aggregate or tile, or the project involves the full pool interior rather than steps alone.
Why professional resurfacing is often the best long-term choice
A DIY epoxy kit applied correctly can extend the life of thermoplastic or fiberglass steps by several years. But for concrete pools, or for any homeowner who wants a finish that won’t need attention for 15–25 years, professional installation is the more reliable path.
Professionally applied pebble/aggregate finishes like Pebble Tec® bond to the concrete shell as a unified system, not a surface coating. The exposed aggregate provides natural slip resistance, requires no anti-slip additives, and holds its texture through years of chemical exposure and UV. Marcite plaster, applied by an experienced crew, is the traditional choice for full pool interiors including steps, and it remains one of the most cost-effective professional options for concrete pools.
Service benefits of professional resurfacing:
- Structural assessment and repair integrated into the project scope
- Manufacturer-authorized application for warranty-backed finishes
- Proper surface prep equipment (pressure washing, acid washing, grinding) that DIY tools can’t match
- Controlled mix ratios and application conditions
- Documented cure protocols and post-fill water chemistry management
Classicmarcite has resurfaced more than 100,000 pools since 1988, including residential, commercial, and resort properties. As the largest Pebble Tec® applicator in Central Florida, the company brings manufacturer-authorized experience to every aggregate finish project. For homeowners considering pebble finishes, that certification matters: it means the application follows the manufacturer’s specifications, which is what the warranty requires.
What the most common DIY failures actually look like
The jobs that fail fastest share the same pattern: the homeowner skipped prep, rushed the cure, or worked in the wrong temperature window. Insufficient surface prep accounts for the majority of early adhesion failures. A step that looks clean to the eye still carries calcium scale, algae residue, or mold release compounds that prevent epoxy from bonding. Scuff sanding and the included cleaner are not optional steps.
Pot-life mistakes are the second most common failure. Once a two-part epoxy is mixed, the clock runs. Working in sections that are too large, or stopping to troubleshoot mid-application, results in a coat that partially cures before it’s fully spread, creating a surface that looks fine but delaminate under foot traffic within weeks.
Practical advice from experienced installers:
- Check substrate stability before ordering any materials. Tap every tread and listen for hollow sections.
- Follow pot-life instructions to the minute, not approximately.
- Allow the full manufacturer-specified cure time before refilling, regardless of how dry the surface looks.
- Document every step of the job with photos and keep the product batch numbers for warranty claims.
Classicmarcite’s installation crews work with these variables daily, which is why their results hold up where DIY attempts often don’t.
Classicmarcite: professional pool step resurfacing in Central Florida
Classic Marcite offers pool step resurfacing using Pebble Tec® aggregate finishes, marcite plaster, porcelain tile, and structural repair services for residential and commercial pools across Orlando, Jacksonville, and Central Florida. As the largest Pebble Tec® applicator in Central Florida, the company brings manufacturer-authorized credentials to every aggregate finish project, which means your finish qualifies for the manufacturer’s warranty from day one.
Every project starts with a structural assessment. If voids, cracks, or leaks are present under or through the steps, those are addressed before any surface finish is applied. That integrated approach is what separates a finish that lasts 20 years from one that fails in two.
To get a free estimate for your pool steps, visit the Pool Resurfacing in Orlando service page and submit your project details. A Classicmarcite specialist will assess your substrate, recommend the right finish, and walk you through the timeline and cure requirements before any work begins.
Sources
The recommendations in this article draw from the following primary sources. Each link lets you verify the specific claim it supports.
- Olympic Step Renew Instructions (English)
- Step Renew Pool Step Resurfacing Kit
- AquaBond Vinyl-Lined Pool Step Repair Instructions
- Pool stair anti-slip tile porcelain guide
- Pool Step Specialists – Services
- Pool Step Repair: Fiberglass Pool Step Guide
