Surface bonding is where pool resurfacing either succeeds or fails. Get it right, and a new finish holds for a decade or more. Skip steps, and you’re looking at hollow spots, delamination, and a costly redo within two years. The core pool resurfacing surface bonding techniques come down to three non-negotiable stages: thorough mechanical and chemical surface preparation, correct bond coat selection and application, and disciplined curing management.
Key steps for effective surface bonding in pool resurfacing:
- Drain and dry completely before any inspection or prep work begins
- Remove all existing plaster down to the bare shell using mechanical methods
- Inspect and repair cracks before applying any bonding material
- Acid wash and neutralize the shell to eliminate scale and contaminants
- Achieve Saturated Surface Dry (SSD) condition before bond coat goes on
- Apply a minimum of three bond coat layers using a spray gun, not a roller
- Apply the finish (plaster or Pebble Tec®) while the bond coat is still active
- Manage water chemistry carefully through the full 28-day curing window
Bond coats from manufactured product lines such as Multicoat (Scratch Kote 2000), CLI, and SGM Bond Kote are the industry standard for underwater adhesion. They work like a primer, penetrating the pores of the shotcrete or gunite shell and creating a uniform substrate that prevents delamination and evens out surface inconsistencies around steps, plumbing penetrations, and variable shotcrete areas.
Table of Contents
- What surface preparation methods actually work for pool resurfacing?
- How do bond coats work, and which type should you use?
- Step-by-step pool resurfacing process from prep through curing
- What Classicmarcite’s experience reveals about surface bonding best practices
- How bonding techniques differ by pool material
- How to choose the right bonding agent for your pool’s condition
- How do bonding techniques hold up over time?
- Classicmarcite brings 35+ years of bonding expertise to your pool
- Key Takeaways
What surface preparation methods actually work for pool resurfacing?
Surface preparation determines bond strength more than any other variable. Bond strength between old and new surfaces is directly tied to how clean, rough, and structurally sound the shell is before the new finish goes on. Cutting corners here is the single most common reason pool finishes fail prematurely.
Mechanical removal methods
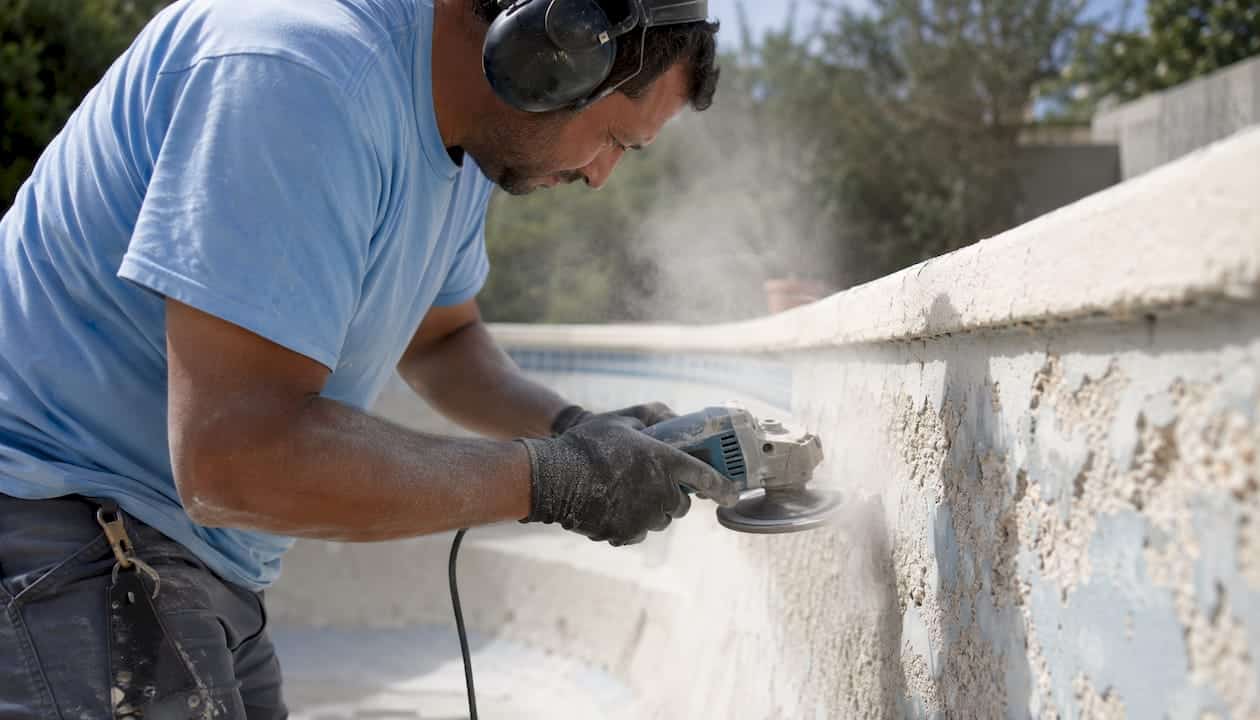
Chipping (air hammers and chisels): Effective at removing plaster, but the process creates micro-cracks in the underlying gunite or shotcrete. Repeated chipping across multiple resurface cycles reduces concrete thickness and can expose reinforcing steel, leading to rust staining. It also produces a highly inconsistent surface profile.
Grinding: Better surface consistency than chipping, though still labor intensive. Useful for localized areas and around fixtures where other methods are impractical.
Sandblasting: Creates a roughened profile suitable for bonding, but generates airborne silica dust, a known health hazard. It can also erode concrete unevenly if pressure is not carefully controlled.
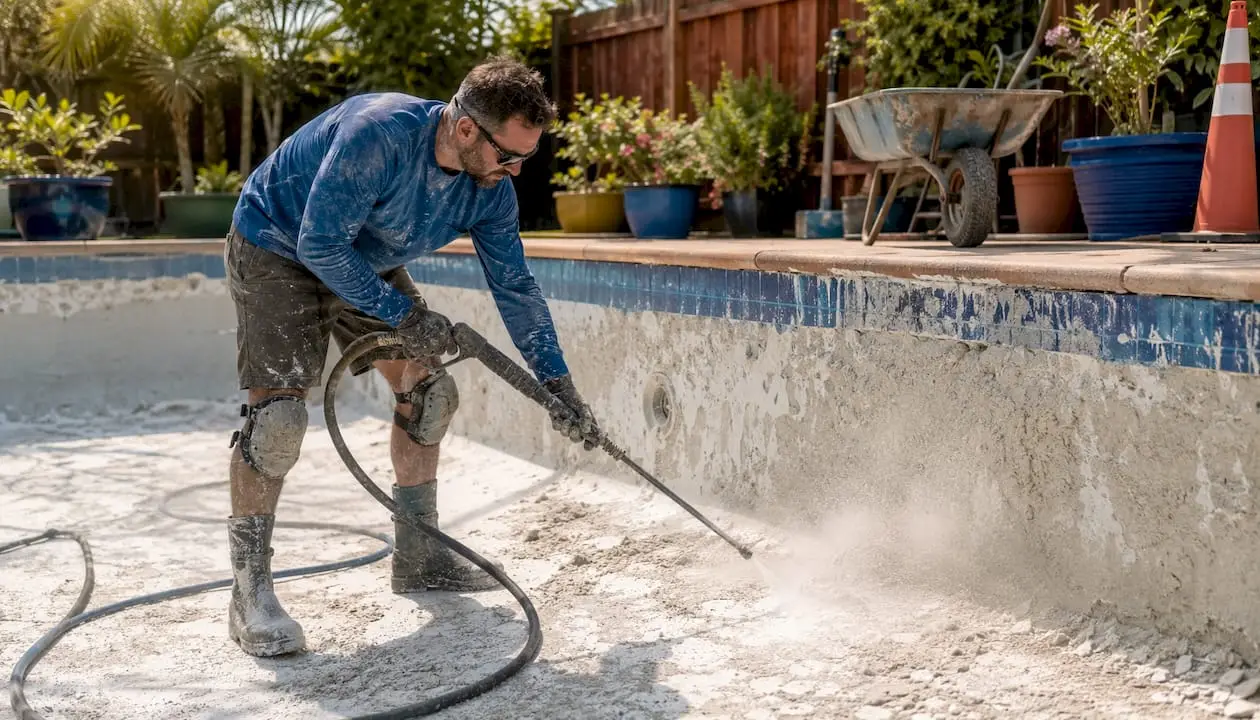
Ultra-High Pressure (UHP) water blasting: Water pressurized up to 40,000 PSI strips old plaster without creating the structural micro-fractures common with chipping hammers. UHP water blasting produces bond values significantly stronger than more invasive methods. It also removes multiple plaster layers, calcium deposits, algae, and rust staining in a single pass, leaving a clean, microscopically rough profile ideal for new coatings.
Most professional contractors combine UHP water blasting for large field areas with chipping around light fixtures and decorative tile work where precision matters more than speed.
| Prep Method | Bond Strength | Surface Profile | Structural Impact | Time |
|---|---|---|---|---|
| Chipping | Moderate | Inconsistent | High (micro-cracks) | Slow |
| Grinding | Moderate | Consistent | Low to moderate | Moderate |
| Sandblasting | Good | Consistent | Low | Moderate |
| UHP water blasting | Highest | Excellent | Minimal | Fast |
Cleaning and chemical prep
After mechanical removal, the shell requires acid washing to eliminate surface scale, staining, and any residual bond-breaking contaminants. The acid wash must be fully neutralized with high-pressure water before the next step. Skipping neutralization leaves an acidic surface that interferes with bond coat adhesion.
Crack inspection follows cleaning. Hairline cracks in old plaster are different from cracks that penetrate the structural shell. Any crack running through the shell must be repaired before the new finish is applied, not patched cosmetically afterward.
Safety and environmental notes: UHP water blasting produces minimal chemical waste compared to acid washing. Sandblasting requires respiratory protection and containment for silica dust. All chemical waste from acid washing must be neutralized and disposed of per local environmental regulations.
The pool must reach Saturated Surface Dry (SSD) condition before bond coat application. SSD means the substrate is clean and damp but carries no standing water. Applying bond coat to a wet or dry surface both compromise adhesion.
How do bond coats work, and which type should you use?
Bond coats act as the chemical and mechanical bridge between the old shell and the new finish. They penetrate the pores of the shotcrete, fill micro-irregularities, and create a uniform substrate that plaster or aggregate finishes can grip reliably.
Manufactured bond coats
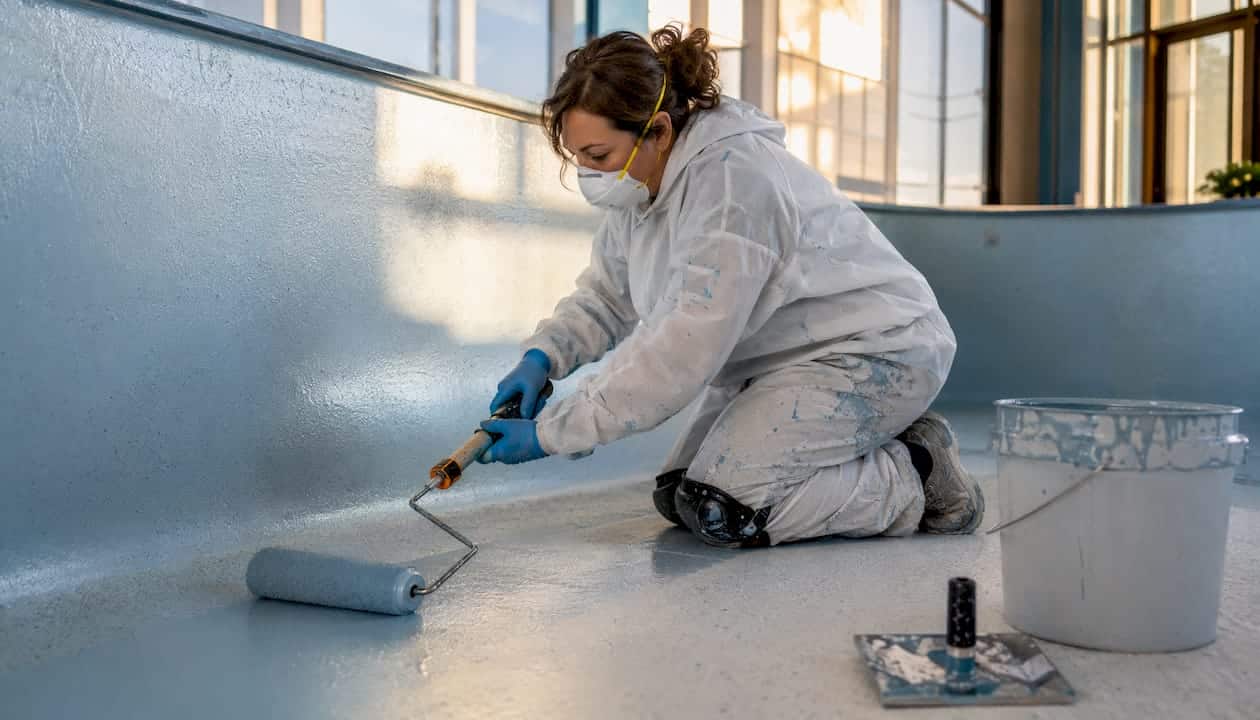
Manufactured products such as Multicoat (Scratch Kote 2000), CLI, and SGM Bond Kote are formulated specifically for underwater use. SGM Bond Kote, for example, is a two-part cementitious system combining a factory-blended dry cement mix with a liquid resin. It delivers high flexural strength, virtually eliminates delamination, and provides even hydration during plastering.
Manufactured bond coats are appropriate when the pool has a single original plaster layer that is solid and non-hollow. They are not a substitute for mechanical stripping when multiple plaster layers are present.
Homebrew (glue-based) bond coats
Glue-based bond coats are widely used by contractors looking to reduce labor costs. They are not formulated for continuous underwater exposure. Newly applied plaster is semi-permeable during curing, and water that reaches the back of the plaster will re-emulsify a glue-based bond coat, destroying adhesion and causing hollow spots or pop-offs. Manufactured bond coats do not carry this risk.
Application best practices
- Substrate must be at SSD condition: damp but free of standing water
- Apply with a spray gun, not a roller. Rolling risks pulling the agent back off the surface during back-rolling
- Monitor wet film thickness with a wet film thickness gauge. SGM Bond Kote requires a minimum wet membrane thickness of 80 mil (0.08 inches) per the manufacturer’s specification
- Apply a minimum of three coats. A single coat will not prevent impurities within existing shotcrete from leaching into new plaster, and industry expert Jon Temple recommends at least three coats to prevent delamination
- Allow adequate cure time between coats and before plastering (SGM Bond Kote reaches minimum cure in 6 hours; waiting 24 hours before plastering produces better results)
- Never apply bond coat over hollow or loose plaster sections. Drain the pool fully and allow trapped water between plaster layers to dissipate before sounding the shell for hollow spots
Pro Tip: Apply bond coat using a hopper gun and compressor for uniform coverage. If you use a brush to work it into penetrations or steps, do not back-roll the field areas. Adding water to a thickening mix to cover more area is the most common application error and directly causes delamination.
Common mistakes that cause bond coat failure:
- Applying over multiple plaster layers without stripping to sound concrete
- Checking for hollow spots before trapped water has drained from between layers
- Adding excess water to the mix during application
- Applying to a surface that is too wet or too dry
- Using a single coat instead of the recommended minimum of three
Step-by-step pool resurfacing process from prep through curing
A successful resurface follows a fixed sequence. Skipping or reordering steps compounds risk at every stage.
- Drain the pool completely. Allow adequate time for water trapped between plaster layers to drain before any inspection.
- Sound the shell for hollow spots. Walk the entire surface tapping with a hammer. Hollow areas produce a distinctly different tone and must be removed before prep continues.
- Mechanical removal. Strip all existing plaster down to the bare shell using UHP water blasting, chipping, grinding, or a combination. No residual plaster, scale, or contamination should remain.
- Crack inspection and repair. Identify all cracks. Repair any that penetrate the structural shell using appropriate cementitious repair materials. Surface-only cracks in old plaster that are now removed do not require structural repair.
- Acid wash and neutralize. Remove remaining surface scale and contaminants. Neutralize fully with high-pressure water and allow the shell to reach SSD condition.
- Bond coat application. Apply manufactured bond coat (Multicoat, CLI, or SGM Bond Kote) in a minimum of three coats using a spray gun. Monitor wet film thickness throughout. Allow to cure per manufacturer specifications.
- Finish application. Apply plaster or Pebble Tec® finish while the bond coat is still active and properly cured. Plaster should be applied at a minimum thickness of 3/8 inch at any location, using the double-back method for uniform coverage.
- Fill the pool. Begin filling immediately after the finish is applied to prevent shrinkage cracking from drying.
- 28-day curing management. The first 28 days after resurfacing are a chemical curing phase, not a waiting period. Water chemistry during this window determines how hard and dense the finished surface becomes.
Curing maintenance tips:
- Test and adjust pH, alkalinity, and calcium hardness daily for the first two weeks
- Keep pH between 7.4 and 7.6 throughout the curing period
- Avoid aggressive brushing of the new surface for the first week
- Do not add algaecides or clarifiers during the initial startup phase without confirming compatibility with the finish manufacturer
- Brush the pool walls and floor twice daily for the first two weeks to remove plaster dust and promote even hydration
What Classicmarcite’s experience reveals about surface bonding best practices
Classicmarcite has resurfaced over 100,000 pools across residential, commercial, resort, and theme park projects since 1988, making it the largest Pebble Tec® applicator in Central Florida. That volume of work produces a clear pattern: pool renovation mistakes almost always originate in the prep phase, not in the finish material itself.
Classicmarcite’s approach to surface preparation prioritizes UHP water blasting for its ability to produce a consistent, micro-fractured-free surface profile across the entire shell. The company’s warranty on bonding reflects direct confidence in this method. Pebble Tec® finishes applied over properly prepared and bonded shells consistently achieve the material’s full expected lifespan, which runs well beyond standard plaster.
For property managers overseeing commercial pools or resort facilities, Classicmarcite’s process addresses the specific challenges of pools with long service histories, multiple previous resurface cycles, and surfaces that may have been painted or coated with non-cementitious products. Each of those conditions requires a different prep approach, and identifying them correctly before work begins is where experience matters most.
How bonding techniques differ by pool material
The pool’s shell material determines which bonding approach is appropriate. Gunite, concrete, fiberglass, and previously painted surfaces each present different adhesion challenges.
Gunite and shotcrete pools are the most common shell type in the United States and the primary substrate for which manufactured bond coats like Multicoat, CLI, and SGM Bond Kote are designed. The porous, rough texture of properly prepared gunite accepts cementitious bond coats well. UHP water blasting is highly effective on gunite and does not harm the substrate.
Poured concrete pools behave similarly to gunite for bonding purposes. The key variable is surface profile. Smooth-formed concrete requires more aggressive mechanical profiling (grinding or UHP blasting) to achieve the roughness needed for chemical and mechanical adhesion.
Fiberglass shell pools require a fundamentally different approach. Cementitious bond coats do not adhere reliably to fiberglass. Resurfacing fiberglass typically involves epoxy-based or specialized polymer bonding systems. UHP water blasting can be used on fiberglass at adjusted, lower pressure settings to avoid shell damage. The pool surface repair techniques for fiberglass focus on surface scuffing, solvent cleaning, and epoxy primer application rather than cementitious bond coats.
Previously painted pools present a particular challenge. Paint layers must be completely removed before any cementitious bond coat is applied. SGM Bond Kote’s manufacturer explicitly prohibits application over painted or plastic finishes. UHP water blasting is the most effective method for paint removal without damaging the underlying shell.
How to choose the right bonding agent for your pool’s condition
Selecting the correct bonding agent starts with an honest assessment of the existing surface, not a preference for a particular product.
Single original plaster layer, solid and non-hollow: A manufactured bond coat (Multicoat, CLI, or SGM Bond Kote) applied correctly over a properly prepared shell is appropriate. The shell must pass a thorough hollow-spot inspection after full draining.
Multiple plaster layers present: Strip all layers down to the original shell before applying any bond coat. Applying bond coat over multiple plaster layers without reaching sound concrete causes premature plaster delamination regardless of product quality.
Painted surface: Full paint removal is required. No cementitious bond coat should go over paint. UHP water blasting or heavy sanding followed by UHP blasting is the correct sequence.
Soft, peeling, or flaking substrate: The SGM Bond Kote specification requires heavy sanding or water blasting before application when the surface is unusually soft. A soft substrate that cannot be consolidated must be removed entirely.
Pools below the water table or with active leaks: Hydrostatic pressure management is required before and during resurfacing. Bond coats cannot compensate for hydrostatic uplift. The shell must remain empty and pressure-relieved throughout the work.
Temperature and humidity also affect bond coat performance. SGM Bond Kote specifies that materials and surfaces must remain between 50°F and 120°F for 24 hours before and after installation. Application in rain or extremely high humidity is not permitted.
How do bonding techniques hold up over time?
Long-term bond performance comes down to three factors: surface profile quality at the time of application, bond coat product selection, and application discipline. All three must be present for a finish to reach its expected service life.
UHP water blasting consistently produces the strongest long-term bond profiles. The mechanical profile it creates at the microscopic level gives new coatings a textured surface to grip, and because it avoids micro-fractures in the shell, the substrate itself remains structurally intact through subsequent resurface cycles.
Manufactured bond coats outperform homebrew alternatives over time because they are formulated for continuous submersion. Water that reaches the back of a plaster finish during the semi-permeable curing phase will not re-emulsify a properly cured cementitious bond coat, but it will destroy a glue-based product. The practical result is that homebrew bond coats tend to fail within one to three years, while manufactured products applied correctly support finishes through their full expected lifespan.
Application quality is the variable that most often separates a 10-year finish from a 2-year failure. Mixing errors, insufficient coat count, incorrect SSD condition, and hollow-spot oversight each independently cause bond failure even when the product itself is appropriate. Consistent monitoring of wet film thickness during application is one of the most reliable ways to confirm adequate coating depth across the entire shell.
Classicmarcite brings 35+ years of bonding expertise to your pool
Classicmarcite has been resurfacing pools across Central Florida since 1988, with over 100,000 completed projects ranging from backyard residential pools to large commercial facilities and resort properties. As the largest Pebble Tec® applicator in Central Florida, the company applies the full technical process described in this article on every project: complete mechanical removal, manufactured bond coat application in multiple coats, and a structured 28-day startup protocol.
For pool owners and property managers who want a finish that holds, the difference between a 5-year result and a 15-year result almost always comes down to who handles the prep and bonding. Classic Marcite’s process is built around that reality. Whether your pool is in The Villages or Winter Park, request a free estimate and get a clear picture of what your pool’s surface actually needs before any work begins.
Key Takeaways
Proper surface bonding in pool resurfacing requires complete mechanical removal, a minimum of three manufactured bond coat layers at SSD condition, and 28 days of disciplined water chemistry management after the finish is applied.
| Point | Details |
|---|---|
| Surface prep drives bond strength | UHP water blasting produces bond values up to 50% stronger than chipping and avoids structural micro-fractures. |
| Three bond coat layers minimum | Fewer coats allow substrate impurities to leach into new plaster and leave the bond unreliable. |
| SSD condition is non-negotiable | Bond coats applied to surfaces that are too wet or too dry fail chemically regardless of product quality. |
| 28-day curing determines surface density | Water chemistry during the first 28 days permanently sets how hard and stain-resistant the finish becomes. |
| Classicmarcite’s process covers every stage | With 100,000+ pools resurfaced, Classicmarcite applies UHP prep, manufactured bond coats, and structured curing on every project. |
