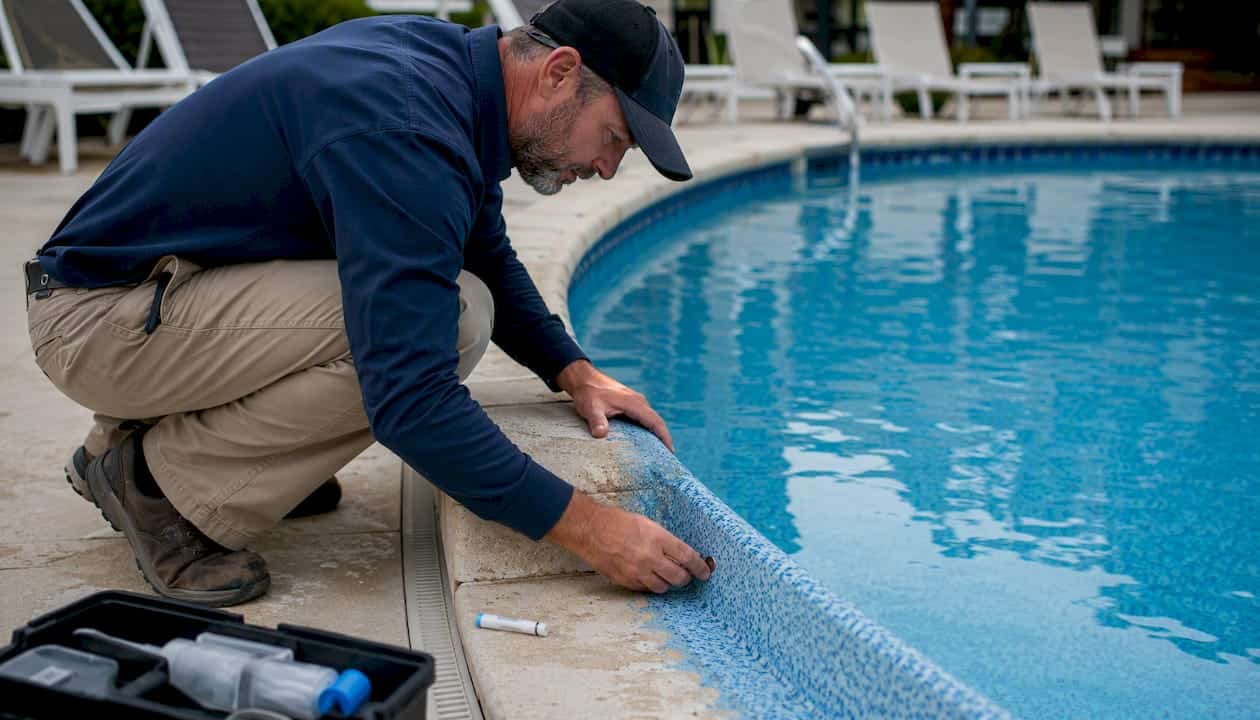
The most urgent commercial pool surface wear indicators are rough or dusting texture, hollow-sounding delamination, persistent staining that returns within days of cleaning, visible cracking, tile or grout loss, loss of aggregate or pebble exposure, white scaling deposits, and consistent unexplained water loss. If you are seeing two or more of these at once, the surface system is failing, not just aging. Structural and safety-critical signs (delamination, cracking, active leaks, tile loss) require immediate action. Cosmetic signs (light staining, minor scaling) allow a short planning window.
Immediate action checklist:
- Secure the area if tile loss, sharp aggregate exposure, or cracking creates a slip or laceration hazard. Post signage and restrict bather access to affected zones.
- Run three field tests before calling a contractor: tap the surface with a coin or knuckle to map hollow areas, drop dye near suspected cracks to confirm active leaks, and drag a gloved hand across the surface to check for dusting or abrasion.
- Photograph every problem area with a scale reference (a ruler or coin), log the date and location, and record your current water chemistry readings. That documentation is what contractors and regulators will ask for first.
Pro Tip: A single hollow-sounding spot under a tile is a repair. Hollow sounds across a substantial portion of the shell surface is a resurfacing conversation. The tap test takes ten minutes and tells you which situation you are in.
Key Takeaways
Identifying commercial pool surface wear indicators early, documenting severity with field tests, and correcting water chemistry to a Saturation Index of 0.0 to +0.3 are the three actions that determine whether a surface is repaired or replaced on your timeline rather than a regulator’s.
| Point | Details |
|---|---|
| Top urgency indicators | Hollow-sounding delamination, active leaks confirmed by dye test, and flaking or tile loss require immediate access restriction and professional assessment. |
| Saturation Index target | The NPC recommends 0.0 to +0.3; water outside this range accelerates etching or scaling and shortens finish life. |
| Repair vs. resurface threshold | Hollow areas covering 15–25% or more of the shell surface, or recurring leaks after patching, indicate a systemic failure that warrants full resurfacing rather than spot repair. |
| Permitting reality | Commercial resurfacing is treated as a construction project in most U.S. jurisdictions; budget 2–8 weeks for permits and plan for code-related upgrades including drain covers and bonding verification. |
| Classicmarcite assessment | Classicmarcite’s commercial inspection delivers documented findings, a prioritized scope, and permitting guidance for facility managers planning repair or resurfacing projects in Orlando and Jacksonville. |
Table of Contents
- What causes surface deterioration in commercial pools?
- How to inspect your pool: a detailed wear indicator checklist
- How do you measure and document surface wear severity?
- When should you repair vs. resurface a commercial pool?
- What does a commercial resurfacing project actually cost and how long does it take?
- Short-term steps to slow damage while you plan repairs
- What U.S. commercial pools must know about permits and code compliance
- How Classicmarcite inspects and diagnoses commercial pool surface wear
- What facility managers often get wrong about surface wear
- Classicmarcite’s commercial assessment offer
- Sources
What causes surface deterioration in commercial pools?
Surface failures rarely come from one source. Most trace to water chemistry mismanagement, application errors, or mechanical stress, and often a combination of all three.
Water chemistry: the leading driver
Aggressive water (low pH, low calcium hardness, low total alkalinity) etches and leaches cementitious finishes, dissolving the calcium hydroxide that holds the matrix together. The result is a porous, weakened top layer that dusts, stains easily, and loses aggregate bond. On the other end, water that is oversaturated with calcium deposits scale, trapping debris and creating the white crusty deposits you see at the waterline and on steps.
The National Plasterers Council’s Technical Bulletin No. 3 identifies the Saturation Index (also called the Calcium Saturation Index, or CSI) as the primary balancing tool for protecting cementitious finishes. The NPC’s recommended range is 0.0 to +0.3. Water below 0.0 is aggressive and actively etches the surface; water above +0.5 tends to scale. Petrographic case studies confirm that alternating acidic and alkaline conditions can produce both etching and scaling on the same finish, which is why a single out-of-range reading matters less than a chronic pattern.
Application and start-up failures
Industry practitioners estimate a majority of finish failures trace to water chemistry, with a significant share attributed to application or workmanship errors, with poor start-up procedure ranking among the most common workmanship-related causes. Overtroweling closes surface pores and creates a calcium-depleted top layer that is structurally weaker than the material beneath it. Finishing in the presence of excess surface water raises the water-cementitious ratio, producing a thin porous layer that petrographic analysis can identify in a core sample. Improper start-up, particularly failing to maintain continuous fill and balanced chemistry during the first month after coating, accelerates deterioration before the finish has fully cured.
Pro Tip: Even Pebble Tec® and other high-performance aggregate finishes will fail prematurely if start-up chemistry is neglected. The aggregate itself is durable; the cementitious matrix binding it is vulnerable to aggressive water exposure during initial curing. Strict adherence to ANSI/PHTA/ICC standards during start-up is what separates a 20-year finish from a 7-year one.
Mechanical and environmental causes
Heavy bather loads, abrasive cleaning equipment, and deck or shell movement from freeze-thaw cycles all contribute to surface stress. High-salt chlorination systems and certain shock treatments can accelerate surface degradation when chemistry is not carefully managed alongside them. In Florida’s climate, thermal expansion and contraction at the bond coat interface is a consistent mechanical stressor, particularly in older shells where the bond coat has already weakened.
How to inspect your pool: a detailed wear indicator checklist
Each indicator below has a distinct appearance, a field test you can run without specialized equipment, and a clear urgency level. Work through this list during every formal inspection.
Rough or dusting surface
What it looks like: The surface feels like coarse sandpaper rather than smooth plaster. Running a gloved hand across it leaves a white or gray residue. Underwater, you may see a fine cloud of particles near the surface when disturbed.
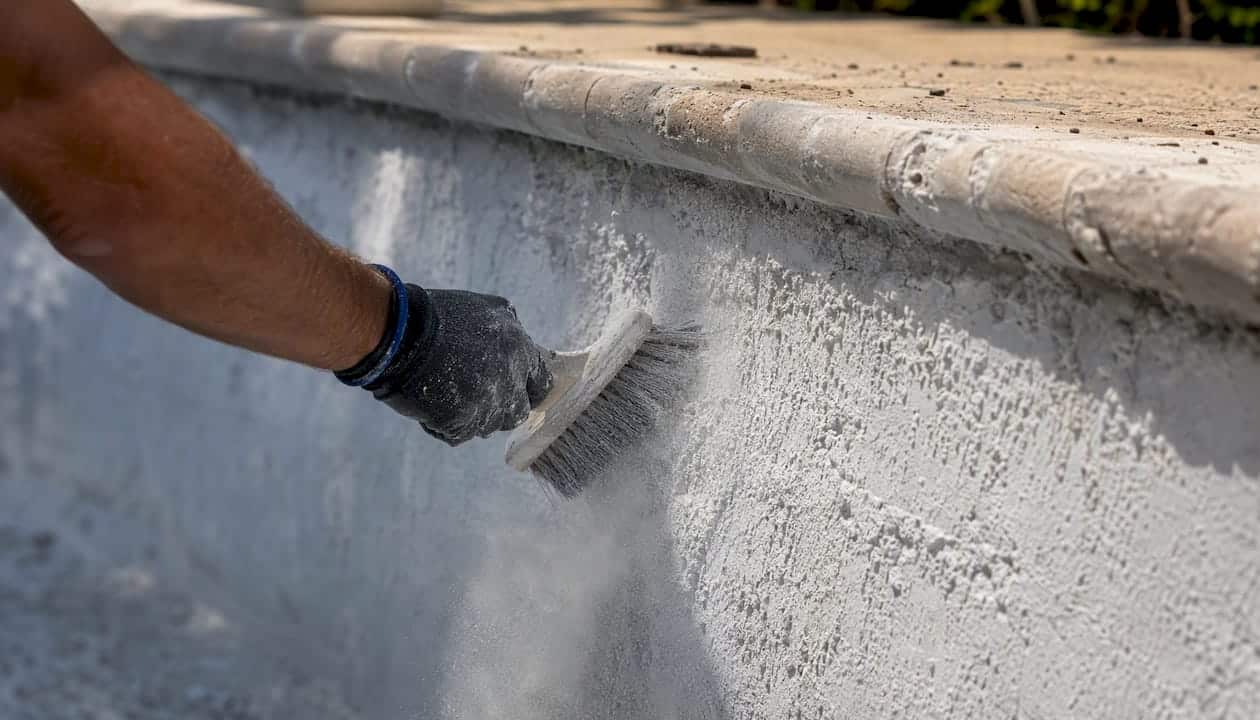
Field test: Rub a dark-colored glove or cloth firmly across a dry section of the coping or a drained area. Significant white dust indicates active surface erosion.
What it means: Etching from aggressive water or a calcium-depleted top layer from overtroweling. Urgency: medium to high. Rough surfaces harbor biofilm, increase chemical demand, and cause skin abrasion for swimmers. Petrographic evidence shows that porous top layers caused by excess surface water during finishing are a documented failure mode that worsens rapidly once the protective layer is breached.
Hollow-sounding delamination
What it looks like: No visible surface change, but tapping with a coin or knuckle produces a dull, hollow sound rather than a solid ring.
Field test: Tap systematically across the shell in a grid pattern. Mark hollow areas with chalk or tape. Map the percentage of total surface affected.
What it means: The finish has separated from the substrate or bond coat. Urgency: high. Delaminated sections can crack, spall, or lift suddenly, creating sharp edges and a slip hazard.
Flaking or peeling
What it looks like: Sections of finish lifting at the edges, curling, or coming away in sheets or chips.
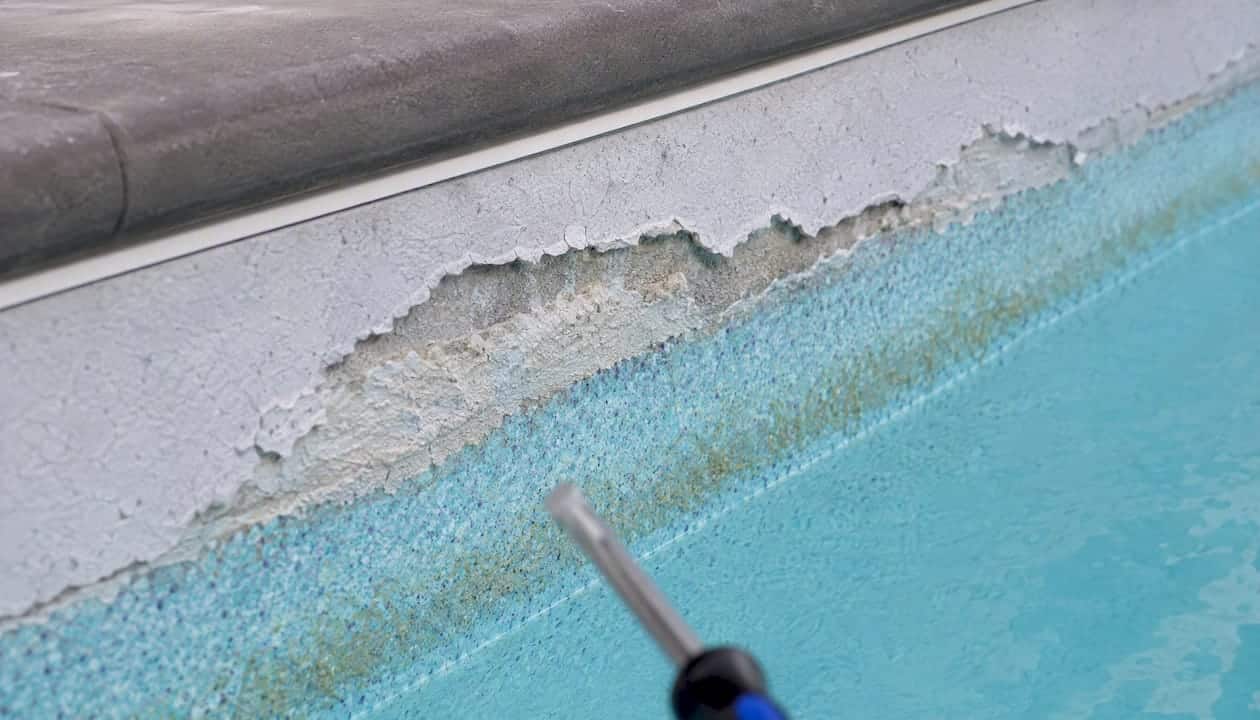
Field test: Visual inspection. Probe lifted edges with a blunt tool to determine how far the separation extends beneath the visible edge.
What it means: Bond coat failure or severe delamination. Urgency: high. Loose material is a laceration hazard and a code compliance issue in commercial facilities.
Persistent staining or discoloration
What it looks like: Brown, gray, or black staining that returns within days of chemical treatment. Metal stains (blue-green, rust) that do not respond to standard sequestrants.
Field test: Apply a small amount of ascorbic acid (vitamin C) to a metal stain. If it lightens immediately, the stain is iron-based. Persistent organic staining that returns quickly after treatment suggests a porous surface that is trapping organic material.
What it means: A porous, etched surface that can no longer be cleaned effectively. Urgency: medium. Persistent staining also signals that disinfection is compromised, since biofilm anchors in porous surfaces.
Cracks
What it looks like: Hairline to wide cracks running across the shell, often following grout lines or structural seams.
Field test: Dye test. Squeeze a small amount of dark dye near the crack with the pump off. If the dye is drawn into the crack, it is an active leak path. Structural cracks that move under pressure indicate shell movement, not just surface failure.
What it means: Hairline surface cracks may be cosmetic. Cracks that pass the dye test are structural and a water-loss source. Urgency: high for active leaks, medium for surface-only cracks.
Tile or grout loss
What it looks like: Missing tiles, cracked grout, or tiles that move when pressed.
Field test: Press each tile firmly. Movement indicates bond failure. Check grout lines for gaps that allow water infiltration behind the tile field.
What it means: Water infiltrating behind the tile field accelerates delamination of the surrounding finish. Urgency: medium to high. Recurring tile loss after repair is a strong signal that the underlying surface system is failing, not just the tile adhesive.
Loss of aggregate or pebble exposure
What it looks like: Smooth patches in a pebble or aggregate finish where the stone has dislodged, leaving a rough, pitted matrix.
Field test: Visual and tactile. Run a hand across the smooth patch. If the matrix beneath feels soft or crumbles, the binder has degraded.
What it means: Binder degradation from aggressive water or mechanical abrasion. Urgency: medium. Exposed pitted matrix is rough on swimmers and accelerates further aggregate loss.
Scaling and white deposits
What it looks like: White or gray crusty deposits at the waterline, on steps, or across the shell. May feel chalky or crystalline.
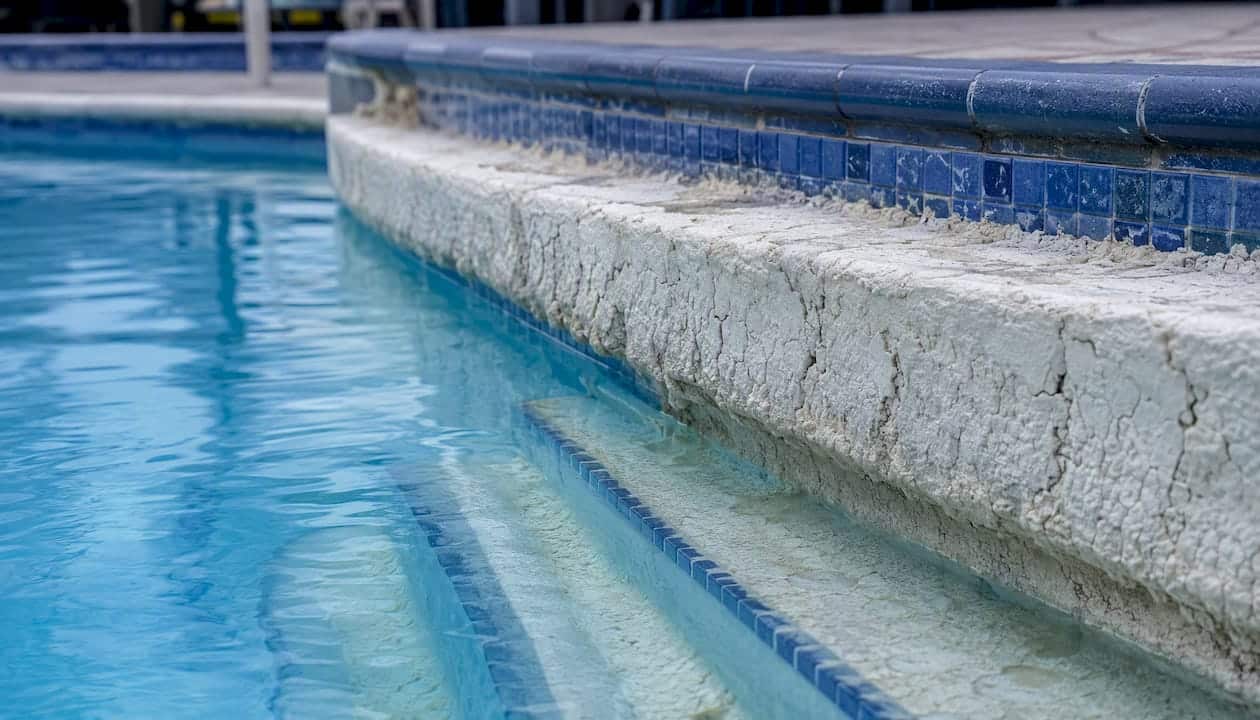
Field test: Apply a drop of muriatic acid to the deposit. If it fizzes, it is calcium carbonate scale. If it does not react, it may be calcium silicate, which is harder to remove and indicates a longer-term imbalance.
What it means: Oversaturated water (high CSI) or localized chemistry imbalance. Urgency: low to medium for cosmetic scale, medium to high if scale is masking underlying surface damage.
Consistent water loss
What it looks like: The pool loses more than 1/4 inch of water per day after accounting for evaporation.
Field test: Bucket test. Fill a bucket to pool water level, set it on a step, and mark both levels. After 24 hours, compare the drop. If the pool drops more than the bucket, there is a structural leak.
What it means: Active water loss through cracks, failed fittings, or delaminated sections. Urgency: high. Water loss in a commercial facility also signals potential structural damage to the surrounding deck and shell.
Pro Tip: Increased cleaning labor and higher-than-normal chemical consumption are indirect but reliable early indicators that the surface is degrading. If your maintenance team is spending noticeably more time scrubbing and dosing, run a full inspection before the next visible failure appears.
How do you measure and document surface wear severity?
Defensible documentation is what separates a vague “the pool looks bad” conversation from a contractor scope, a permit application, and a capital budget line. Build a record that stands on its own.
Step-by-step documentation protocol
- Chemistry audit first. Before any visual inspection, pull a full water chemistry panel: pH, total alkalinity (TA), calcium hardness (CH), free chlorine, cyanuric acid (CYA), and total dissolved solids (TDS). Calculate the Saturation Index. Record every value with the date and time.
- Photograph systematically. Cover the full shell in overlapping photos. Include a ruler or coin in every frame for scale. Note the exact location (e.g., “north wall, 2 feet below waterline, midpoint”) in the file name or a written log.
- Run the tap test. Walk the full perimeter and floor in a grid. Mark hollow areas with chalk. Estimate the percentage of total surface area affected.
- Run the dye test at every crack and suspected leak point. Record which locations draw dye and which do not.
- Probe soft spots. Use a blunt screwdriver or probe to check any area that sounds hollow or shows surface disruption. Note whether the surface yields under moderate pressure.
- Assign a severity rating. Use a simple three-tier scale: Green (cosmetic, monitor), Amber (maintenance action required within 30–60 days), Red (safety or structural, restrict access and schedule repair or resurfacing immediately).
- Escalate to core sampling when hollow areas are widespread, when the dye test shows multiple active leak points, or when the surface history is unknown and you need to distinguish etching from scaling at the substrate level. A petrographic lab analysis of a core sample can identify whether the failure is chemistry-driven or application-driven, which matters for warranty and contractor conversations.
Saturation Index reference ranges
| Saturation Index Range | Water Condition | Likely Effect on Finish |
|---|---|---|
| Below -0.5 | Highly aggressive | Active etching, leaching, rapid finish loss |
| -0.5 to 0.0 | Mildly aggressive | Slow etching, increased porosity over time |
| 0.0 to +0.3 | Ideal (NPC target) | Finish protected, minimal scaling or etching |
| +0.3 to +0.5 | Mildly scaling | Light scale deposits, manageable with maintenance |
| Above +0.5 | Scaling | Heavy scale, deposit buildup, potential surface masking |
Test pH, TA, and free chlorine 1–2 times per week. Test CH, CYA, and TDS monthly. Use the NPC’s recommended testing cadence as your baseline protocol, and calculate the Saturation Index at each full-panel test. For practical guidance on maintaining water balance to protect your finish, the relationship between chemistry and surface longevity is direct and measurable.
When should you repair vs. resurface a commercial pool?
The decision hinges on whether the problem is localized or systemic. Patching a systemic failure wastes money and delays the inevitable.
Repair is appropriate when:
- Tile or grout loss is isolated to a defined section with no evidence of bond failure in adjacent areas.
- Delamination is limited to one or two discrete spots, each smaller than roughly one square foot, with solid surface confirmed by tap test on all surrounding areas.
- Staining is surface-level and responds to chemical treatment.
- A single crack passes the dye test but is isolated, with no evidence of shell movement.
Resurface when:
- Hollow-sounding areas cover 15–25% or more of the total shell surface.
- Dusting or surface erosion is pervasive across multiple zones.
- Staining returns within days of treatment across large areas, which indicates a porous surface that can no longer be maintained.
- Multiple cracks pass the dye test, or leaks recur after patching.
- Tile loss is recurring in the same locations after repair, suggesting the underlying surface system is failing.
- The finish has reached or exceeded its expected service life and shows two or more of the above indicators simultaneously.
Decision checklist for triage:
- Complete the full documentation protocol above.
- Calculate the percentage of surface area affected by hollow sound, cracking, and staining.
- Consult a qualified resurfacing contractor with your photo log and chemistry records before committing to a repair scope.
- Implement temporary mitigations (chemistry correction, reduced bather load, signage) while the resurfacing project is planned.
- Budget for code-related upgrades at the same time. Resurfacing a commercial pool without addressing permit-triggered items adds cost and delay later.
Pro Tip: Smooth trowel plaster finishes show cosmetic irregularities earlier and are more sensitive to chemistry swings than exposed aggregate finishes. If your facility is on smooth plaster and you are seeing widespread staining or roughness, the surface is likely closer to the end of its useful life than it appears. Aggregate and pebble finishes are generally more forgiving in high-use commercial settings.
What does a commercial resurfacing project actually cost and how long does it take?
Expect a commercial resurfacing project to take longer and cost more than a residential one. The variables are real and worth understanding before you go to bid.
Typical project phases and durations
- Assessment and documentation: 1–3 days, depending on pool size and complexity.
- Permitting: 2–8 weeks in most U.S. jurisdictions. Florida’s commercial pool permitting process includes plan submission, health department review, and inspector sign-off. Factor this into your program calendar, not as a surprise.
- Preparation and demolition: 2–5 days for surface removal, substrate repair, and bond coat application.
- Resurfacing application: 1–3 days for most commercial pools, longer for large or complex geometries.
- Cure and start-up: 28–30 days of careful water-balance management before the pool returns to full bather load.
Total downtime from permit approval to reopening for a straightforward commercial project is generally several weeks, and longer when structural repairs, waterproofing, or code upgrades are required.
Primary cost drivers
- Finish material selection. Marcite plaster is the lowest entry cost. Aggregate finishes and Pebble Tec® carry a higher material cost but longer expected service life in commercial settings.
- Extent of substrate repairs. Hollow areas, cracks, and failed bond coat all require additional preparation before resurfacing. The more prep, the higher the cost.
- Access and scaffolding. Deep competition pools, lap pools, and pools with limited deck access require additional equipment and labor.
- Code-related upgrades. Drain cover replacement, equipotential bonding inspection, depth and no-diving markers, and ADA-related deck adjustments can add significant cost. These are not optional in most jurisdictions.
- Scheduling seasonality. In Florida, scheduling a commercial resurfacing during the off-season (typically fall or early winter) often yields better contractor availability and shorter lead times.
Include water-balance and start-up documentation requirements in your contract language. Ask your contractor for a staged schedule that identifies the permit submission date, the mobilization date, and the expected reopening date as separate milestones. For a detailed look at how a commercial pool renovation workflow is structured from assessment through reopening, that sequencing matters for stakeholder communication.
Short-term steps to slow damage while you plan repairs
You cannot always resurface immediately. These steps reduce further deterioration and keep the pool safe and operational while the project is being planned.
- Correct water chemistry first. Bring the Saturation Index to 0.0–+0.3 immediately. Aggressive water actively erodes the surface every day it remains out of range. This single step does more to slow deterioration than any other short-term measure.
- Switch to non-abrasive cleaning methods. Automated brush systems and manual scrubbing with stiff brushes accelerate surface loss on a weakened finish. Use soft brushes only, and reduce scrubbing frequency.
- Reduce bather load in affected zones. If delamination or cracking is localized, restrict access to those areas with lane ropes or signage. Do not close the entire facility if only a section is compromised.
- Increase chemistry monitoring frequency. Move from weekly to daily pH and TA checks until the surface is repaired. Swings in either direction accelerate damage on an already-weakened finish.
- Document changes weekly. Photograph the same locations on the same schedule. If the damage is progressing rapidly, that documentation supports an emergency resurfacing timeline with your capital planning team.
Recommended monitoring schedule
- Daily: pH, free chlorine, visual check of problem areas.
- 2–3 times per week: Total alkalinity, visual inspection of hollow-mapped zones.
- Monthly: Full panel (CH, CYA, TDS), Saturation Index calculation, photo log update.
Pro Tip: Avoid adding dry acid or muriatic acid directly to a weakened surface. Always pre-dilute and add to the deepest part of the pool with the pump running. Concentrated acid contact with an already-etched surface accelerates localized damage.
For a complete pool surface maintenance schedule with chemistry targets and monitoring frequency, that resource covers the full operational cadence.
What U.S. commercial pools must know about permits and code compliance
Resurfacing a commercial pool is not a maintenance task in the eyes of most U.S. building and health departments. It is a construction project, and it triggers a review process that can affect your timeline and budget significantly.
What typically triggers a permit
- Any removal and replacement of the pool interior finish in a commercial or public facility.
- Structural repairs to the shell, including crack injection and bond coat replacement.
- Any modification to the pool’s hydraulic system, fittings, or drain covers.
Common code-related upgrades triggered at resurfacing
- Drain cover replacement. Virginia Graeme Baker Act (VGB) compliance requires anti-entrapment drain covers. Resurfacing projects in most jurisdictions require confirmation that covers meet current standards.
- Equipotential bonding. Many jurisdictions require inspection and verification of the bonding grid when the interior finish is removed. Florida’s resurfacing form for public pools explicitly requires this verification under Florida Building Code 454.1.10.4.2.
- Depth and no-diving markers. Updated depth markings and no-diving indicators must meet current code at the time of permit issuance, not the original construction date.
- ADA and deck adjustments. If deck work is included in the scope, ADA accessibility requirements for entry points and deck surfaces may apply.
Permitting checklist
- Confirm the applicable jurisdiction (city, county, or state health department) and obtain the correct permit application form before starting any contractor conversations.
- Prepare as-built drawings or a current site plan showing pool dimensions, drain locations, and existing safety appurtenances.
- Include all planned safety upgrades in the permit submission. Submitting an incomplete scope and adding items later delays inspector sign-off.
- Schedule a pre-construction meeting with the inspector when possible. It surfaces code issues before mobilization, not during.
- Plan for a final inspection and sign-off before reopening. In Florida and most other states, a commercial pool cannot reopen after resurfacing without a health department or building department clearance.
For a current overview of commercial pool safety regulations and permitting requirements, that resource covers the regulatory framework in detail.
How Classicmarcite inspects and diagnoses commercial pool surface wear
A professional assessment follows a defined sequence, not a walk-around with a flashlight. Here is the methodology Classicmarcite uses on commercial projects.
Inspection sequence
- Intake and history review. Collect the pool’s construction date, finish history, last resurfacing date, and any available chemistry logs. A pool with no chemistry records is a higher-risk project than one with documented maintenance.
- Chemistry audit. Pull a full water panel and calculate the Saturation Index before touching the surface. Chemistry history explains most of what the surface shows.
- Full-surface walk with hollow-sound mapping. Tap the entire shell systematically. Mark and photograph every hollow area. Estimate the percentage of total surface affected.
- Selective dye and probe testing. Test every crack, grout line gap, and fitting penetration for active water loss. Probe soft or hollow areas to assess depth of separation.
- Photographic documentation. Every finding is photographed with a scale reference and logged by location. This record goes to the client and, when required, to the permitting authority.
- Prioritized recommendations. The assessment output distinguishes immediate safety items, near-term repair candidates, and resurfacing scope. It includes a preliminary estimate of the percentage of surface affected and a recommendation on whether repair or full resurfacing is warranted.
When Classicmarcite recommends a core sample
A core sample and petrographic analysis are recommended when the surface history is unknown, when the failure pattern does not match the chemistry history, or when a warranty or insurance claim requires documented cause-of-failure evidence. Petrographic analysis can distinguish etching and leaching from scaling at the substrate level and identify whether a thin porous top layer resulted from application error or chemistry mismanagement. That distinction matters for contractor accountability and for specifying the correct repair approach. For most commercial projects with a documented maintenance history, a field-test-based assessment is sufficient to scope the work.
What facility managers often get wrong about surface wear
Most facility managers treat pool surface wear as a cosmetic issue until it becomes a safety or compliance problem. That sequence is expensive. The surface indicators that seem minor, persistent staining, slightly rough texture, a small hollow-sounding section near the main drain, are the early signals of a system that is failing at the substrate level. By the time delamination is visible and widespread, the window for cost-effective repair has usually closed.
The other consistent mistake is attributing surface failures to material quality alone. A Pebble Tec® finish applied by a skilled crew will outlast a smooth plaster finish applied by an inexperienced one, but neither finish survives chronic chemistry mismanagement. The NPC’s guidance on Saturation Index maintenance is not a suggestion for high-end finishes. It is the minimum standard for any cementitious pool surface, regardless of material cost or brand.
The managers who get the most life out of their pool surfaces are the ones who treat chemistry logs as asset-management records, not just compliance paperwork. A three-year chemistry log handed to a resurfacing contractor tells that contractor exactly what caused the failure and exactly what the new finish needs to survive. Without it, you are starting from scratch every time.
Classicmarcite’s commercial assessment offer
Classic Marcite has resurfaced over 100,000 pools since 1988, including commercial facilities, resorts, and theme parks across Orlando and Jacksonville. For facility managers who need a documented assessment rather than a sales visit, Classicmarcite’s commercial inspection covers the full sequence: chemistry audit, hollow-sound mapping, dye and probe testing, photographic documentation, and a written scope recommendation that distinguishes repair from resurfacing and identifies permit-triggered upgrades.
As Central Florida’s largest Pebble Tec® applicator, Classicmarcite works with property managers and facility teams on scheduling that minimizes program disruption, including off-season priority scheduling for commercial clients. The assessment output is formatted to support contractor conversations, capital budget requests, and permit submissions. To schedule a commercial assessment or request a scope estimate for your facility, contact Classicmarcite through the Orlando commercial Resurfacing page or review the commercial pool finish options available for your project.
Sources
- Technical Bulletin Number 3 – Swimming Pool Interior Finishes & Chemical Etching Deterioration
- The life and death of a pool finish
- (PDF) SWIMMING POOL PLASTER DETERIORATION 6 OVERVIEW & CASE STUDIES