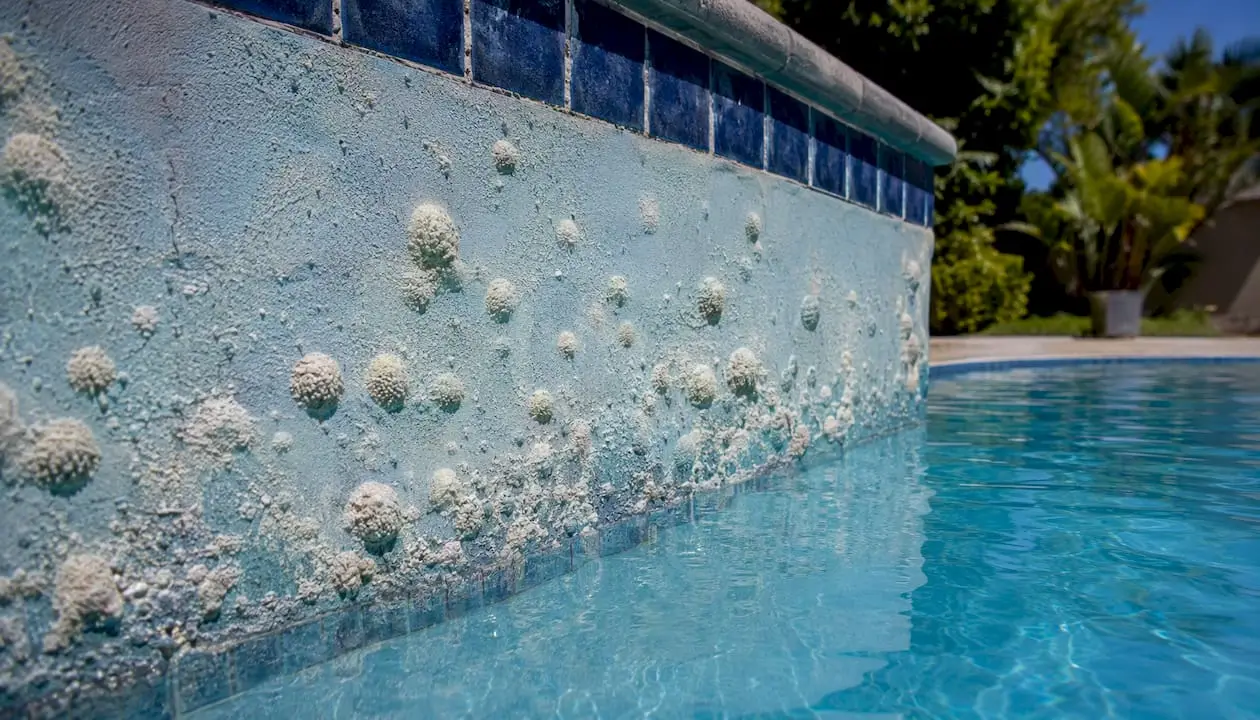
Calcium nodules in pool plaster are localized calcium carbonate deposits that form at the exit points of cracks or voids in the plaster, not from unbalanced water chemistry. That distinction matters for every decision you make next. According to onBalance/Pool Help research, the primary cause is a plaster application or bond defect, which means chasing your water balance will not stop them from coming back.
Do this now:
- Photograph every nodule with a close-up and a wide-angle shot showing its location relative to cracks or fittings.
- Map the nodule locations on a simple sketch of your pool floor and walls.
- Monitor isolated nodules for regrowth after a single scrape before escalating to repairs.
Avoid these mistakes:
- Do not acid-wash the entire pool surface hoping to dissolve the deposits. Acid washing can damage surrounding plaster and mask the underlying defect.
- Do not assume scraping once is a permanent fix. Regrowth at the same spot means the void is still active.
The technical model behind this guidance comes from petrographic laboratory analyses by Construction Technology Laboratories (CTL) and RJ Lee Group, peer-reviewed work published in the Journal of the Swimming Pool and Spa Industry (JSPSI), and field guidance from the National Plasterers Council (NPC) and onBalance.
Key Takeaways
Calcium nodules in pool plaster are a plaster application or bond defect problem, not a water chemistry problem, and the repair approach must match the underlying cause to be durable.
| Point | Details |
|---|---|
| Nodules signal plaster defects | Calcium carbonate deposits form at crack or void exit points, not from unbalanced water. |
| Two types, two repair paths | Void/delamination nodules need coring or resurfacing; craze nodules may respond to wet sanding if the source is exhausted. |
| Regrowth is the key diagnostic | A nodule that regrows at the same spot after two removals confirms an active void requiring professional remediation. |
| Petrographic cores resolve disputes | CTL Group, RJ Lee Group, and WJE analyses identify calcium source and bond quality for warranty claims. |
| Classicmarcite provides full-service diagnosis | From tap testing and coring to epoxy injection and Pebble Tec® resurfacing across Orlando and Jacksonville, FL. |
Table of Contents
- How calcium nodules form in pool plaster
- Identifying nodules: what they look like and where to find them
- What actually causes calcium nodules: root causes and risk factors
- How to inspect and test your pool for nodules
- How to remove or repair calcium nodules: homeowner options vs. professional repairs
- When nodules justify replastering and what that process looks like
- How to prevent nodules when plastering or replastering a pool
- Key industry research and lab case studies that support the nodule model
- What a contractor site visit actually reveals
- Classicmarcite handles calcium nodule problems from inspection to full resurfacing
- Sources
How calcium nodules form in pool plaster
The mechanism is straightforward once you see it. Water migrates into a void or crack behind the plaster surface. That water dissolves calcium hydroxide (Ca(OH)₂) from the cement-based plaster matrix. When the calcium-rich solution reaches the plaster surface, it reacts with carbon dioxide in the pool water or air and precipitates as calcium carbonate (CaCO₃), the white, hard deposit you see as a nodule.
The JSPSI paper on pool plaster efflorescence confirms through coupon experiments and petrographic core analysis that the calcium is plaster-derived, not a water-chemistry product. That finding shifts the diagnosis entirely: the nodule is a symptom of a structural defect, not a mineral scaling event.
Two distinct defect types produce two distinct nodule patterns:
| Feature | Void/delamination nodule | Craze/shrinkage-crack nodule |
|---|---|---|
| Cause | Bond failure between plaster layers or substrate | Shrinkage cracking from over-acceleration, rapid drying, or troweling errors |
| Visible pattern | Dome-shaped, clustered, often over hollow-sounding areas | Small, linear, following crack networks across the surface |
| Likely recurrence | High — void remains active until sealed | Moderate — may exhaust source if cracks are fine and sealed by carbonate |
| Diagnostic clue | Hollow sound on tap, larger nodule base | Visible craze lines radiating from nodule base |
| Typical remedy | Coring, epoxy injection, or resurfacing | Wet sanding, polishing; resurfacing if widespread |
Identifying nodules: what they look like and where to find them
Calcium deposits in pool plaster have a specific look that separates them from algae staining, ordinary mineral scale, or plaster dust. Knowing the difference saves you from treating the wrong problem.
Visual signs to look for:
- White to off-white color, hard to the touch, and resistant to brushing
- Dome or blister shape, ranging from a few millimeters to over a centimeter in diameter
- Location directly over or adjacent to visible cracks, pinholes, or fitting penetrations
- On vertical surfaces, elongated drip or stalactite shapes where solution has run downward before hardening
- Clusters near steps, corners, or the waterline where plaster stress concentrates
Simple in-pool checks you can do yourself:
A scratch test tells you a lot. Use a coin or a stainless steel tool to scratch the deposit. Calcium carbonate is hard and will resist a fingernail but yield slightly to metal. Algae and soft scale scrape away easily and leave a stain; a nodule leaves a white powder and a hard base.
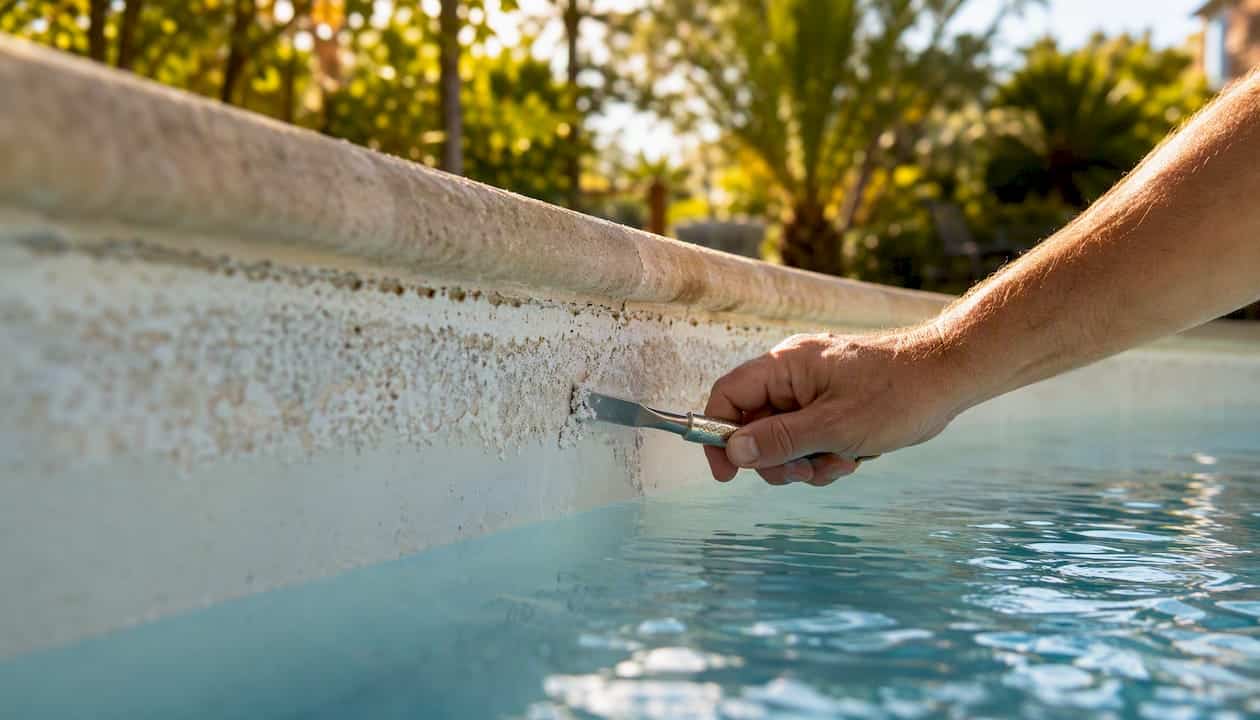
Tap the plaster around a nodule with a solid object. A hollow sound indicates a void beneath, which points toward delamination rather than a simple craze crack. That distinction changes the repair path significantly.
Pro Tip: When photographing nodules to share with a contractor, take three shots per cluster: one macro close-up showing the nodule’s shape and base, one mid-range showing its position relative to any visible cracks, and one wide shot showing its location on the pool floor or wall. Include a coin or ruler for scale in at least one frame.
What actually causes calcium nodules: root causes and risk factors
The dominant risk categories are plaster bond failure, over-accelerated curing, finishing errors, slow or uneven filling, ground movement, and replaster work over an inadequately prepared substrate. Water chemistry plays a secondary role at most.
The four highest-risk scenarios in practice:
- Delamination: When the new plaster layer does not bond properly to the substrate, water finds the gap immediately. This is the most common source of large, recurring nodules.
- Over-acceleration with calcium chloride: Adding excess CaCl₂ to speed curing increases shrinkage stress and craze cracking. The JSPSI research documents coupon experiments showing that admixture extremes significantly change nodule frequency and timing.
- Troweling and finishing errors: Burning the surface (over-troweling) or finishing in direct sun or wind creates a dense skin that traps moisture and promotes delamination beneath.
- Replastering over old plaster: Applying new plaster over an existing surface without adequate mechanical preparation leaves a bond plane that water can exploit.
Ground movement and soil settlement add mechanical stress to plaster that is already at its tensile limit, particularly in Florida’s sandy soils. A pool that developed no nodules for years can develop them after a dry season followed by heavy rain shifts the substrate.
Slow or uneven filling after plastering is another underappreciated factor. Plaster that dries unevenly before the pool reaches full water level develops differential shrinkage cracks that become nodule sites within weeks.
How to inspect and test your pool for nodules
A structured inspection gives you the information a contractor needs and helps you decide whether you are dealing with an isolated cosmetic issue or a systemic plaster failure.
- Drain or partially drain the pool. A full visual inspection requires a dry or nearly dry surface. Many nodules are invisible underwater until you look at the right angle with a light.
- Map every nodule. Use a simple grid sketch of your pool. Mark each nodule’s location, approximate size, and whether it sits on a visible crack or over a smooth area.
- Tap-test the surrounding plaster. Work outward from each nodule in a 6-inch radius. Mark hollow-sounding areas with chalk or tape. Hollow zones indicate delamination.
- Measure nodule density. Count nodules per 10-square-foot area. Density matters for the repair decision: a few scattered nodules call for monitoring; dense clusters suggest systemic failure.
- Photograph everything. Use the three-shot protocol described in the identification section above.
- Do a scratch and brush test. Confirm the deposits are calcium carbonate, not algae or soft scale, before escalating.
- Note regrowth history. If you have scraped nodules before, mark which locations regrew. Repeated regrowth at the same spot is the clearest sign of an active void.
When to escalate to coring or lab analysis:
If tap-testing reveals extensive hollow areas, if nodules are dense across multiple zones, or if a warranty dispute is involved, a petrographic core analysis is the appropriate next step. The CTL petrographic report on Gilbert, AZ pool plaster cores demonstrates that coring can distinguish craze nodules from bond-failure nodules with high confidence, which is exactly the information needed to assign responsibility in a dispute.
Firms like CTL Group, RJ Lee Group, and Wiss, Janney, Elstner Associates (WJE) perform petrographic analyses on cored plaster samples. A core sample is typically 1–2 inches in diameter, taken at a nodule site and at a control location, and examined under polarized light microscopy to identify the calcium source, bond quality, and crack morphology.
Pro Tip: If you are preparing for a warranty claim, request that the contractor take cores at both nodule sites and at a nodule-free area of the same pool. The contrast between the two samples is often the most persuasive evidence in a dispute.
How to remove or repair calcium nodules: homeowner options vs. professional repairs
The right intervention depends on how many nodules you have, whether they regrow, and what the tap test reveals beneath them.
Decision path in plain terms: A single nodule that does not regrow after scraping is likely from an exhausted source. Scrape it smooth, monitor for six months, and move on. A nodule that regrows at the same spot within weeks means the void is still feeding calcium hydroxide to the surface. That spot needs professional remediation. Widespread nodules across multiple zones, or hollow-sounding areas covering more than a few square feet, point toward resurfacing as the most cost-effective long-term answer.
Homeowner-safe removal steps
Mechanical removal is the only safe DIY approach. Acid washing is not recommended: it removes calcium carbonate temporarily but does not seal the void, and repeated acid exposure degrades the surrounding plaster matrix, making future repairs harder and more expensive.
- Scraping: Use a stainless steel pool trowel or a plastic scraper for small, isolated nodules. Work at a low angle to avoid gouging the plaster beneath.
- Wet sanding: A wet/dry sandpaper (80–120 grit) or a purpose-built pool polishing pad removes the nodule flush with the surrounding surface. Tools like those from Coyote Abrasives are designed specifically for removing calcium nodules from pool plaster without damaging the base plaster.
- Polishing: After sanding, a fine-grit polish restores the surface texture and reduces the visual contrast between the treated spot and surrounding plaster.
| Intervention | Who performs it | When it applies | Limitations |
|---|---|---|---|
| Scraping/sanding | Pool owner or tech | Isolated nodules, first occurrence | Does not seal void; regrowth possible |
| Wet sanding + polishing | Pool owner or tech | Small clusters, cosmetic concern | Repeated sanding thins plaster over time |
| Epoxy injection | Licensed contractor | Recurring nodules over confirmed void | Requires coring; not suitable for craze cracks |
| Localized patching | Licensed contractor | Bond-failed area with defined boundary | Color match difficult; patch may stand out |
| Full resurfacing | Licensed contractor | Widespread nodules, systemic delamination | Highest cost; most durable long-term fix |
Professional repair overview
For recurring nodules over a confirmed void, a contractor drills a small core at the nodule site, confirms the void depth and extent, and injects structural epoxy to seal the water pathway. According to Pool Help’s guidance on epoxy injection, this approach is durable when the technician can reliably locate and access the leaking pathway, because it stops calcium hydroxide from reaching the surface at that point.
Localized patching works when the delaminated area has a clear boundary. The contractor removes loose plaster, prepares the substrate, and applies a matching plaster mix. Color matching is imperfect on aged plaster, so patching is more practical on pools scheduled for resurfacing within a few years anyway.
Pro Tip: Before hiring a contractor for epoxy injection, ask specifically: “What cure protocol did the original plasterer use, and did they use calcium chloride as an accelerator?” The answer tells you whether craze cracking from over-acceleration is likely, which changes whether injection or resurfacing is the better investment.
When nodules justify replastering and what that process looks like
Resurfacing becomes the right call when the problem is systemic rather than localized. Three clear triggers:
- Nodules are present across more than one zone of the pool and density is high enough that sanding would thin the plaster unevenly.
- Petrographic cores or tap-testing reveal delamination covering a significant portion of the shell.
- Nodules have regrown at the same locations after two or more removal attempts, confirming active voids that injection cannot reliably reach.
- Extensive craze cracking is visible across the surface, indicating the plaster layer has lost structural integrity.
The contractor workflow for a full resurfacing job follows a defined sequence. First, a site inspection with coring confirms the extent of bond failure and documents the substrate condition. Loose or delaminated plaster is then mechanically removed, typically by chipping or grinding, down to sound substrate. The substrate is cleaned, profiled for bond, and any structural cracks in the shell are repaired before new plaster goes on. The new finish, whether standard marcite, quartz aggregate, or a Pebble Tec® surface, is applied in controlled conditions with attention to mix ratios, accelerator use, and trowel technique. The pool curing and filling protocol after plastering is as important as the application itself: filling too slowly or unevenly is one of the documented causes of the craze cracking that leads to nodules in the first place.
Timeline for a residential pool resurfacing job typically runs five to ten days from start to swim-ready, depending on pool size, substrate condition, and finish type. Cost varies widely by region, pool size, and finish material. Standard marcite resurfacing for a typical residential pool in Florida generally starts in the low thousands of dollars; premium aggregate or Pebble Tec® finishes run higher. Get at least two itemized estimates, and ask each contractor to specify their cure protocol and calcium chloride policy in writing before signing.
How to prevent nodules when plastering or replastering a pool
Prevention happens at the job site, not in the water. The decisions a plasterer makes during application determine whether nodules appear in six months or never.
Questions to ask any contractor before signing:
- What is your calcium chloride policy? (The answer should be “minimal use” or “none.”)
- How do you handle surface prep on a replaster job? (Look for mechanical profiling, not just acid washing.)
- What is your fill schedule after plastering? (A controlled, continuous fill within hours of finishing is correct.)
- Do you offer a written warranty that covers nodule formation?
- Can you provide references from jobs done in similar soil and climate conditions?
On-site plastering controls that reduce nodule risk:
Proper surface preparation is the single highest-leverage step. On a replaster job, the existing plaster surface must be mechanically roughened to create a bond profile. Acid washing alone does not provide adequate mechanical adhesion. Mix ratios should follow NPC guidelines, with water-to-cement ratios kept consistent throughout the job. Calcium chloride, when used at all, should be held to the minimum the NPC recommends for ambient conditions, because excess CaCl₂ is a documented driver of shrinkage cracking.
Troweling technique matters more than most owners realize. Over-troweling creates a dense, low-permeability skin that traps bleed water and promotes delamination. Finishing in direct sun or wind accelerates surface drying unevenly, with the same result.
After plastering, proper post-resurfacing maintenance during the first 28 days is critical. Brush the surface daily, maintain balanced water chemistry, and avoid abrasive cleaning tools until the plaster has fully cured.
Pro Tip: Ask your contractor to document the ambient temperature, humidity, and wind conditions at the time of plastering. If nodules appear later and a warranty dispute follows, that record is evidence of whether the application conditions were within acceptable limits.
Key industry research and lab case studies that support the nodule model
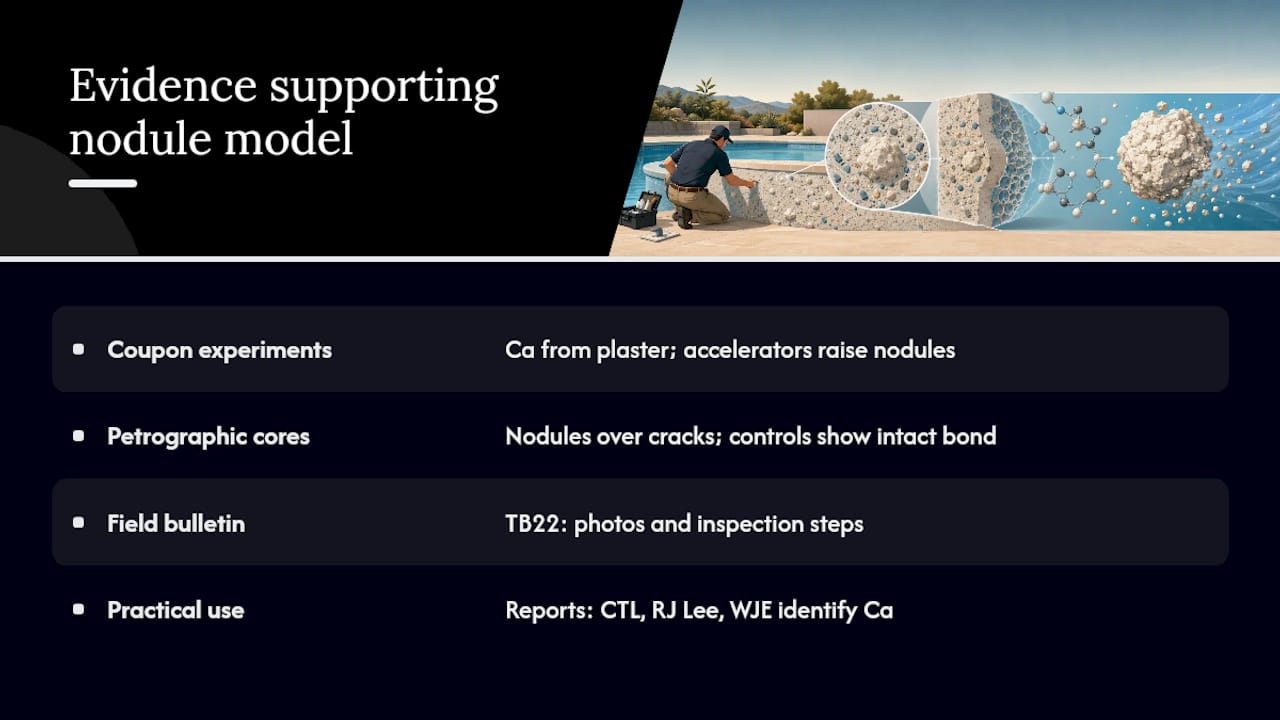
The technical case for the plaster-defect model rests on three categories of evidence: coupon experiments, petrographic core analyses, and field case studies.
The JSPSI paper on swimming pool plaster efflorescence is the most cited primary source. Researchers created plaster coupons under controlled conditions, varied accelerator use and curing parameters, and examined the resulting nodules under microscopy. The calcium in every nodule traced back to the plaster matrix, not to pool water minerals. Coupon experiments with elevated calcium chloride showed dramatically higher nodule frequency, directly linking over-acceleration to nodule formation.
The CTL Group petrographic examination of pool plaster cores from Gilbert, Arizona provides case-specific evidence. Cores taken at nodule sites showed nodules positioned directly over microcracks or bond-failed interfaces. Control cores from nodule-free areas of the same pool showed intact bond planes. That contrast is the clearest possible demonstration that the defect, not the water, determines where nodules form.
The onBalance Technical Bulletin 22 translates the laboratory findings into field-applicable guidance, with photographic examples of void versus craze nodules and practical inspection steps. For a pool owner preparing for a warranty conversation, this bulletin is a useful document to share with a contractor because it establishes the accepted industry model in plain language.
Practical use of this evidence in a dispute: If a contractor claims your water chemistry caused the nodules, a petrographic core report from CTL, RJ Lee Group, or WJE will either confirm or refute that claim with physical evidence. The report identifies the calcium source, the crack morphology, and the bond quality at the sampled location. That is the kind of documentation that resolves disputes and supports repair claims under warranty.
What a contractor site visit actually reveals
When a professional visits a pool with calcium nodule complaints, the first ten minutes look nothing like what most owners expect. The contractor is not primarily looking at the nodules themselves. The nodules are already visible in your photographs. What the site visit adds is the tap test, which no photograph can replicate.
A systematic tap survey across the pool floor and walls, using a solid rod or the handle of a trowel, maps the hollow zones that photographs miss entirely. That finding changes the repair recommendation from targeted injection to resurfacing, and it changes the cost conversation significantly.
Technicians also look at the nodule base diameter relative to the nodule height. A wide, flat base with a small dome suggests a craze crack source. A narrow base with a tall, rounded dome suggests a void beneath. That ratio, combined with the tap test, usually gives an experienced contractor a confident preliminary diagnosis before any coring happens.
Documentation from the site visit should include a marked-up sketch of hollow zones, photographs of representative nodule types, tap-test findings, and a written summary of the recommended repair path with the reasoning behind it. If a contractor visits and offers a quote without producing any of that documentation, ask for it before signing. A quote without a diagnosis is a guess.
Classicmarcite handles calcium nodule problems from inspection to full resurfacing
When calcium deposits in your pool plaster keep coming back, the fix requires more than a scraper. Classicmarcite has resurfaced more than 100,000 pools since 1988, operating across Orlando, Jacksonville, and surrounding Florida communities, and holds the distinction of being the largest Pebble Tec® applicator in Central Florida.

For calcium nodule problems specifically, Classic Marcite offers the full diagnostic and repair workflow: on-site inspection with tap testing and mapping, coring at nodule sites when delamination is suspected, localized epoxy injection for confirmed void-based nodules, and professional pool repair for targeted patching.
When the inspection reveals systemic bond failure or widespread craze cracking, the team provides full pool resurfacing in Orlando using marcite plaster, quartz aggregate, or Pebble Tec® finishes, with documented cure protocols and written warranty terms. Prepare your nodule photographs and location map before the visit, and the estimate conversation will be faster and more specific. Request your free estimate to get a professional diagnosis rather than another temporary fix.
Sources
The following primary sources support the technical model described in this article and are worth sharing directly with contractors or warranty administrators:
