TL;DR:
- Regrouting pool tiles involves removing existing grout to restore a waterproof seal when tiles are properly bonded and the underlying membrane is intact. Proper inspection, full grout removal, and timely curing are essential for a durable repair, especially in Florida’s challenging climate. Epoxy grout is recommended for Florida pools due to its resistance to chemicals, UV exposure, and salt.
Regrouting pool tiles means removing failed grout from the joints between tiles and replacing it with fresh, pool-grade grout to restore a watertight seal. It works when tiles are solidly bonded and the waterproofing membrane beneath them is intact. If either condition fails, regrouting is cosmetic at best and a costly delay at worst.
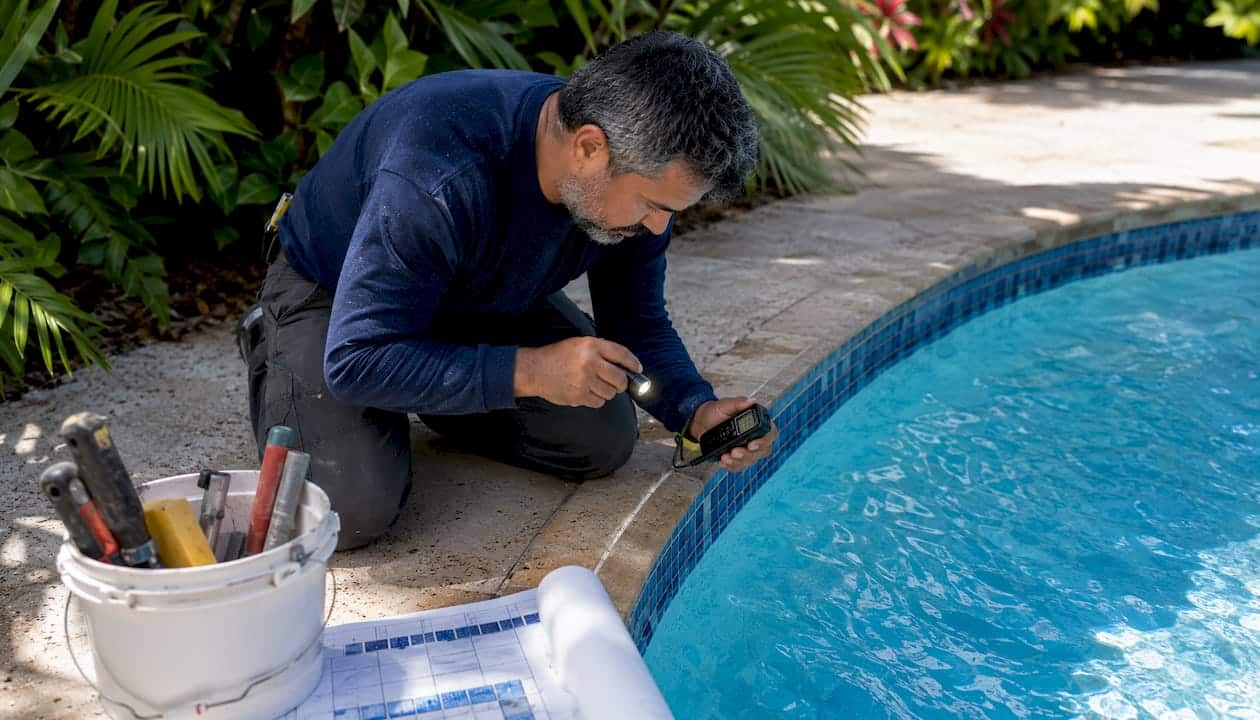
Run these three checks before scheduling any work:
- Tap test: Knock firmly across every tiled surface with a coin or knuckle. A hollow sound signals adhesive failure beneath the tile. Those areas need more than new grout.
- 48-hour water-loss check: Mark the water level and measure again two days later. Normal evaporation in Florida is typically a small daily amount. Losses beyond that point to a membrane or structural issue, not a grout problem.
- Visual scan: Look for crumbling joints, missing grout, or tiles that shift underfoot.
Based on what you find, your next step is one of three:
- Solid tiles, no abnormal water loss, visible grout gaps only: proceed with professional regrouting.
- Hollow tiles in isolated spots with no water loss: localized tile replacement plus regrouting.
- Hollow tiles across multiple zones, persistent water loss, or a history of repeat regrout failures: schedule a full inspection for retiling and waterproofing.
Table of Contents
- What Does the Regrout Pool Tiles Workflow Look Like Step by Step?
- When Does Regrouting Alone Not Solve the Problem?
- Which Grout Type Is Right for Your Florida Pool?
- What Should You Expect for Timeline and Cost?
- How Do You Choose the Right Contractor?
- How Do You Protect New Grout After the Pool Refills?
- Key Takeaways
- Why a Specialized Contractor Makes the Difference in Florida
- Classicmarcite’s Pool Tile and Renovation Services in Florida
- Useful Sources and Manufacturer Guides
What Does the Regrout Pool Tiles Workflow Look Like Step by Step?
A professional regrouting job follows a defined sequence. Skipping steps, especially grout removal and cure time, is what separates a repair that lasts from one that fails within a season.
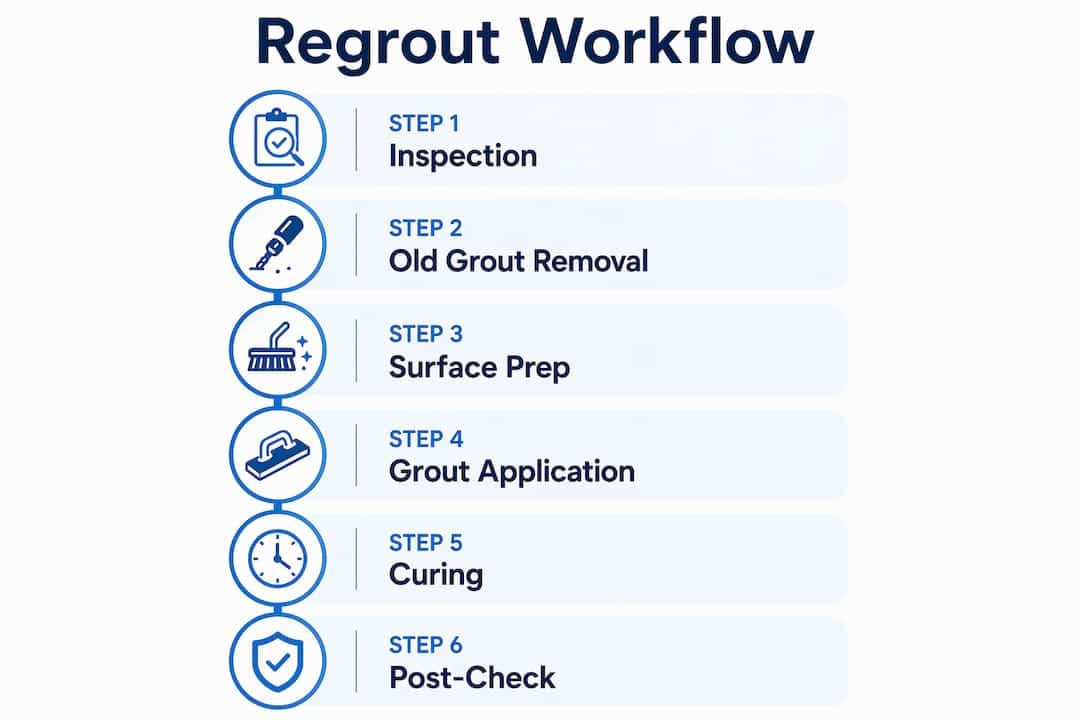
- On-site professional inspection. A qualified contractor performs a full tap test across walls, floor, and steps, reviews the pool’s repair history, checks equipment and plumbing, and runs the 48-hour water-loss test. This step determines whether regrouting is the correct scope or whether retiling and waterproofing are required.
- Drain and stage. Depending on scope, the pool is partially or fully drained. Equipment is protected, and adjacent finishes are masked off.
- Remove old grout. Full grout removal down to the tile edges is non-negotiable. Professionals use diamond-blade angle grinders or high-pressure power washers (1,000–2,000 psi for standard joints) with dustless attachments. Applying new grout over failing old grout is a shortcut that fails quickly.
- Joint cleaning and prep. Joints are vacuumed, rinsed, and inspected for organic growth and calcium deposits. Per LATICRETE’s re-grouting technical guide, joints must be clean and fully dry before epoxy grout is installed, though they may be damp for cementitious products.
- Apply new grout. Pool-grade grout is mixed and packed into joints with a grout float held at roughly 45 degrees. Tile faces are cleaned immediately with a damp sponge before the grout sets.
- Cure. Most pool-grade grouts require 24–72 hours before refilling. Refilling too early softens uncured grout and causes wash-out at the joints.
- Refill and verify. The pool is refilled slowly while water chemistry is rebalanced. The contractor performs a visual inspection, adhesion spot-checks, and water-level monitoring over the first 48 hours. Before-and-after photos document the completed work.
Pro Tip: Ask your contractor to photograph the empty joints before grout is applied. That documentation protects you if a warranty dispute arises later.
When Does Regrouting Alone Not Solve the Problem?
The most expensive mistake Florida pool owners make is treating regrouting as a universal fix when the real failure is in the waterproofing membrane or tile adhesive. Professional inspection is what separates those two diagnoses.
Watch for these red flags during your own assessment:
- Hollow tiles in multiple zones. Hollow sounds during the tap test mean the adhesive has failed. Regrouting over debonded tiles is purely cosmetic.
- Persistent water loss after a previous regrout. If the pool lost water before and the problem returned within 6–12 months of a regrout, the membrane had likely already failed before that work was done.
- Widespread tile movement or detachment. Tiles shifting on walls or steps indicate structural-level failure, not a surface grout issue.
- Structural cracks in the shell. Cracks that run through the concrete require repair before any surface work.
- Floor or step detachments. These almost always mean the waterproofing layer beneath has been compromised.
When red flags appear, stop the regrouting conversation and request a full scope assessment that includes flood testing. For Florida-specific guidance on what persistent water loss actually means structurally, the pool leak detection guide covers the diagnostic steps in detail.
Which Grout Type Is Right for Your Florida Pool?
Florida pools face a combination of high UV exposure, elevated water temperatures, aggressive chlorine and salt levels, and wide pH swings. Those conditions make material selection more consequential here than in most other climates.
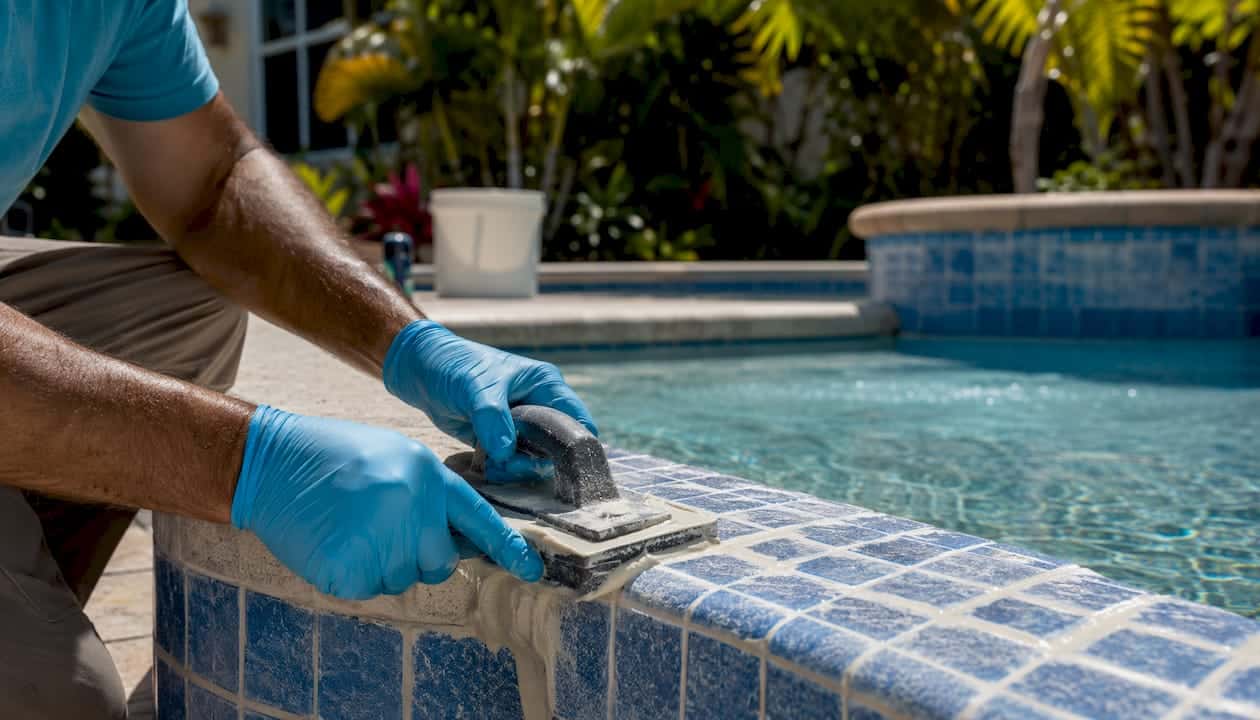
Epoxy grout is the stronger choice for Florida pools. Epoxy grouts offer better durability and chemical resistance than standard cement-based products when installed and cured per manufacturer specifications. Low porosity means fewer entry points for calcium scaling and algae. The trade-off is cost and a narrower installation window before the product begins to set.
Cementitious grout costs less and is easier to clean up during installation. It performs adequately in pools with well-maintained water chemistry, but it degrades faster under the chemical loads typical of Florida pools. LATICRETE’s technical data identifies improper water chemistry maintenance, filling the pool too soon, and poor surface preparation as the leading causes of cement grout failure in submerged installations.
Key considerations for Florida specifically:
- High calcium hardness and high pH accelerate scaling on cementitious grout joints. Maintaining balanced calcium hardness and pH levels helps protect grout.
- Salt chlorinator systems produce a consistently oxidizing environment. Epoxy grout handles this better over time.
- UV exposure at Florida’s latitude degrades sealers and surface coatings faster than in northern states. Epoxy’s lower porosity gives it an inherent advantage here.
Pro Tip: For grout material choices specific to Central Florida conditions, confirm with your contractor that the product they specify carries a manufacturer warranty for submerged pool applications.
If tiles need to be relaid as part of the scope, the adhesive and waterproofing layer beneath them matter as much as the grout. Any waterproofing membrane that is damaged during tile removal must be repaired before new tiles are set.
What Should You Expect for Timeline and Cost?
A standard residential regrout in Florida typically takes a few days from drain to refill, including cure time. Localized or partial jobs finish faster. Full retiling with waterproofing can take about one to two weeks.
| Phase | Typical Duration |
|---|---|
| Drain and staging | several hours |
| Grout removal and joint prep | up to a couple of days |
| Grout application | less than a day |
| Cure before refill | one to several days |
| Refill and water chemistry rebalance | about a day |
| Total (standard regrout) | several days |
Cost ranges vary by pool size, scope, and grout type. General ballparks for Florida:
- Localized spot repairs: Lower cost, shorter downtime, appropriate when only a few joints or a single zone has failed.
- Full residential regrout: Mid-range investment covering all tile joints across walls, floor, and steps.
- Retiling with waterproofing: Significantly higher cost and longer downtime, but the correct choice when the membrane has failed. Spending on regrout first and waterproofing second costs more in total than doing the right scope once.
Get at least two written quotes that specify grout type, removal method, and cure time. Vague quotes that omit those details are a warning sign.
How Do You Choose the Right Contractor?
The regrouting procedure itself is straightforward. What separates a durable result from a repeat repair is the contractor’s willingness to do the work correctly rather than quickly.
Verify these before signing anything:
- State contractor license and current liability insurance
- Local references with before-and-after photo documentation
- Documented experience with both regrouting and waterproofing scopes
- Clear written scope specifying full grout removal (not skim-over)
- Named grout product with manufacturer data sheet
- Stated cure time before refill
- Waterproofing inspection results included in the quote
- Workmanship warranty length and what it covers
Ask specifically: “Will you remove all existing grout mechanically, or apply new grout over the old?” A contractor who describes anything other than full removal is describing a shortcut.
Before scheduling any enclosure work that affects site access for your regrouting crew, a pool enclosure safety inspection can identify clearance or structural issues worth coordinating in advance.
How Do You Protect New Grout After the Pool Refills?
Water chemistry management after regrouting is as important as the installation itself. Poor chemistry undoes high-quality grout faster than mechanical wear alone.
Follow this testing schedule after refill:
- Days 1–3: Test pH, total alkalinity, and calcium hardness daily. New grout is most vulnerable in this window.
- Weeks 1–4: Test weekly and adjust as needed.
- Month 2 onward: Shift to a monthly routine check with quarterly professional testing.
Target ranges that protect grout integrity:
- pH: 7.4–7.6
- Total alkalinity: 80–120 ppm
- Calcium hardness: 200–400 ppm
- Free chlorine: Maintain moderate levels appropriate for pool sanitation.
Avoid these after regrouting:
- Acid washing or muriatic acid treatments near new grout for at least 30 days
- Shocking the pool within the first 72 hours of refill
- Allowing calcium hardness to climb above 400 ppm, which accelerates scaling on joints
For ongoing maintenance, keep chlorine levels stable rather than allowing large swings. Sudden pH drops from heavy bather loads or rain events are among the fastest ways to degrade cementitious grout. Schedule a professional inspection annually to catch early adhesive failures before they spread. Detailed maintenance guidance for Orlando-area pools is available in the Orlando pool tile grout guide.
Key Takeaways
A professional regrout workflow that starts with a tap test and 48-hour water-loss check, uses full grout removal, specifies epoxy grout for Florida conditions, and follows manufacturer cure times delivers results that last.
| Point | Details |
|---|---|
| Inspect before committing | Run the tap test and 48-hour water-loss check before scheduling any regrouting work. |
| Full removal is non-negotiable | Grout applied over failing existing grout fails quickly; full mechanical removal is the only correct method. |
| Choose epoxy for Florida pools | Epoxy grout resists pool chemicals, UV, and salt better than cementitious grout in Florida’s climate. |
| Respect cure times | Refilling before the 24–72 hour cure window causes wash-out and undermines watertight joints. |
| Classicmarcite for professional scope | Classicmarcite provides on-site inspection, written scope, and full regrouting and resurfacing services across Orlando and Jacksonville. |
Why a Specialized Contractor Makes the Difference in Florida
The failure pattern I see most often is straightforward: a pool owner notices crumbling grout, gets a quote for regrouting, and the work looks fine for six months. Then tiles start moving. A second contractor pulls the tiles and finds a membrane that failed years before the first regrout was ever done. The homeowner paid for regrouting twice and still needed waterproofing. The first inspection was the missing step.
Florida’s climate makes this worse than it would be elsewhere. The combination of UV intensity, salt exposure, and wide seasonal pH swings degrades both grout and adhesive faster than in cooler, drier states. A contractor who skips the tap test and water-loss check before recommending a scope is not cutting corners on paperwork. They are skipping the only diagnostic that tells you whether regrouting is even the right answer.
Documented warranties and flood testing matter for the same reason. A workmanship warranty with no verification step behind it is a piece of paper. Flood testing after waterproofing, and water-level monitoring after regrouting, are what give that warranty meaning. Ask for both in writing.
Classicmarcite’s Pool Tile and Renovation Services in Florida
Regrouting is a precision job, and the diagnostic work before it determines whether the repair lasts. Classic Marcite has resurfaced more than 100,000 pools across Florida since 1988, including residential, commercial, and resort properties. As the largest Pebble Tec® applicator in Central Florida, the team handles the full range of scopes: tile regrouting, retiling, waterproofing, deck repair, and complete pool resurfacing in Orlando and Jacksonville.

When you request a free estimate, ask for an on-site tap test across all tiled surfaces, a 48-hour water-loss assessment, and a written scope that clearly states whether the job is a regrout, a retile, or a full pool renovation. That written scope is what protects you from paying for the wrong repair. Contact Classicmarcite to schedule your professional inspection and get a detailed, no-obligation estimate.
Useful Sources and Manufacturer Guides
The following sources support the inspection protocols, material recommendations, and procedural steps covered in this article:
- Regrouting vs. Retiling: Which One Does Your Pool Really Need? — Covers the tap-test and 48-hour water-loss diagnostic, and explains when regrouting is insufficient.
- What Is Swimming Pool Regrouting and Why Is It Important? — Explains full grout removal requirements, cure times, and water chemistry impacts on grout longevity.
- LATICRETE TDS 186: Re-Grouting Swimming Pools, Fountains and Water Features — Manufacturer technical data sheet covering removal methods, joint preparation, grout selection, and cure specifications for submerged installations.
- Pool Tile Grout — Professional guidance on epoxy versus cementitious grout performance and durability for pool applications.
- Fix Pool Tiles: Complete Repair and Replacement Guide — Covers typical job durations and common DIY pitfalls that justify professional installation.