
Pool owners in Orlando and Jacksonville face a persistent challenge: damaged tiles caused by Florida’s hard water and temperature swings. Minor tile damage like loose tiles or small cracks can compromise your pool’s appearance and lead to bigger problems if ignored. The good news? You can tackle many of these repairs yourself with the right approach, materials, and understanding of when DIY makes sense versus calling professionals. This guide walks you through identifying tile damage, preparing for repair, executing the fix properly, and maintaining your pool to prevent future issues.
Table of Contents
- Key takeaways
- Understanding pool tile damage causes in Orlando and Jacksonville
- Preparing for your DIY pool tile repair
- Step-by-step pool tile repair process
- Verification and ongoing pool tile maintenance
- Professional pool resurfacing and renovation services in Florida
- Frequently asked questions
Key Takeaways
| Point | Details |
|---|---|
| Hard water damage | Hard water in central Florida causes calcium scale that gradually weakens tile adhesion and leads to failures. |
| DIY epoxy repair | Minor tile damage can be repaired with underwater rated epoxy, thorough surface prep, and full adhesive coverage. |
| Inspect for structural issues | Weeds through gaps or concrete chunks signal bond beam failure or structural movement and require professional assessment. |
| Maintain pool chemistry | After repairs, monitor pH, alkalinity, and calcium hardness weekly to prevent reoccurrence and protect tile adhesion. |
Understanding pool tile damage causes in Orlando and Jacksonville
Central Florida’s unique water conditions create specific challenges for pool tiles. The Floridan Aquifer supplies hard water throughout the region, leading to calcium scale buildup that gradually weakens the bond between tiles and pool surfaces. This mineral-rich water deposits calcium carbonate on tiles, creating a barrier that prevents proper adhesion over time.
Thermal cycling compounds the problem. Florida’s temperature swings cause pool surfaces to expand and contract repeatedly, stressing tile adhesive. When combined with calcium scaling, this thermal movement accelerates tile failure, causing the characteristic popping or loosening you might notice along waterlines or step edges.
Recognizing when damage exceeds DIY capabilities is critical. Weeds growing through gaps or tiles with concrete chunks indicate bond beam failure or structural movement. These symptoms signal that the underlying pool structure has shifted or deteriorated, making surface tile repair a temporary Band-Aid that masks deeper problems requiring professional assessment.
You should also watch for crack propagation. If cracks spread across multiple tiles or extend into the pool shell itself, the issue likely stems from structural settling rather than simple adhesive failure. Understanding these distinctions helps you make informed decisions about whether to proceed with DIY repair or contact specialists.
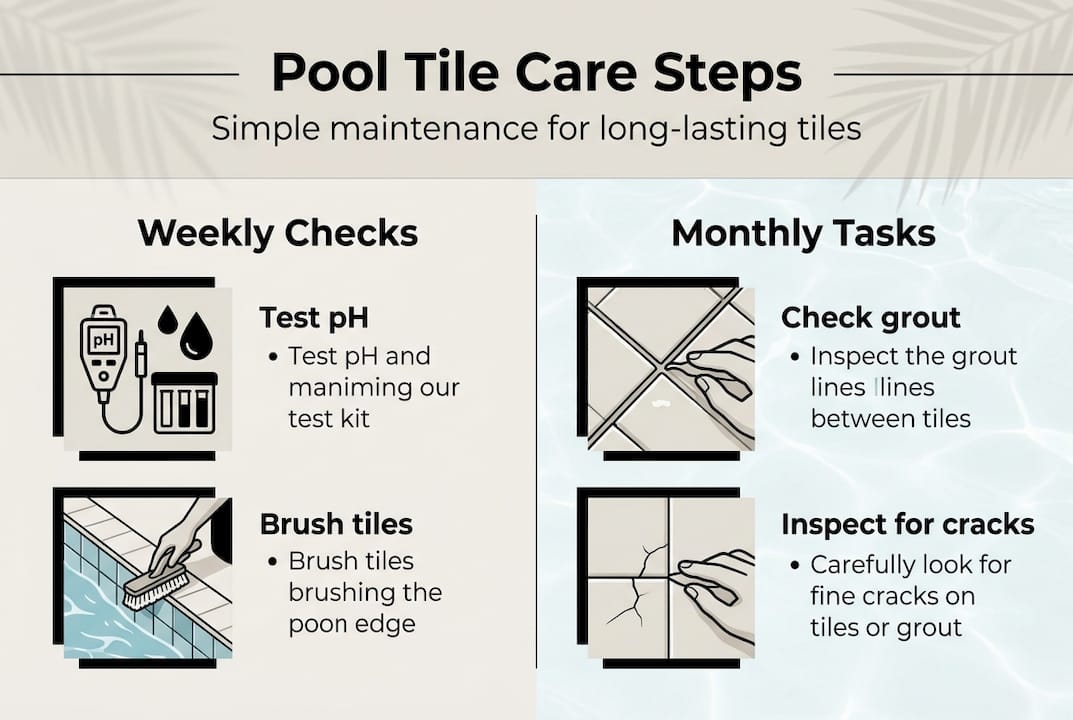
Maintaining balanced water chemistry after repair prevents reoccurrence. Test pH, alkalinity, and calcium hardness weekly. Keep pH between 7.2 and 7.6, total alkalinity between 80 and 120 ppm, and calcium hardness between 200 and 400 ppm. These ranges minimize scaling while protecting tile adhesion, extending the life of both original and repaired tiles. Check out common pool repair examples in Florida to see how water chemistry impacts long-term pool integrity.
Preparing for your DIY pool tile repair
Successful tile repair starts with proper preparation and the right materials. Lower your pool’s water level several inches below the damaged tiles using your pool pump or a submersible pump. This exposes the work area and prevents water from interfering with adhesive curing. Mark the target water level with tape before draining to avoid over-draining.
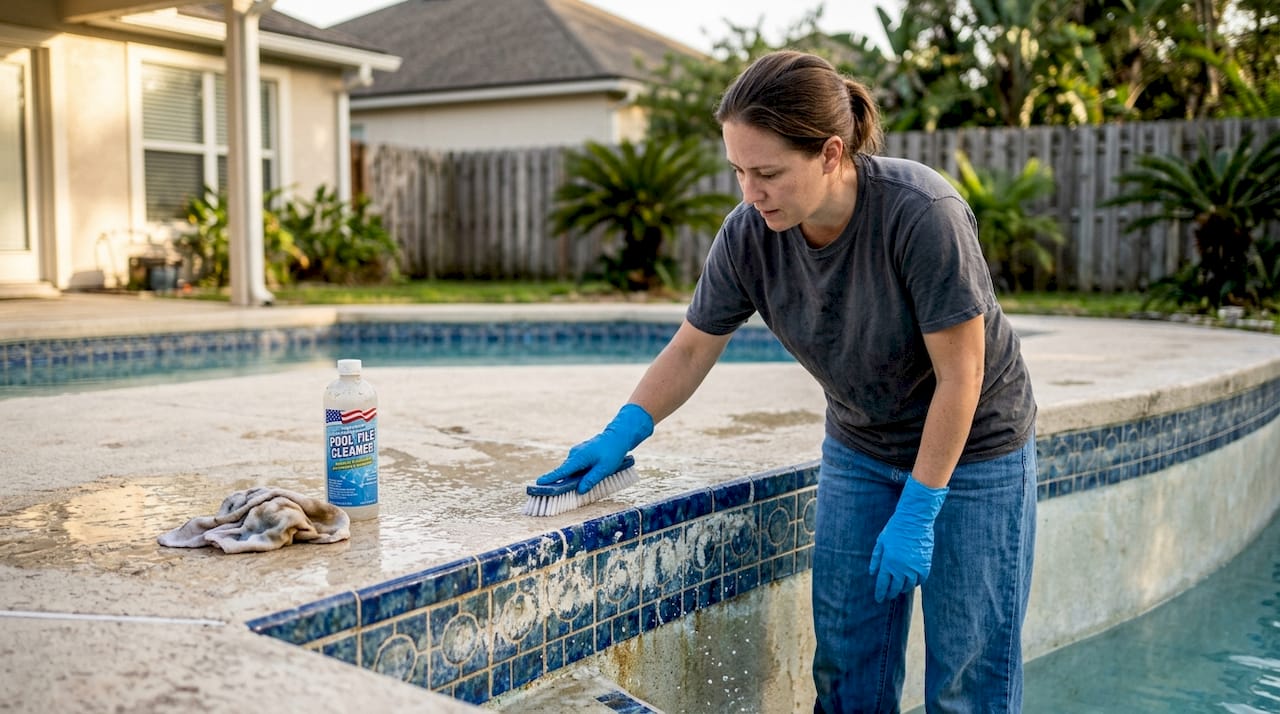
Cleaning the repair area thoroughly determines whether your fix lasts months or years. Remove all calcium scale, algae, and loose debris using a wire brush, scraper, or diluted muriatic acid solution. For stubborn calcium deposits, apply a 10:1 water-to-acid mixture, let it sit for 60 seconds, then scrub and rinse completely. The tile back and pool surface must be completely clean and dry for proper adhesion.
Select underwater-rated epoxy adhesive specifically formulated for pool environments. Standard construction adhesives break down when submerged, leading to rapid failure. Pool epoxy resists water, chemicals, and UV exposure. Popular brands include Aqua-Bond, E-6000 Pool & Spa, and Marine Epoxy. Purchase 20% more than you think you need to account for waste and ensure full coverage.
Essential materials and tools:
- Underwater-rated pool epoxy adhesive
- Wire brush or scraper for surface prep
- Muriatic acid solution (10:1 dilution) for calcium removal
- Clean rags and buckets for cleaning
- Mixing sticks and disposable containers for epoxy
- Rubber gloves, safety glasses, and respirator mask
- Painter’s tape for marking and protecting adjacent areas
- Sponges for final cleanup
Safety gear protects you during preparation and application. Wear chemical-resistant gloves when handling muriatic acid or epoxy. Safety glasses prevent splashes from reaching your eyes. If working in enclosed areas or with strong-smelling products, use a respirator mask with organic vapor cartridges. Ensure adequate ventilation throughout the process.
Pro Tip: Mix a small test batch of epoxy first to familiarize yourself with working time and consistency. Most pool epoxies offer 5 to 15 minutes of working time before they begin setting. Practice applying even pressure and achieving full coverage on a spare tile before tackling your actual repair.
Allow full cure time before refilling and using your pool. Most underwater epoxies require 24 to 48 hours to reach full strength, though some fast-cure formulas set in 12 hours. Check manufacturer specifications and add an extra 24 hours if temperatures fall below 70°F. Rushing this step causes premature failure. For detailed guidance specific to Florida conditions, review this Florida DIY pool tile repair guide.
| Material Category | Specific Items | Estimated Cost |
|---|---|---|
| Adhesive | Underwater pool epoxy (8 oz tube) | $15-$30 |
| Cleaning Supplies | Wire brush, scraper, muriatic acid, rags | $20-$35 |
| Safety Equipment | Gloves, safety glasses, respirator | $25-$45 |
| Application Tools | Mixing sticks, containers, tape, sponges | $10-$20 |
| Total Investment | $70-$130 |
Step-by-step pool tile repair process
Follow these steps carefully to achieve professional-quality results with your DIY repair. Each step builds on the previous one, so resist the temptation to skip or rush through any stage.
Step 1: Lower water and clean surfaces
Drain your pool until the water level sits at least 4 inches below the damaged tiles. Clean the tile backs and pool surface aggressively, removing every trace of old adhesive, calcium scale, algae, and debris. Use a wire brush for textured surfaces and a scraper for smooth areas. Rinse thoroughly and let everything dry completely, which may take 2 to 4 hours in humid Florida conditions.
Step 2: Mix underwater epoxy adhesive
Read manufacturer instructions completely before opening containers. Most two-part epoxies require equal amounts of resin and hardener mixed thoroughly for 2 to 3 minutes. Mix only what you can apply within the working time window, typically 5 to 15 minutes. Scrape the mixing container sides and bottom to ensure complete blending.
Step 3: Apply epoxy with full coverage
Spread epoxy evenly across the entire tile back, not just the edges or center. Achieving 95% mortar contact prevents voids that trap water and cause future delamination. Use a notched trowel or putty knife to create consistent thickness. Back-butter the pool surface as well, applying a thin layer to both mating surfaces for maximum bond strength.
Step 4: Press tile firmly into position
Align the tile carefully, then press it firmly against the pool surface using steady, even pressure. Hold for 30 to 60 seconds to allow initial grab. Twist slightly back and forth to eliminate air pockets and ensure the epoxy spreads completely. Check that the tile sits flush with adjacent tiles and that grout lines align properly.
Step 5: Seal edges if recommended
Some epoxy systems benefit from edge sealing to prevent water intrusion during the cure period. If your product instructions recommend this, apply a thin bead of epoxy along the tile perimeter using a small brush or your gloved finger. Smooth it to create a water-resistant barrier. Remove excess epoxy immediately with a damp sponge before it hardens.
Step 6: Allow complete cure time
Resist using your pool for at least 24 to 48 hours, even if the epoxy feels hard after a few hours. Full chemical cure takes time, and premature water exposure weakens the bond significantly. Mark your calendar and wait the full recommended period plus an additional safety margin if possible.
When to DIY versus hire professionals:
- DIY appropriate: Minor cracks or chips affecting less than 20% to 25% of tile area, loose individual tiles with intact backing, cosmetic damage without structural concerns
- Professional required: Damage exceeding 25% to 40% of tile area, cracks propagating into pool shell, evidence of bond beam failure, widespread tile movement, or water leaks behind tiles
Pro Tip: Avoid the most common DIY mistake that causes repeated failures. Poor initial thinset coverage creates voids where water infiltrates and freezes during temperature drops, popping tiles off again. Always back-butter both surfaces and eliminate air pockets by pressing firmly and twisting slightly during installation. This single technique dramatically improves repair longevity.
Understanding the importance of pool tile repair helps you prioritize this maintenance task. Damaged tiles allow water to penetrate behind the tile line, potentially damaging the pool shell, bond beam, and surrounding deck. Early repair prevents these cascading problems and protects your investment.
Verification and ongoing pool tile maintenance
After your repair cures completely, verify its success through careful inspection. Tap repaired tiles gently with a rubber mallet or your knuckles, listening for hollow sounds that indicate incomplete adhesion. Solid, dense sounds confirm good contact, while hollow sounds suggest voids beneath the tile. Check that tiles sit flush with neighbors and that grout lines remain consistent.
Watch for warning signs during the first few months after repair. Water seeping through grout lines, tile movement when pressed, or growing gaps around repaired areas indicate the fix has failed or that underlying structural problems persist. Forums and experts note that DIY repairs often mask root causes like inadequate original thinset coverage, leading to repeated failures if the fundamental issue remains unaddressed.
Maintain balanced water chemistry to prevent new calcium scaling. Test water weekly using reliable test strips or a liquid test kit. Adjust pH using murionic acid to lower or soda ash to raise. Control alkalinity with sodium bicarbonate or muriatic acid. Manage calcium hardness by diluting with fresh water if too high or adding calcium chloride if too low. Consistent chemistry extends tile life dramatically.
Regular inspection checklist:
- Tap tiles monthly to detect hollow sounds indicating loose adhesion
- Check grout lines for cracks, gaps, or water seepage
- Look for new calcium scale buildup requiring cleaning
- Inspect for tile movement or shifting along waterlines
- Monitor for crack propagation across multiple tiles
- Examine bond beam area for concrete deterioration or gaps
Pro Tip: Schedule professional pool maintenance annually to catch early tile issues before they become expensive repairs. A trained eye spots subtle signs of adhesive failure, structural movement, or water chemistry imbalances that homeowners often miss. This preventive approach saves thousands compared to emergency repairs or full resurfacing.
Implementing proper Florida pool maintenance tips reduces tile stress and extends repair longevity. Brush tiles weekly to prevent algae and scale buildup. Maintain proper water levels to minimize exposure cycling. Run your pump adequately to ensure even chemical distribution. These simple habits protect both original and repaired tiles.
| Aspect | DIY Repair | Professional Repair |
|---|---|---|
| Suitable Scope | Minor damage under 20-25% of tile area | Extensive damage, structural issues, full retiling |
| Durability | 1-3 years if done correctly | 5-10+ years with proper materials and techniques |
| Cost | $70-$130 in materials | $500-$3,000+ depending on extent |
| Risk | May mask structural problems, potential warranty voidance | Identifies underlying issues, maintains warranties |
| Time Investment | 4-8 hours plus cure time | Minimal homeowner time, 1-3 days completion |
Professional pool resurfacing and renovation services in Florida
When tile damage exceeds DIY scope or you want guaranteed long-term results, professional pool resurfacing offers comprehensive solutions. Expert contractors assess not just surface tile damage but underlying structural integrity, identifying bond beam deterioration, shell cracks, or plumbing issues that DIY repairs cannot address. Professional resurfacing transforms your pool with durable finishes like Pebble Tec that resist Florida’s harsh water conditions while providing stunning aesthetics.

Local services in Winter Park, Maitland, and Orlando provide specialized expertise for Central Florida’s unique pool challenges. These professionals understand how the region’s hard water, temperature fluctuations, and high UV exposure impact pool surfaces. They use commercial-grade materials and proven techniques that ensure repairs last decades, not years. Professional work also protects manufacturer warranties that DIY repairs might void, preserving your investment’s long-term value.
Whether you need pool resurfacing in Winter Park, pool resurfacing in Maitland, or comprehensive pool repair services in Orlando, experienced contractors deliver solutions tailored to your pool’s specific needs. They handle everything from minor tile replacement to complete surface renovation, ensuring your pool remains beautiful and functional for years to come.
Frequently asked questions
How long does a DIY pool tile repair take to cure?
Allow 24 to 48 hours of curing time before refilling your pool and resuming swimming. Most underwater epoxy adhesives reach handling strength within 12 hours but require full cure time to achieve maximum bond strength and water resistance. Temperature affects cure speed, with cooler weather extending the required wait time. Adding an extra 24 hours beyond manufacturer recommendations provides a safety margin that significantly improves repair durability.
What signs indicate that tile damage is too severe for DIY repair?
Damage affecting more than 20% to 25% of your tile area typically requires professional replacement rather than DIY patching. Warning signs include gaps wide enough for weeds to grow through, tiles with concrete chunks attached to their backs, cracks that propagate across multiple tiles or into the pool shell, and evidence of structural movement like shifting grout lines. These symptoms indicate bond beam failure or pool shell deterioration that surface repairs cannot fix. Attempting DIY in these situations wastes time and money while allowing underlying damage to worsen.
Can DIY pool tile repair void my pool warranty?
Improper DIY repairs may void your pool warranty if they mask structural issues or use incompatible materials that cause additional damage. Most pool warranties require professional assessment and repair of structural problems to maintain coverage. Before attempting DIY tile repair, review your warranty terms carefully and document the damage with photos. If your pool is relatively new or shows signs of structural issues, consult your warranty provider first. Consider professional repairs to maintain warranty protection, especially for pools under five years old. Learn about common pool renovation mistakes that can compromise warranties and long-term pool integrity.
How often should I inspect my pool tiles for damage?
Inspect your pool tiles monthly during swimming season and quarterly during cooler months. Walk the pool perimeter tapping tiles with your knuckles to detect hollow sounds indicating loose adhesion. Check waterline tiles especially closely, as they experience the most stress from water level fluctuations and chemical exposure. Look for new cracks, scale buildup, or grout deterioration. Early detection allows simple repairs before minor issues escalate into expensive structural problems requiring professional intervention.
