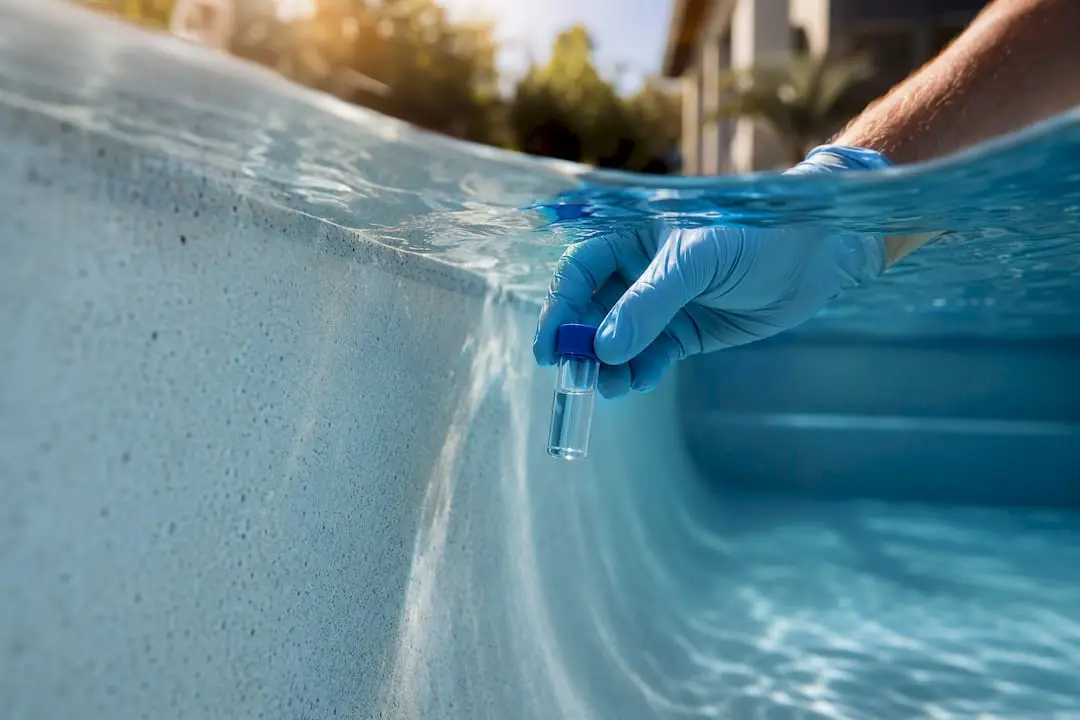
Pool plaster etching is the physical loss of the cementitious surface caused by aggressive, imbalanced water. The single most important thing you can do to prevent it is keep your Langelier Saturation Index between 0.0 and +0.3, which means testing pH, carbonate alkalinity, and calcium hardness on a regular schedule and correcting them the moment they drift low.
TL;DR:
- Keeping the Langelier Saturation Index between 0.0 and +0.3 is crucial, requiring regular testing of pH, alkalinity, and calcium hardness, especially during the first month.
- Signs of etching include rough surfaces, sandy feeling steps, uneven coloring, pit clusters near tiles, and patches that appear chalky or faded.
- Low pH, low carbonate alkalinity, soft water with low calcium, and high cyanuric acid levels increase the risk of aggressive water causing plaster dissolution.
- Proper startup practices, including frequent testing, gradual chemical adjustments, and detailed record-keeping, significantly extend plaster lifespan.
- Major issues like widespread pitting or exposed gunite require professional repair, while mild roughness responds to chemistry correction and routine maintenance.
Table of Contents
- What Pool Plaster Etching Looks Like
- Why Etching Happens: The Water Chemistry Behind It
- Preventing Etching: Startup and Ongoing Maintenance
- When to Manage It Yourself and When to Call a Professional
- What Contractors Actually See on Startup Day
- Get an Expert Evaluation of Your Etched Pool Surface
- Sources
What Pool Plaster Etching Looks Like
Etching rarely shows up as one obvious problem. It usually starts small and gets dismissed as normal wear until the texture changes underfoot.
Watch for these signs:
- Chalky, faded patches where the plaster looks lighter or washed out compared to surrounding areas
- Small pits clustered near pebbles, aggregate, or tile lines, since these interfacial zones dissolve first
- A gritty or sandy feel on steps, benches, and the floor instead of a smooth finish
- Uneven coloring or blotchy patterns that weren’t there when the pool was new
- Etched pockets that trap dirt and algae, making stains look worse than they actually are
If you run a hand across the surface and feel roughness that wasn’t there last season, that’s a stronger signal than color alone. Scale deposits feel bumpy and raised; etching feels scooped out and rough, almost like fine sandpaper.
Why Etching Happens: The Water Chemistry Behind It
Etching is a chemical dissolution problem, not a cosmetic one. Aggressive water pulls calcium hydroxide out of the cement paste, and it attacks fastest at the Interfacial Transition Zones around aggregates, tile, and light niches because that’s where the material is most soluble. That’s why etching shows up as scattered spots and pits rather than even, uniform wear.
Four numbers drive whether your water is aggressive or balanced:
- pH: below 7.2 pushes water toward acidic and corrosive
- Carbonate alkalinity: low readings remove the buffer that keeps pH stable
- Calcium hardness: soft water with too little dissolved calcium actively pulls calcium out of the plaster
- Cyanuric acid (CYA): elevated levels distort your alkalinity readings and can worsen etching risk
The Langelier Saturation Index target for new plaster is 0.0 to +0.3, according to the National Plasterers Council’s Technical Bulletin 3. Fall below that range and the water starts dissolving the finish instead of protecting it.
The most common mistake homeowners make isn’t neglect. It’s confusing total alkalinity with carbonate (adjusted) alkalinity. CYA inflates a standard alkalinity test, so the LSI formula requires a corrected value, roughly total alkalinity minus one-third of your CYA reading. Skip that correction and your LSI calculation can look fine while the pool is quietly etching. Salt also skews the numbers, which is why manufacturers recommend tracking water balance carefully rather than relying on a single strip test. Other frequent errors: dumping acid in one large dose instead of small, measured corrections, trusting only visual test strips for a new pool, and never writing down what was adjusted during startup. Every one of those mistakes makes it harder to trace an etching problem back to its cause months later.
Understanding why water balance matters for your finish is the foundation for everything else in this article.
Preventing Etching: Startup and Ongoing Maintenance
The first month after plastering determines a lot of what happens over the following decade. New plaster is chemically active while it cures, and it’s far more vulnerable to aggressive water in that window than it will be once it stabilizes.
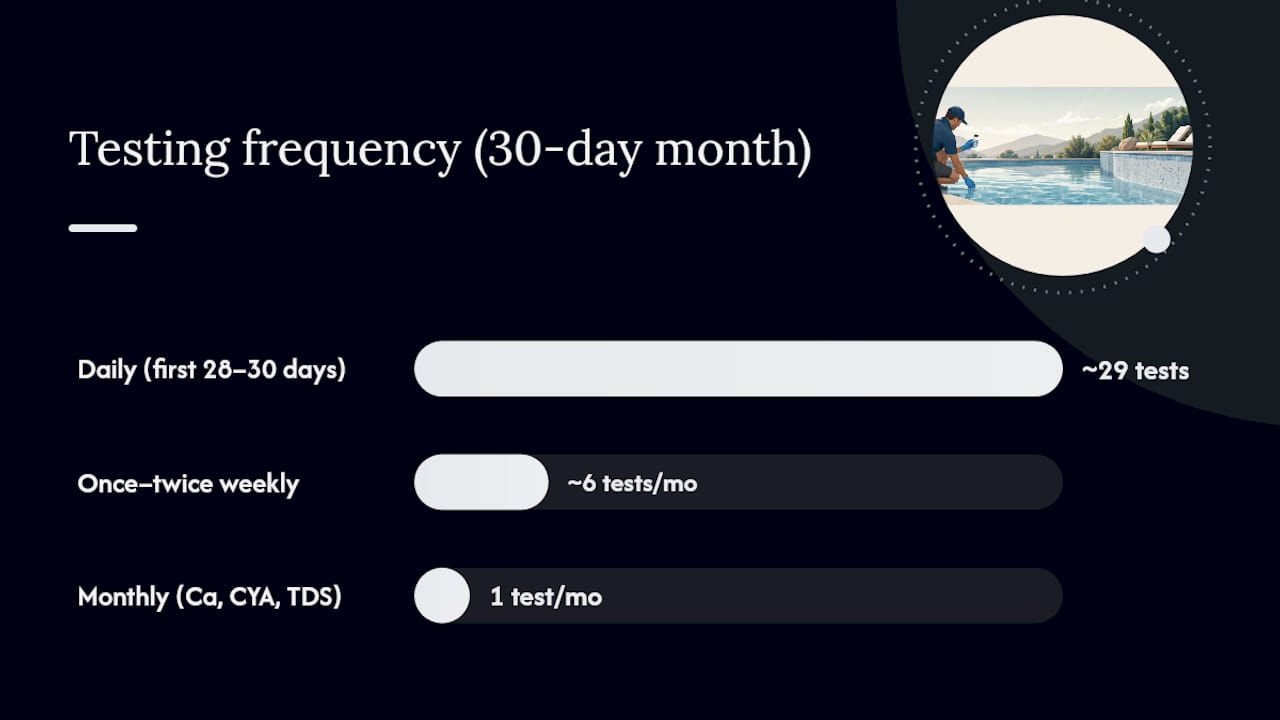
- Test and brush daily for the first 28 to 30 days. The National Plasterers Council’s startup guidance calls this window critical, and frequent brushing keeps calcium byproducts from bonding to the surface unevenly.
- Raise calcium hardness gradually. Large, fast additions cause cloudy water and uneven distribution rather than steady protection.
- Add cyanuric acid carefully, aiming for roughly 30 to 50 ppm, and never pour concentrated product where it can contact the finish directly.
- Settle into a testing rhythm. Check pH, alkalinity, and free chlorine once or twice a week; test calcium hardness, CYA, and total dissolved solids monthly, or more often during that first month.
- Pre-dilute acid before adding it, pour chemicals into water rather than water into chemicals, and brush the pool after any correction to disperse it evenly.
Pro Tip: Keep a simple log, even a notes app entry, of every test result and every chemical you add. If etching shows up a year from now, that record is the only way to trace back what went wrong, and it’s often what a contractor will ask for during a warranty review.
When your LSI reads negative, don’t panic and dump acid or calcium blindly. Check which input is actually low, pH, alkalinity, or hardness, and correct that specific value. Overcorrecting one factor while ignoring the others is how homeowners swing from aggressive to scale-forming water in the same week.
When to Manage It Yourself and When to Call a Professional
Mild, localized etching, a few faded patches, slight roughness in one corner, responds well to disciplined chemistry and consistent brushing. Correcting your LSI and holding it steady can slow or halt further material loss. It cannot undo damage that has already occurred; etching is a loss of material, not a deposit you can dissolve away.
Deeper problems need hands-on repair:
- Widespread pitting or exposed aggregate across large sections signals the surface has thinned past a cosmetic fix
- Rough texture that’s uncomfortable to walk or swim on usually means sanding or polishing alone won’t hold up long-term
- Structural exposure, where you can see or feel the gunite or shell beneath the finish, requires patching at minimum
Repair options scale with severity. Wet or dry sanding smooths minor roughness without a full redo. Spot patching chip-and-replaster techniques address isolated pitted areas. Full replastering, or switching to a pebble and aggregate finish, resets the surface entirely and tends to outlast a patched repair, though it costs more upfront. Before any warranty conversation, a contractor will typically ask for your startup log, water test history, and proof of ongoing maintenance, which is exactly why the role of water chemistry in resurfacing documentation matters so much.
What Contractors Actually See on Startup Day
Improper fill-water testing is the mistake we see most often. Someone fills a new pool from a hose without checking calcium or alkalinity first, and the plaster starts leaching within weeks. Acid overdosing and delayed brushing come next. On-site, contractors assess severity by feel and by pit depth, not just color. A documented startup with test records almost always means a longer plaster life and a cleaner warranty claim if problems appear later.
— Results
Get an Expert Evaluation of Your Etched Pool Surface
If your pool already shows gritty texture, visible pitting, or faded patches that chemistry alone won’t fix, a professional inspection tells you exactly where you stand instead of leaving you guessing between sanding, patching, or replastering. Classic Marcite has resurfaced more than 100,000 pools across Orlando and Jacksonville since 1988, and as the largest Pebble Tec® applicator in Central Florida, the team has seen every stage of plaster etching, from a few rough spots to full aggregate exposure.
Request an inspection if you’re seeing pitting near tile lines, rough steps, or discoloration that’s worsened over a season. Bring whatever test records or startup notes you have. During an estimate, Classic Marcite evaluates surface depth and severity on-site and walks you through realistic options, from targeted patching to a full pool resurfacing with Pebble Tec® or fresh marcite. Schedule your free estimate to find out which fix actually fits your pool’s condition, not just its age.
Sources
- Technical Bulletin Number 3 – Swimming Pool Interior Finishes & Chemical Etching Deterioration
- Swimming pool interior finishes & etching deterioration — NPC
- Water balance, scaling, & etching: protecting pool plaster (CL Industries)
