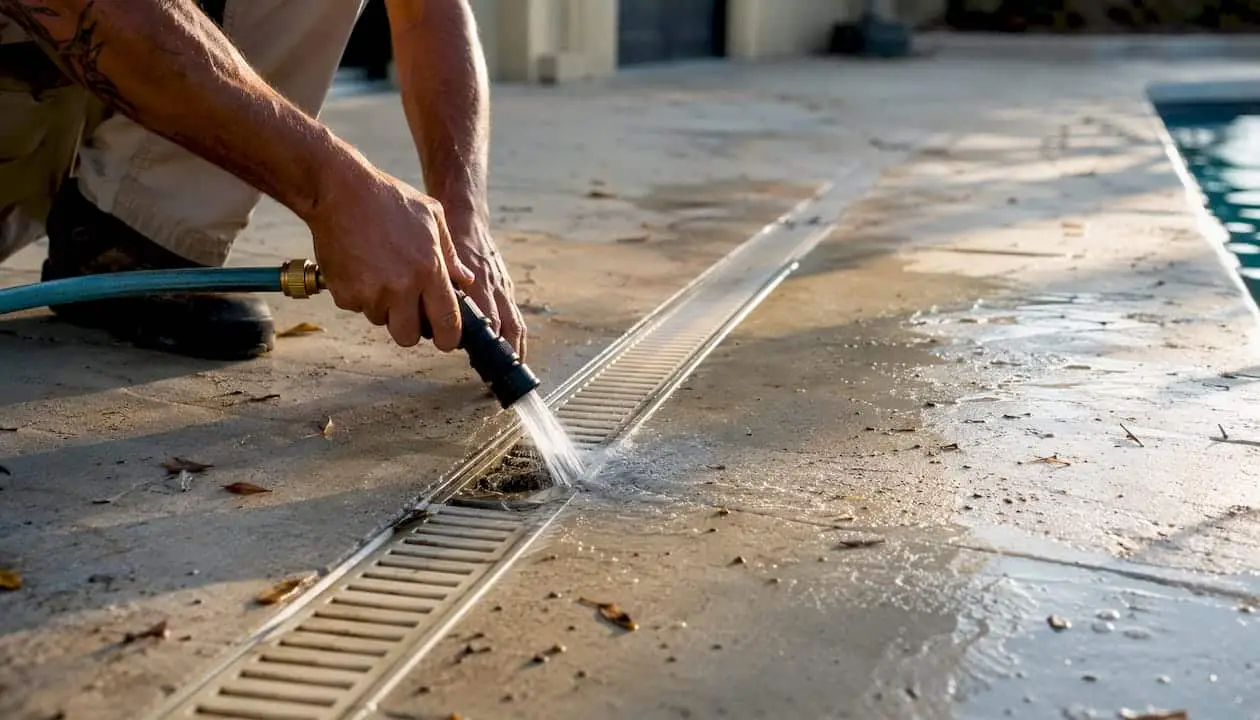
If water pools on your pool deck, the cause is almost always one of three things: not enough slope, a clogged deck drain, or yard grading that’s pushing stormwater onto the deck instead of away from it. You can rule two of those out in the next ten minutes.
Start here, in order:
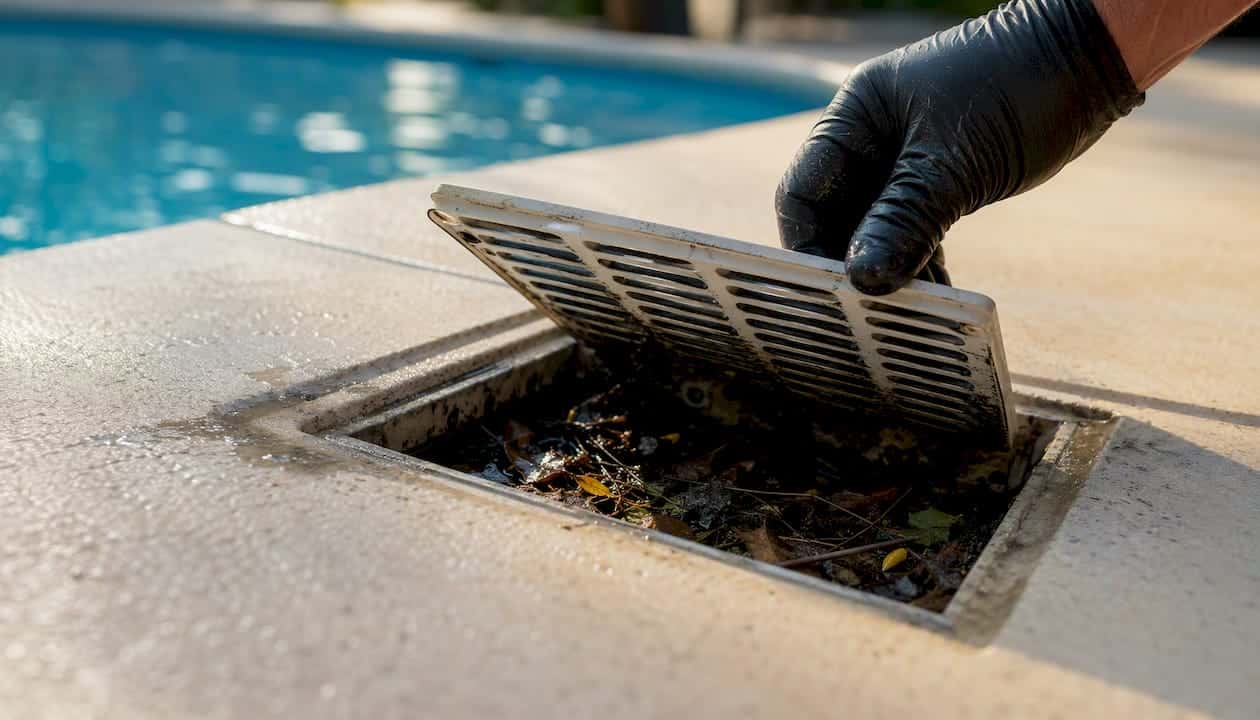
- Clear every grate you can see. Leaves, sand, and grass clippings block channel and point drains constantly, and a clogged grate is the single easiest fix on this list.
- Move furniture and planters off the ponded area so you can see the true low spot once the water drains or evaporates.
- Run the hose test. Let a hose run near the highest point of the deck and watch where the water actually travels. If it stalls instead of flowing toward a drain, you’ve found your slope problem.
- Sweep debris away from the deck edge and any visible drain outlets, including where pipes daylight into a yard or swale.
A few things matter before you touch anything else. Standing water on a wet deck is a slip hazard, and if pool lighting, pumps, or outlets sit anywhere near the pooling, treat that area as an electrical risk until a licensed electrician or your pool contractor confirms it’s safe. Once you’ve done the quick checks above, head to the diagnostic checklist below to nail down exactly what’s happening before you spend money on a fix.
Key Takeaways
Most pool deck drainage problems trace back to insufficient slope, a clogged drain, or upstream grading, and a hose test plus a level check identifies which one you’re dealing with in under 20 minutes.
| Point | Details |
|---|---|
| Diagnose before you spend | Run the hose test and check slope with a level before assuming you need a costly repair. |
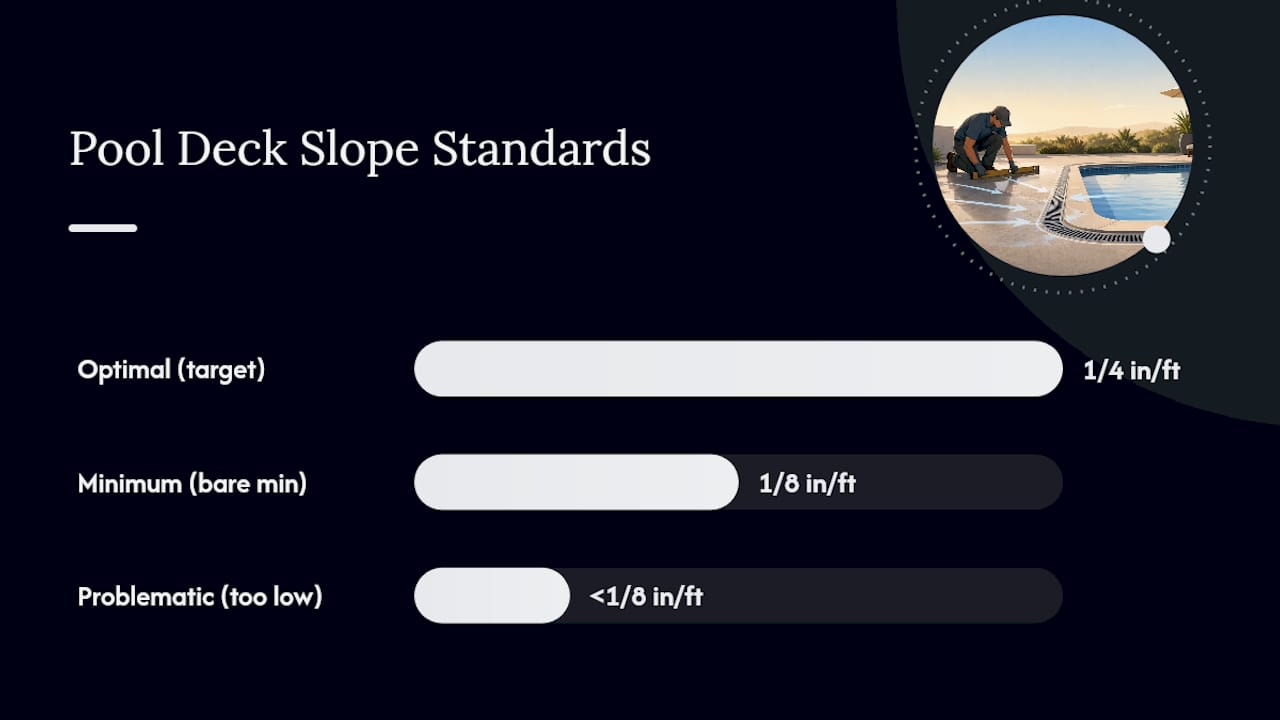
| Slope target matters | Aim for roughly 1/4 inch per foot of slope away from the pool, with 1/8 inch as the bare minimum. |
| Clean drains first | Most pooling clears up once grates and channels are properly flushed and rodded out. |
| Know your discharge point | Deck water must reach an approved storm system, swale, or dry well, never a neighbor’s yard or sanitary sewer. |
| Call a pro for structural signs | Repeated pooling after cleaning, cracked slabs, or reversed slope call for a level survey and camera inspection, and Classic Marcite handles regrading and resurfacing together when patch repairs stop holding. |
Table of Contents
- Diagnosing Pool Deck Water Drainage Problems Step By Step
- Common Causes of Pool Deck Drainage Problems
- DIY Fixes You Can Try Before Calling a Pro
- How to Clean Channel, Slot, and Point Drains
- Where Should Pool Deck Drains Actually Discharge?
- When to Call a Pool Deck Drainage Professional
- Preventive Maintenance for Pool Deck Drains
- Get a Professional Assessment for Chronic Pool Deck Drainage
- Sources
Diagnosing Pool Deck Water Drainage Problems Step By Step
Confirming the actual cause takes about 20 minutes and a handful of tools you likely already own. Skipping this step is how homeowners end up paying to fix the wrong problem.
Tools you’ll need:
- Garden hose
- 4-foot level or a straightedge (a smartphone level app works in a pinch)
- Chalk or a paint marker
- Flathead screwdriver
- Flashlight
Safety checklist before you start:
- Never run water tests near an energized pool light or open electrical panel.
- Wear shoes with grip. Wet decking, especially textured concrete or pavers with algae film, gets slick fast.
- If you smell sewage or see standing water with an odor, stop and call a professional rather than continuing the DIY inspection.
Here’s the actual diagnostic sequence:
- Inspect right after a rain event. Note exactly where water sits, how deep it pools, and how long it takes to disappear. A puddle that clears in 30 minutes is a different problem than one that sits for two days.
- Trace the flow path. Follow the water from the highest point of the deck to wherever it stops moving. That stop point is either a clog or a low spot.
- Run the hose test at multiple points. Simulate rainfall by running a hose slowly across different deck sections and watching where the water travels or stalls. Do this at the deck’s high point, near coping joints, and near any drain.
- Check slope with your level. Set the level or straightedge across the suspect area. Industry and code guidance for exterior flatwork generally calls for a deck slope near 1/4 inch per foot sloping away from the pool and adjacent structures, with 1/8 inch per foot sometimes cited as the bare minimum for water to move at all.
- Mark suspected low spots with chalk, then re-check with the level from multiple angles. Small slope reversals, even a quarter inch over several feet, are often invisible to the naked eye but obvious once you measure.
- Inspect visible drain components. Remove grates with the screwdriver and shine the flashlight down the drain body to check for standing water, sediment buildup, or a visibly cracked drain box.
Pro Tip: Take spot elevation readings every two to three feet across a large ponding area and jot the numbers down. A single low reading in an otherwise consistent slope points to isolated settlement, not a design flaw, which changes your entire repair approach.
Common Causes of Pool Deck Drainage Problems
Once you know where the water sits and how it behaves, match the symptom to the likely cause.
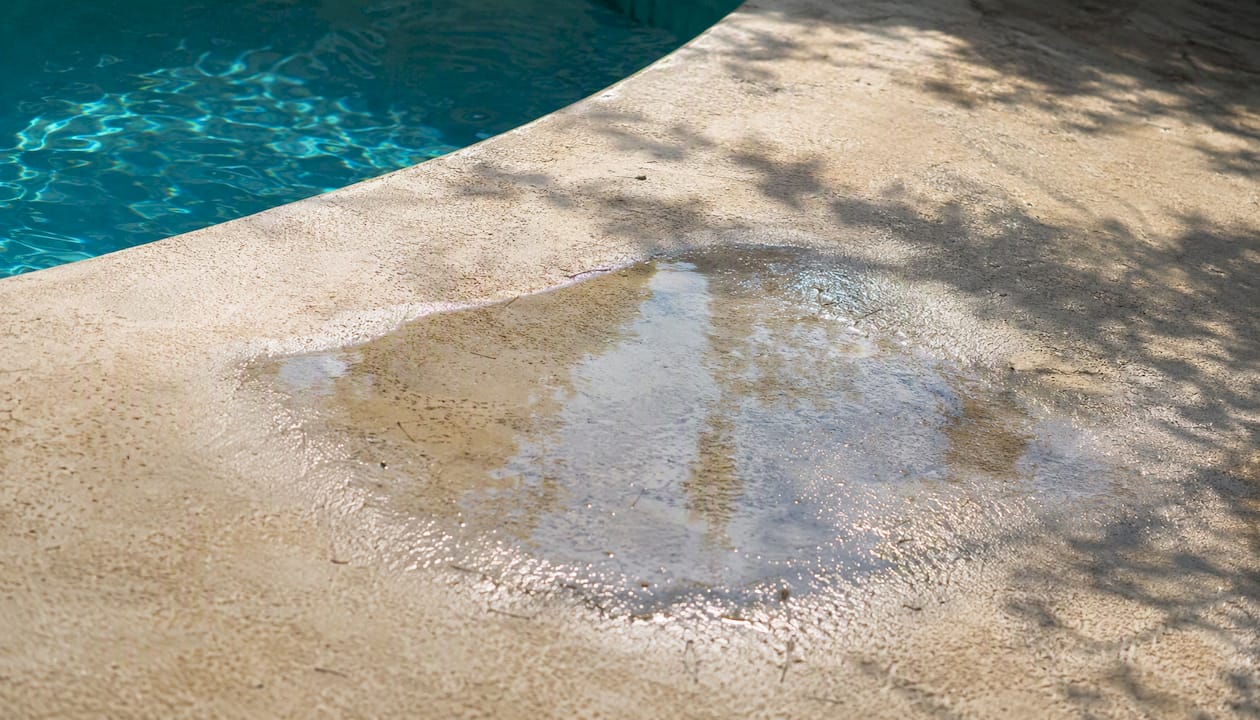
- Inadequate original slope. Symptom: broad, shallow ponding across large sections of deck, usually worst near the pool edge, present even on a deck with no visible cracks.
- Clogged channel or point drains. Symptom: water pools directly at or just upstream of a drain grate, and clearing debris only fixes it temporarily.
- Yard grading directing stormwater onto the deck. Symptom: pooling that gets dramatically worse during heavy rain and seems to originate from beyond the deck’s edge, not from the pool area itself.
- Clogged or disconnected discharge pipes and drywells. Symptom: drains that clear fine at the grate but water still backs up. This means the obstruction is downstream, often invisible from the surface.
- Deck settlement or heaving. Symptom: a visible dip, a cracked or offset slab, or a spot where two adjacent pavers no longer sit level with each other.
- Failed coping or expansion joints. Symptom: water disappearing into a joint near the pool edge rather than draining across the surface, sometimes paired with staining or a hollow sound when you tap the deck nearby.
A few of these are not homeowner-fixable and need professional evaluation before you do anything else: structural cracking that runs through a slab (not just surface crazing), settlement affecting a large section of deck, or a slope that seems to reverse no matter how many times you regrade or patch it. Puddling near the pool edge is not just cosmetic, either. Runoff that carries dirt and organic debris back into the water raises chemical demand and algae risk, so a drainage problem you ignore for a season can turn into a water-quality problem the next.
DIY Fixes You Can Try Before Calling a Pro
Most of what fixes ponding today is cheap, fast, and doesn’t require a permit. Work through these in order of effort.
- Clear every grate and flush the channel. Free, takes 10 minutes.
- Snake or rod any accessible drain line to dislodge shallow clogs. A basic drain rod runs $15 to $30 if you don’t already own one.
- Trim planters and landscaping that overhang drains or channel water toward the deck instead of away from it.
- Re-seal small sections of failed coping joint with pool-rated sealant. Materials run $10 to $25 per tube, and this is realistic as a DIY job only for isolated, small failures, not a joint that’s failed along an entire pool edge.
- Cut shallow surface grooves to redirect standing water toward an existing drain, as a temporary measure only. This is a stopgap, not a repair.
For a genuine low spot, homeowners sometimes try grinding down a high lip or feathering in a thin cement patch over a small depression. This can work for a shallow dip of an inch or less over a few square feet, but it fails fast on anything larger because a thin feathered patch has no structural bond strength and will crack under foot traffic within a season.
Estimated cost ranges:
- Clearing a grate: free
- Renting a drain snake or rod: $0 to $50
- Small joint resealing: $20 to $75 in materials
- Cutting in a new short channel drain yourself (materials only, if you’re comfortable with saw work): roughly $150 to $400
Here’s where DIY needs to stop. Do not attempt any repair that involves cutting into wiring conduit, undermining a structural footing, or rerouting drainage discharge without checking local permit rules. A poorly executed DIY fix that pushes water toward a neighbor’s property or into a sanitary line instead of an approved discharge point can create liability that costs far more than the original puddle ever would.
How to Clean Channel, Slot, and Point Drains
A clogged drain is the most common, most fixable cause of pool deck water drainage problems, and cleaning one properly takes about 20 minutes per drain.
Tools:
- Work gloves
- Flathead screwdriver or a manufacturer drain key for grate removal
- Plumber’s snake or flexible drain rod
- Wet/dry shop vacuum
- Garden hose with a spray nozzle
- Small bucket for debris
- Flashlight
Step-by-step:
- Remove the grate. Most channel and point drain grates lift out with a screwdriver or snap free with a drain key. Set screws aside where you won’t lose them in the grass.
- Clear large debris by hand. Leaves, twigs, and built-up sediment usually sit right at the surface. Bag it, don’t sweep it back onto the deck.
- Run the snake or rod through the drain body. Push gently until you feel resistance clear, working in short strokes rather than forcing it.
- Flush thoroughly with the hose. Run water at moderate pressure and confirm it flows freely out the discharge end, not just disappears into the pipe.
- Vacuum remaining sediment from the drain channel with the shop vac’s wet setting.
- Inspect the outlet. Follow the pipe to wherever it daylights, whether that’s a swale, a drywell, or a storm connection, and confirm water is actually exiting there.
Linear or channel drains tend to clog less often than point drains because they capture water continuously across their length rather than relying on water finding a single opening, which is one reason many pool contractors prefer them for retrofits on decks with chronic pooling.
Safety notes: Never run a corded electric tool near standing water. If you’re using an extension cord for a shop vac outdoors, make sure it’s plugged into a GFCI-protected outlet. Wear gloves throughout, since debris in these drains often includes broken glass, sharp mulch, or pest nests.
If the drain still runs slow after a full cleaning, the obstruction is downstream, not at the grate. That usually means a pipe clog further along the line, a collapsed section of pipe, or root intrusion from a nearby tree, and none of those are fixable with a hose and a snake. That’s your signal to move to a camera inspection, which is a job for a contractor.
Where Should Pool Deck Drains Actually Discharge?
Deck drainage has to go somewhere approved, and getting this wrong isn’t just a maintenance oversight, it’s a code violation. Under standard plumbing guidance, deck drainage must be directed to a storm water system or otherwise disposed of in an approved manner. Indoor pool decks are treated differently: they require their own separate deck drainage system with an indirect sanitary connection, meaning the water can’t simply tie directly into sewer plumbing.
Approved outdoor discharge points typically include:
- A municipal storm water system
- A properly designed swale that carries water away from structures
- A dry well or soakaway pit sized for the deck area
- A retention or detention area on the property
Avoid two mistakes that come up constantly: routing deck water onto a neighbor’s property, which creates a legal and neighborly headache regardless of how well-intentioned the fix was, and tying deck drainage into sanitary sewer lines without an approved indirect connection, which is a code violation in most jurisdictions.
On slope specifics, the guidance is consistent across sources. A 1/4 inch per foot slope away from the pool and structures is the commonly recommended standard, and it’s also described as the most critical single element of a functioning pool deck drainage system, with 1/8 inch per foot treated as a bare minimum rather than a target.
Before you modify any drainage line, discharge point, or grading on your property, check with your local building authority. Permit requirements and discharge rules vary by jurisdiction, and what’s acceptable in one county can require a permit in another.
When to Call a Pool Deck Drainage Professional
Some drainage problems are a Saturday afternoon project. Others need a contractor with a level survey and a pipe camera. Here’s how to tell the difference.
Call a pro if you see:
- Pooling that returns within days of a thorough cleaning
- Visible structural cracks running through slabs, not just surface hairline cracking
- A deck that seems to slope the wrong way across a wide area, not just one low spot
- Drains that stay clogged after snaking, suggesting a collapsed or root-blocked pipe
- Any project that requires altering where drainage discharges, since that often needs a permit
What a professional typically does:
- A level survey with spot elevations across the whole deck, which catches subtle slope reversals invisible during a casual walk-through
- Camera inspection of underground pipe runs to locate root intrusion or collapsed sections
- Excavation to repair or replace damaged pipe and reset the base material
- Slab leveling, sometimes called mudjacking or polyurethane foam injection, to correct isolated low spots without tearing out the whole deck
- Cutting in new channel drains where the existing drainage plan simply can’t handle the water
- Full deck removal and regrading when the underlying base has failed broadly, not just at one spot
Rough cost and timeline ranges:
- Drain cleaning or minor spot repairs: a few hours to one day, typically in the low hundreds of dollars
- Cutting and installing a new channel drain: roughly $500 to $2,500 or more, depending on run length and how much pipe needs replacing
- Slab leveling or foam injection: about $500 to $3,000 or more depending on the affected area
- Full deck replacement with regrading: several thousand to tens of thousands of dollars, and a multi-day to multi-week project depending on deck size
Common failure causes behind these bigger jobs include soil settlement, root intrusion, and original installation errors, and the good news is that targeted fixes like slab leveling or a single channel-drain install can often solve the problem without a full replacement, unless the base has failed across a large portion of the deck.
Questions worth asking any contractor before you sign anything: Do they provide an engineered drainage plan, not just a verbal fix? What’s the tie-in point for discharge, and is it code-approved? Is there a warranty on waterproofing or resurfacing work? And will this project require a permit in your area? If you’re also noticing signs of surface damage alongside the drainage issue, mention that up front, since standing water often accelerates surface deterioration and a contractor should evaluate both at once.
Preventive Maintenance for Pool Deck Drains
A drainage system that gets ignored for a year is a drainage system that fails during the next big storm. Weekly grate clearing and monthly channel flushing drastically reduce the odds that a heavy rain event overwhelms your drains.
| Frequency | Task |
|---|---|
| Weekly | Clear leaves and debris from all visible grates |
| Monthly | Flush channel drains with a hose to prevent sediment buildup |
| After storms | Inspect for new pooling, check that discharge points are flowing |
| Annually | Camera-inspect underground pipes if you’ve had repeat clogs, check coping joints and caulk |
Seasonal habits worth building in:
- Clear fallen leaves before autumn rains hit, since a single wet leaf mat can block a channel drain within a day.
- Do a full drain and slope check before your region’s wet season starts, not after the first flood.
- In hurricane-prone areas, clear all drains and grates as part of standard storm prep, since a blocked drain during a tropical downpour turns a manageable rain event into real flooding around the pool.
- Keep planters and landscaping trimmed back from drain openings year-round, and never stack pool equipment or furniture over a grate, even temporarily.
Pro Tip: Keep a small drain-maintenance kit by the pool equipment pad, a grate key, a short flexible rod, and a shop vac hose adapter, so you can clear drains within minutes of a storm passing instead of waiting days and letting water sit against your deck and coping.
A specialist’s take on what homeowners get wrong
The mistake we see most often isn’t a lack of effort, it’s homeowners treating the symptom instead of the system. Someone notices a puddle, pours a bag of quick-set concrete into the low spot, and calls it fixed. Six months later the puddle is back two feet away, because the real issue was never that one low spot, it was a deck-wide slope that was never quite right to begin with. A proper level survey across the whole deck costs a fraction of what a second and third patch job ends up costing.
The other pattern worth naming: people wait until the deck itself is visibly cracked or heaving before addressing drainage that’s been standing for years. By that point, water has usually worked its way under the slab, degraded the base material, and started undermining coping joints too. If your deck is more than 15 to 20 years old and you’re seeing recurring pooling alongside any surface pitting, discoloration, or hollow spots underfoot, that’s usually a sign the drainage problem and the deck’s structural life are hitting the same wall at the same time, and a full resurfacing or deck rebuild becomes the more economical long-term choice over repeated patchwork.
Get a Professional Assessment for Chronic Pool Deck Drainage
If you’ve cleared every grate, run the hose test twice, and the water still pools in the same spot after every rain, the fix isn’t another patch, it’s addressing the slope and the surface together. Classic Marcite handles that combination directly: regrading the deck to proper slope, tying drainage into an approved discharge point, and resurfacing with durable finishes that hold up to Florida’s wet season instead of cracking and reopening the same low spots year after year.

Beyond drainage correction, the team handles pipe inspection and repair, slab leveling, coping and joint repair, and full resurfacing with materials like Pebble Tec that are built to resist the exact wear standing water causes over time. If your deck issue has started affecting the pool shell itself, it’s worth reading about how pool leaks develop alongside drainage failures, since the two often show up together.
Ready for an honest assessment? Request a free estimate for Pool Resurfacing in Orlando and have a few photos of the pooling area, a rough sense of how long it’s been happening, and notes on any recent storms or landscaping changes ready when you call. That’s usually enough for a contractor to give you a realistic first read before ever stepping on site.
Sources
- ISPSC 2021 — Chapter 3: General Compliance (Section 306.5)
- Up
- Pool deck drainage: keeping water away from your pool (StructureSmart)
- Linear drains for outdoor areas: patios, pools, and landscaped spaces (CMSA/MEA)
- Pool deck drainage problems: causes, fixes, and when you need a new deck (Cornerstone Pool & Remodel)
Always confirm current permit and discharge requirements with your local building authority before altering any drainage line or grading on your property. This article is general guidance, not a substitute for a licensed contractor’s on-site evaluation.
