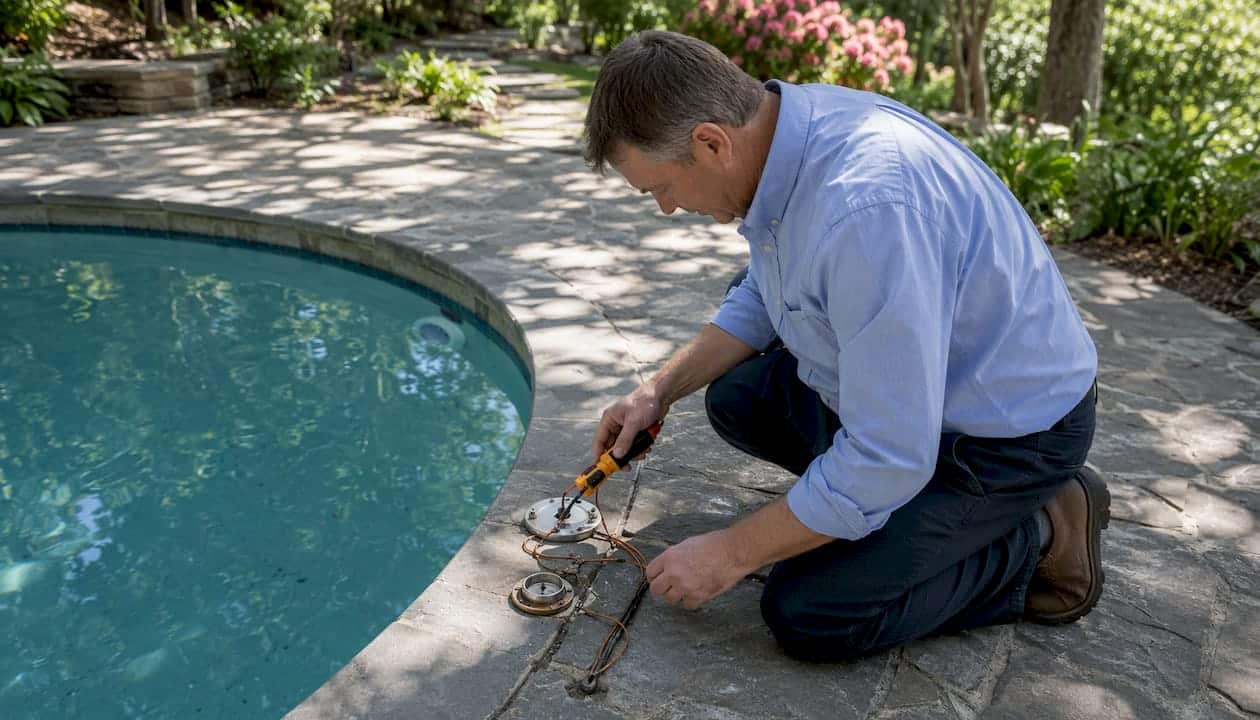
Pool bonding is the safety measure that electrically ties every conductive part of a pool area together so no one becomes the path for stray current. The technical term is equipotential bonding, and its job is simple: equalize the voltage across all metal components, the water, and the surrounding deck so there is no difference in electrical potential that a swimmer’s body could bridge.
If you are building, renovating, or inspecting an existing pool, here is what to do right now:
- Look for a solid copper wire (at least the diameter of a standard pencil lead) running from the pump motor to the handrails, light niches, and any other metal parts near the water.
- Check that visible clamps at ladders and handrails are tight, free of heavy corrosion, and made of listed hardware.
- If you are planning a renovation or deck pour, request a pre-deck inspection report from your contractor before any concrete goes down.
Pro Tip: Never assume that grounding and bonding are the same thing. If anyone reports a tingling sensation in or around the water, stop pool use immediately and call a licensed electrician before anyone re-enters.
Table of Contents
- How does pool bonding differ from grounding, and why does it matter?
- Which pool parts must be bonded — a homeowner checklist
- What a correct bonding installation looks like
- What does NEC 680.26 require, and how does an AHJ inspection work?
- How is pool bonding tested, and what do common failures look like?
- What does it cost to install or retrofit a bonding system?
- When should you hire a licensed electrician, and what should you ask?
- Key Takeaways
- The part of pool bonding most renovation projects get wrong
- Classicmarcite coordinates bonding checks with every renovation
- Authoritative sources and further reading
How does pool bonding differ from grounding, and why does it matter?
Most homeowners hear “bonding” and “grounding” used interchangeably. They are not the same, and confusing them can leave hazardous voltage gradients unaddressed even when the grounding system is otherwise correct.
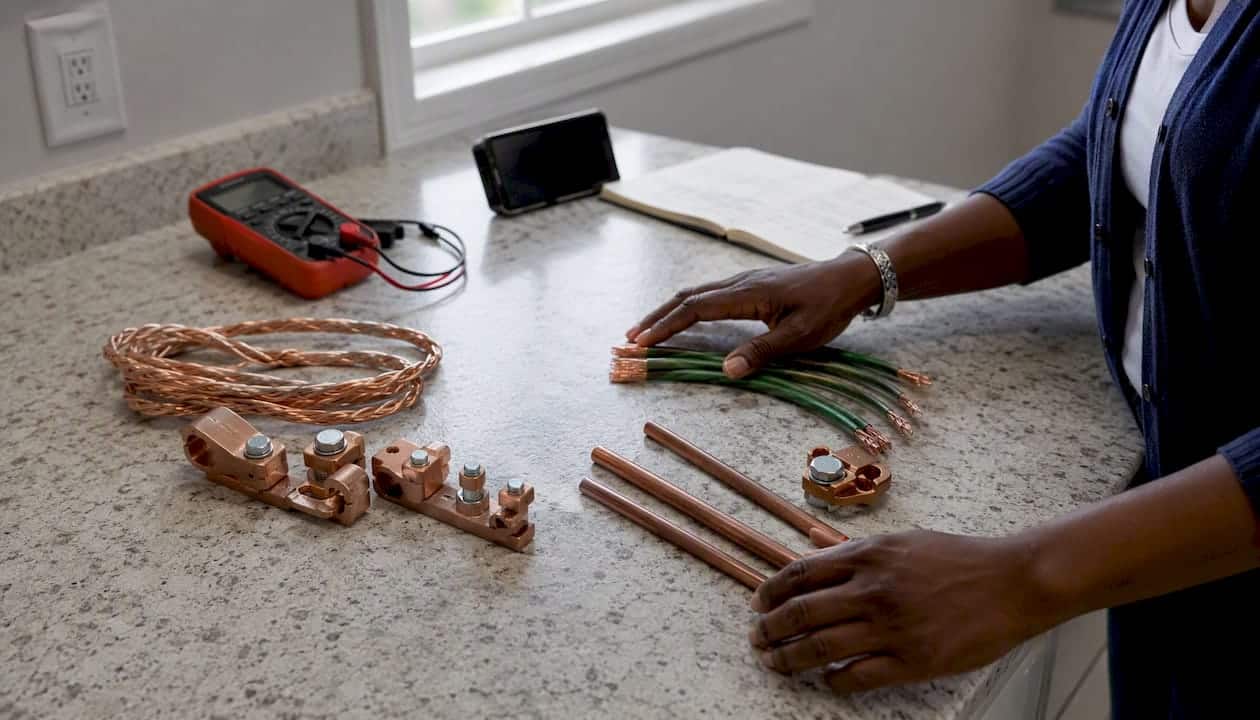
Bonding connects all conductive parts to each other, equalizing their voltage. If every metal surface is at the same potential, there is no gradient for current to flow through a swimmer. Grounding is a separate system that provides a return path for fault current to trip a breaker or blow a fuse. Grounding protects equipment and prevents fires. Bonding protects people in the water.
Picture a pool where the pump motor develops a small wiring fault. A properly grounded system may never trip the breaker because the fault current is too low. But that same small fault can create a voltage difference between the water and a metal ladder. A swimmer touching both becomes the conductor. Bonding eliminates that voltage difference before it can harm anyone. Electrical safety experts confirm that shocks around pools are most often caused by voltage potential differences between conductive objects and surfaces, and equipotential bonding is specifically designed to eliminate those differences.
The governing code is NEC 680.26, which spells out exactly which parts must be bonded, what conductor to use, and how far the bonding perimeter must extend. Your local Authority Having Jurisdiction (AHJ) enforces these rules and conducts inspections. GFCI protection is also required at pool circuits, but it is a separate layer of defense, not a substitute for bonding.
“Bonding equalizes voltage potentials among conductive parts; grounding is a separate system intended to clear faults and trip breakers — relying on grounding alone does not prevent voltage gradients that cause swimmer shock.” — IM Home Inspections, Bonding vs. Grounding in Swimming Pools
Which pool parts must be bonded — a homeowner checklist
NEC 680.26(B) lists every category of conductive part that must be included in the equipotential bond. In plain language, that covers:
- Pool shell reinforcing steel or conductive shell: The rebar cage inside a concrete pool is a primary bonding point. For fiberglass or vinyl liner pools, a corrosion-resistant conductive surface of at least 9 square inches must contact the water and connect to the bonding grid.
- Perimeter surfaces: The deck and surrounding hardscape within the bonding zone must be tied in.
- Handrails and ladders: Any metal rail or step that a swimmer touches must be bonded.
- Metal fittings: Return fittings, skimmer bodies, and other metal hardware in or on the pool wall.
- Electrical equipment: Pump motors, heaters, chlorinators, and any other fixed electrical device within 5 feet of the pool.
- Metal piping and fixed metal parts: Any metallic plumbing or structural component within 5 feet of the inside wall.
The perimeter requirement
The bonding system does not stop at the pool wall. Equipotential bonding must extend at least 3 feet horizontally beyond the inside walls of the pool, covering the deck surface where bathers stand and walk. For conductive perimeters, the conductor or grid must connect to the pool’s reinforcing steel at a minimum of four uniformly spaced points around the perimeter.
Special case for nonconductive shells: Fiberglass and vinyl liner pools have no conductive shell to bond directly. NEC 680.26 requires a corrosion-resistant conductive surface with at least 9 square inches of area in direct contact with the water, bonded to the grid. This is often a stainless steel fitting or a listed water-bond device.
What often gets missed
- Deck steel embedded in the concrete apron (it must connect to the bonding grid before the pour).
- The buried perimeter grid access point (inspectors need to reach it; cover it but do not seal it permanently).
- Metal light niches and conduit runs near the pool.
- Heat pump and gas heater cabinets when added after original construction.
What a correct bonding installation looks like
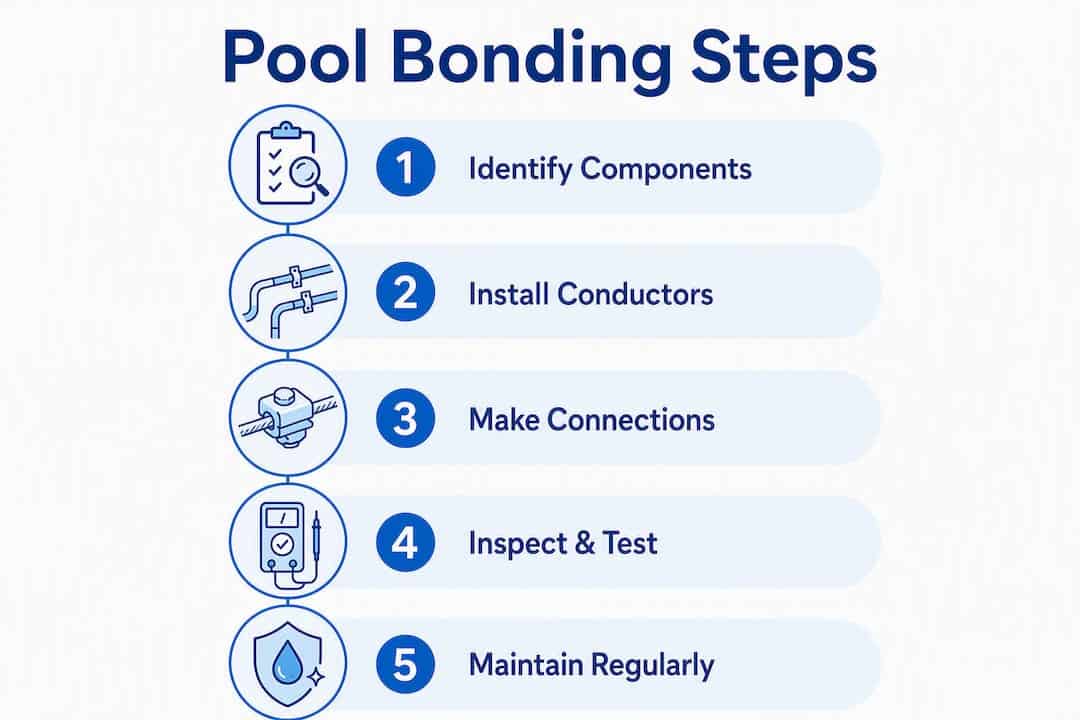
Understanding pool bonding procedures means knowing what you should see during and after installation, not just trusting that the work was done.
Conductor type and sizing
NEC 680.26 requires solid copper conductors of a size considered standard for bonding conductors, or solid copper-clad steel with sufficient copper content. Stranded wire is not permitted for the bond jumper. Individual strands corrode faster in wet and concrete environments, and mechanical failure is more likely over time. If you see stranded wire used as the bonding conductor, that is a code violation.
Grid and loop options
Installers use one of three approaches depending on pool type and construction method:
- Rebar grid (conductive shell): The reinforcing steel cage in a concrete pool serves as the bonding grid when properly connected. The installer ties the bonding conductor to the rebar at the required four points and runs it to all bonded equipment.
- Copper conductor loop: A continuous solid #8 AWG copper loop runs around the perimeter at the required depth and connects to all bonded items.
- Copper mesh or grid: Used in some perimeter applications, particularly where the deck has no embedded steel. As of January 1, 2025, copper grids and welded-wire reinforcement used in perimeter bonding must be listed for corrosion resistance and mechanical performance.
Connection hardware
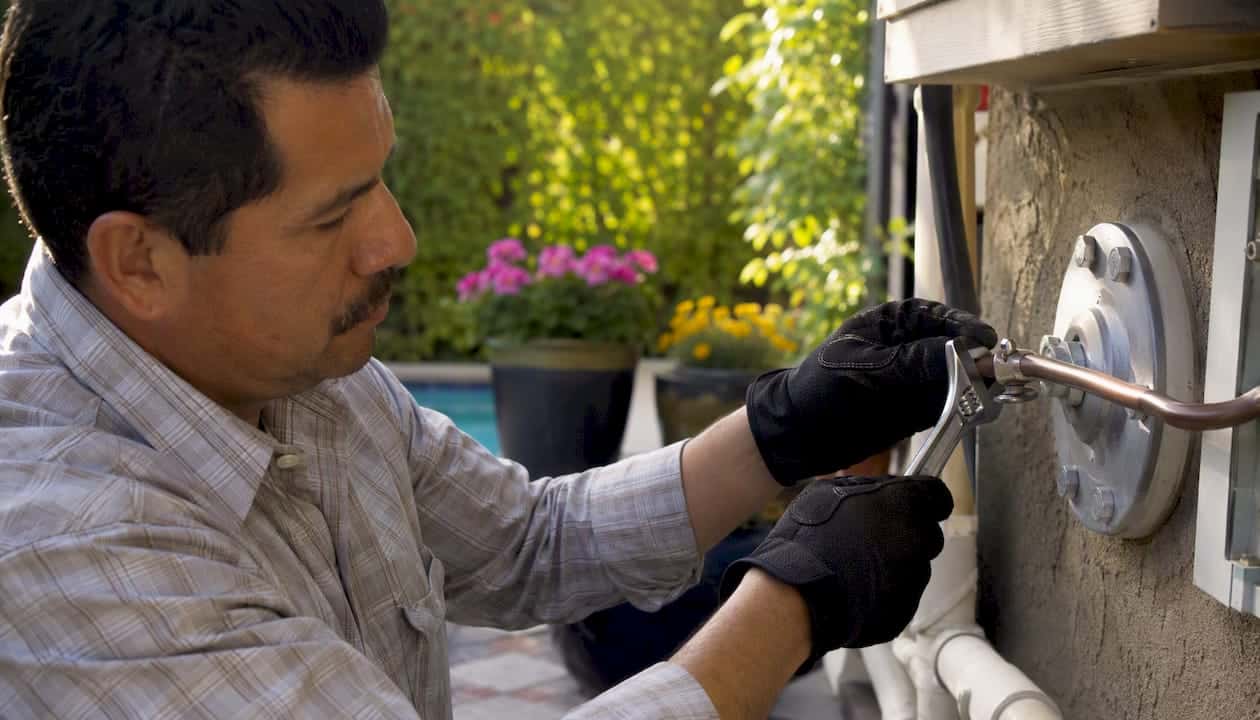
Listed pressure connectors, listed clamps, and exothermic welds are the accepted connection methods. Listed hardware matters because unlisted connectors corrode faster in pool environments, creating high-resistance joints that defeat the purpose of the bond. Ask your installer to show you the connector packaging and confirm the hardware carries a listing mark.
Pro Tip: At pump motor locations, the installer should leave extra slack in the bonding conductor. When a motor is replaced in the future, that slack prevents the need for a splice or a full conductor replacement, both of which require re-inspection.
| Installation element | What to look for |
|---|---|
| Conductor type | Solid copper, no smaller than #8 AWG |
| Connector hardware | Listed clamps or pressure connectors, no improvised hardware |
| Perimeter extent | Conductor or grid extends at least 3 feet horizontally beyond the inside pool wall, with connections to the reinforcing steel (or copper grid) at a minimum of four uniformly spaced points around the pool perimeter |
| Equipment bonding lugs | Visible lug on pump, heater, and light niche |
| Motor slack | Extra conductor length coiled at motor location |
| Accessible terminations | At least one accessible inspection point not buried under deck |
For a closer look at how surface bonding techniques integrate with resurfacing work, Classicmarcite’s guidance covers the coordination steps that prevent rework.
What does NEC 680.26 require, and how does an AHJ inspection work?
The code is prescriptive about materials and methods, not about a specific maximum resistance value for the grid. Inspectors verify that the right hardware was used, that connections are physically sound, and that the system is accessible for review.
Pre-deck inspection: the one-shot opportunity
Once the deck is poured or the grid is buried, bonding connections become inaccessible for inspection. The pre-deck inspection is effectively a one-shot opportunity. If the AHJ cannot see the grid before it is covered, the inspector may require demolition to verify compliance. That is an expensive lesson.
Schedule the bonding inspection with your general contractor and the AHJ before any concrete work begins. Get the sign-off in writing.
Periodic reinspection
The 2020 NEC edition empowers AHJs to enforce periodic inspection of bonding and GFCI systems. NFPA recommends periodic testing and maintenance because equipment ages, terminations corrode, and environments change. Do not treat the original inspection as a permanent pass.
What inspectors check
- Listed connectors and clamps (not improvised hardware)
- Physical continuity of the grid using an ohmmeter
- Accessible terminations that can be re-checked in the future
- Conductor routing to all required bonded items
- Perimeter extent and four-point attachment to reinforcing steel
Homeowner do/don’t list for construction inspections
Do:
- Confirm the bonding inspection is scheduled before the deck pour date.
- Get written AHJ sign-off and keep it with your pool records.
- Walk the site with the electrician before inspection to verify all items on the NEC 680.26(B) list are connected.
- Ask the inspector what local amendments apply beyond the base NEC.
Don’t:
- Allow the contractor to pour the deck before the inspection is approved.
- Assume a passed electrical rough-in covers the bonding grid.
- Accept verbal confirmation in place of a written inspection record.
Property managers overseeing commercial pools should also review commercial pool safety regulations for additional AHJ requirements that go beyond residential NEC provisions.
How is pool bonding tested, and what do common failures look like?
A licensed electrician verifying a bonding system will use a combination of visual inspection and electrical testing. Knowing what they are looking for helps you report problems accurately and evaluate whether the work was done correctly.
Testing methods
- Continuity check with an ohmmeter: The electrician connects test leads to two bonded items and measures resistance. A properly bonded system shows very low resistance between all connected points. The NEC does not set a maximum ohms value, but a high or open reading signals a broken connection.
- Visual inspection of connectors: Corrosion, cracking, or looseness at clamps and pressure connectors indicates a compromised joint.
- Conductor routing verification: The electrician traces the conductor from each bonded item back through the system to confirm no segment is missing.
- Clamp integrity check: Listed clamps should be tight, show no green or white corrosion buildup, and be mechanically secure.
Common failures
Typical installation mistakes include:
- Stranded or undersized conductors used in place of solid #8 AWG copper
- Missing conductor to one or more items on the NEC 680.26(B) list
- Corroded or unlisted connectors creating high-resistance joints
- Missing water bond in fiberglass or vinyl liner pools
- Perimeter grid disconnected or never connected to the pool reinforcing steel
Troubleshooting steps
- Locate accessible terminations and open them for visual inspection.
- Test continuity between each bonded item and the main bonding conductor.
- Replace any corroded or unlisted connectors with listed hardware.
- Add slack at motor locations if the conductor is pulled tight.
- Re-inspect continuity after any repair before closing up access points.
Pro Tip: Any measurable shock sensation in or around the pool water is a red flag requiring immediate action. Stop pool use, call a licensed electrician, and do not re-enter the water until a professional has tested and cleared the system. Stray-voltage readings or visible corrosion at terminations are also grounds for immediate inspection, not a wait-and-see response.
For Florida pool owners, pool inspection guidance covers what to expect from a professional inspection visit and how to prepare.
What does it cost to install or retrofit a bonding system?
Cost depends on whether you are bonding a new pool during construction or retrofitting an existing one. The two scenarios are very different in labor and complexity.
Cost drivers
- New construction vs. retrofit: New construction is far less expensive because the grid is installed before the deck and shell are in place. Retrofit work may require breaking up deck sections to access buried conductors.
- Number of bonded items: More equipment, more runs of conductor, more labor.
- Access to the buried grid: If the perimeter grid is accessible, repairs are straightforward. If it is fully buried under a concrete deck, costs rise sharply.
- Permitting and inspection fees: These vary by jurisdiction and are separate from contractor labor.
- Geographic labor rates: Florida rates differ from national averages; always get local quotes.
Typical scenarios
| Scenario | Typical scope | Expected timeframe |
|---|---|---|
| New construction bonding loop | Full grid, all equipment, pre-deck inspection | 1–2 days |
| Minor retrofit (add missing equipment bond) | One or two conductor runs, accessible connections | 2–4 hours |
| Major retrofit (deck removal required) | Demolition, new grid, re-pour | Several days to a week |
Hidden costs to watch for
- Failed pre-deck inspection requiring rework before the pour can proceed
- Corroded or unlisted connectors that must be replaced throughout the system
- AHJ-ordered upgrades to meet local amendments beyond base NEC requirements
Always get a written estimate that specifies the conductor size, connector type, and whether the price includes permitting and the pre-deck inspection. Confirm the electrician has direct experience with NEC 680.26 and pool work specifically. A general electrician unfamiliar with pool code can miss items on the 680.26(B) list. Understanding pool permit requirements before hiring helps you ask the right questions upfront.
When should you hire a licensed electrician, and what should you ask?
Some bonding questions are straightforward enough to answer with a visual check. Others require a licensed electrician. Here is how to tell the difference.
Clear criteria for hiring a pro
- You cannot locate the bonding conductor at any equipment or fixture.
- You see visible corrosion at clamps, lugs, or connectors.
- A renovation will cover the existing grid with new concrete or decking.
- Anyone has reported a shock or tingling sensation in or near the water.
- You have no documentation from previous inspections or the original installation.
Questions to ask before hiring
- Do you have direct experience with NEC 680.26 and pool bonding specifically?
- Can you show proof of license and insurance for electrical work in this state?
- Will you coordinate with the AHJ for the pre-deck inspection and provide written sign-off?
- What test methods will you use to verify continuity after the work is complete?
- Do you use listed connectors and solid #8 AWG copper throughout?
Red flags in bids
- The contractor uses “grounding” and “bonding” interchangeably without distinguishing them.
- Refusal to provide past inspection documentation or references for pool electrical work.
- A bid that specifies stranded wire or does not mention conductor size at all.
- No mention of a pre-deck inspection or AHJ coordination.
What to hand the electrician on arrival
- A list of all electrical equipment locations (pump, heater, lights, chlorinator).
- Any existing inspection records or as-built drawings.
- Access points to the bonding grid or perimeter conductor.
- Notes on any recent additions or equipment replacements that may not be bonded.
Key Takeaways
Pool bonding is a life-safety system that equalizes voltage across every conductive pool component, and a solid #8 AWG copper conductor, a pre-deck inspection, and a licensed electrician are the three non-negotiable elements of a compliant installation.
| Point | Details |
|---|---|
| Bonding vs. grounding | Bonding equalizes voltage to protect swimmers; grounding clears faults to protect equipment — both are required. |
| Conductor standard | Use solid copper no smaller than #8 AWG; stranded wire is a code violation under NEC 680.26. |
| Perimeter extent | The bonding system must extend at least 3 feet horizontally beyond the inside pool wall and connect to the pool’s reinforcing steel (or copper grid) at a minimum of four uniformly spaced points around the perimeter. |
| Pre-deck inspection | Schedule AHJ sign-off before any concrete is poured — once buried, the grid cannot be inspected without demolition. |
| Classicmarcite coordination | Classicmarcite coordinates bonding inspections during resurfacing and renovation projects to prevent costly rework. |
Pro Tip: Stop pool use immediately if anyone reports a shock sensation, and do not restart until a licensed electrician has tested and cleared the bonding system.
The part of pool bonding most renovation projects get wrong
The most common mistake is not a wiring error. It is a scheduling error. Homeowners and contractors treat the bonding inspection as an afterthought, something to handle after the deck is formed and the equipment is set. By then, the grid is buried, the connections are inaccessible, and the AHJ has two options: accept the work on faith or require demolition. Neither is good.
The second most common mistake is assuming that a pool that passed inspection fifteen years ago is still compliant today. Terminations corrode. Equipment gets replaced without reconnecting the bond. Deck additions cover sections of the perimeter grid. The 2020 NEC edition gave AHJs the authority to require periodic reinspection precisely because original compliance does not guarantee current compliance.
What professionals who work on pools regularly see is that bonding failures cluster around renovation projects. A new heater gets installed, the bonding lug on the old unit is not transferred, and the new heater sits unbonded. A deck gets extended, the perimeter conductor is cut and never spliced back. These are not exotic failures. They happen on well-maintained pools because the bonding system is invisible and easy to overlook when the focus is on the surface work.
The practical takeaway: any time a pool renovation touches the deck, the equipment, or the shell, treat the bonding system as something that needs verification, not assumption. Before Classicmarcite begins a resurfacing or remodeling project, the bonding system is on the checklist, not as a courtesy but because the alternative is rework that costs more than the inspection ever would.
Classicmarcite coordinates bonding checks with every renovation

Resurfacing and remodeling projects are the right moment to verify your pool’s bonding system, because the deck and equipment are already accessible. Classic Marcite has been resurfacing pools in Orlando and Jacksonville since 1988, with over 100,000 pools completed across residential, commercial, and resort properties. Every renovation project includes coordination with licensed electricians to confirm bonding compliance before the final deck work is done, so you are not left with a code violation buried under new concrete.
If your pool is due for resurfacing or a full remodel, request a free estimate for Pool Resurfacing in Orlando and ask about bonding verification as part of the project scope. Getting both done together saves time, avoids duplicate mobilization costs, and means your pool comes out of the renovation both beautiful and fully compliant.
Authoritative sources and further reading
The sources below are the primary references for NEC 680.26 requirements, inspection guidance, and homeowner checklists. Use them to verify code language and confirm what your AHJ will enforce.
- NFPA — Code-Compliant Electrical Installation for Swimmer Safety: — NFPA’s guidance on periodic inspection, GFCI requirements, and the 2020 NEC edition’s AHJ authority for reinspection.
- IAEI Magazine — Taking the Mystery Out of Equipotential Bonding: — Inspector and installer perspective on common code violations and how to avoid them.
- InterNACHI — Inspecting Grounding and Bonding at Residential Swimming Pools: Home inspector checklist and visual guide for identifying bonding components during a residential inspection.
- NFPA Code Finder: Direct access to NEC code text; use this to look up the exact language of NEC 680.26 and any local amendments your AHJ has adopted.
For permitting questions specific to your project, contact your local AHJ or building department directly. They are the final authority on which NEC edition your jurisdiction has adopted and what local amendments apply. Common pool repair pitfalls that homeowners overlook often include bonding-related issues that surface only during a professional inspection.