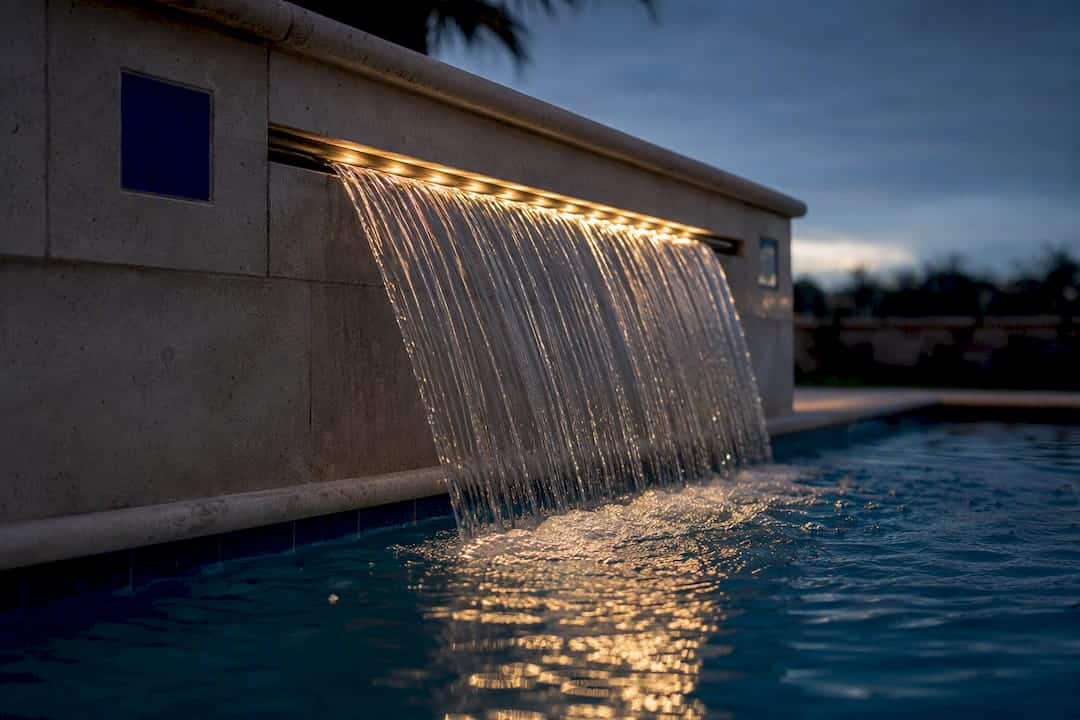
Yes, you can usually add a sheer descent to an existing pool, but three technical constraints decide whether the project is simple or complicated: bond-beam access for notching, pump and plumbing capacity measured in GPM, and a perfectly level lip. Standard units run 8 inches to 8 feet wide, and most need 5 to 15 gallons per minute of flow for every foot of width. Before you call anyone, measure the intended wall space, check what your pump can deliver, and line up a remodeler who can assess the bond beam.
TL;DR:
- Ensuring the bond beam can be notched without compromising rebar or structure is essential before retrofitting a sheer descent into an existing pool.
- Pump capacity must meet the requirement of 5 to 15 gallons per minute per foot of unit width, especially for wider or larger lip units needing dedicated booster pumps.
- Proper installation requires precise leveling and careful sequencing, including lip protection and line purging, to prevent uneven sheets or debris damage.
- Adding a sheer descent increases ongoing energy costs through extra pump use and higher evaporation, so timing operation with a timer can reduce operational expenses.
- Hiring a licensed remodeler for structural, plumbing, and electrical work ensures the project meets safety standards and minimizes costly rework or inspection failures.
Table of Contents
- How Does Adding a Sheer Descent Actually Work?
- What Sizes and Lip Options Should You Choose?
- Can You Add a Sheer Descent to an Existing Pool?
- What Plumbing and Pump Capacity Do You Need?
- How Do You Install a Sheer Descent Without Ruining the Sheet Effect?
- What Does It Cost to Add and Maintain a Sheer Descent?
- What Design Choices Affect the Look of a Sheer Descent?
- What Safety and Code Requirements Apply to Sheer Descent Installations?
- Why Is My Sheer Descent Not Working Right?
- Does a Sheer Descent Increase Your Energy Bill?
- A Contractor’s View on When to DIY and When to Call In Help
- Add a Sheer Descent With a Team That Handles the Structural Side Too
- Sources
How Does Adding a Sheer Descent Actually Work?
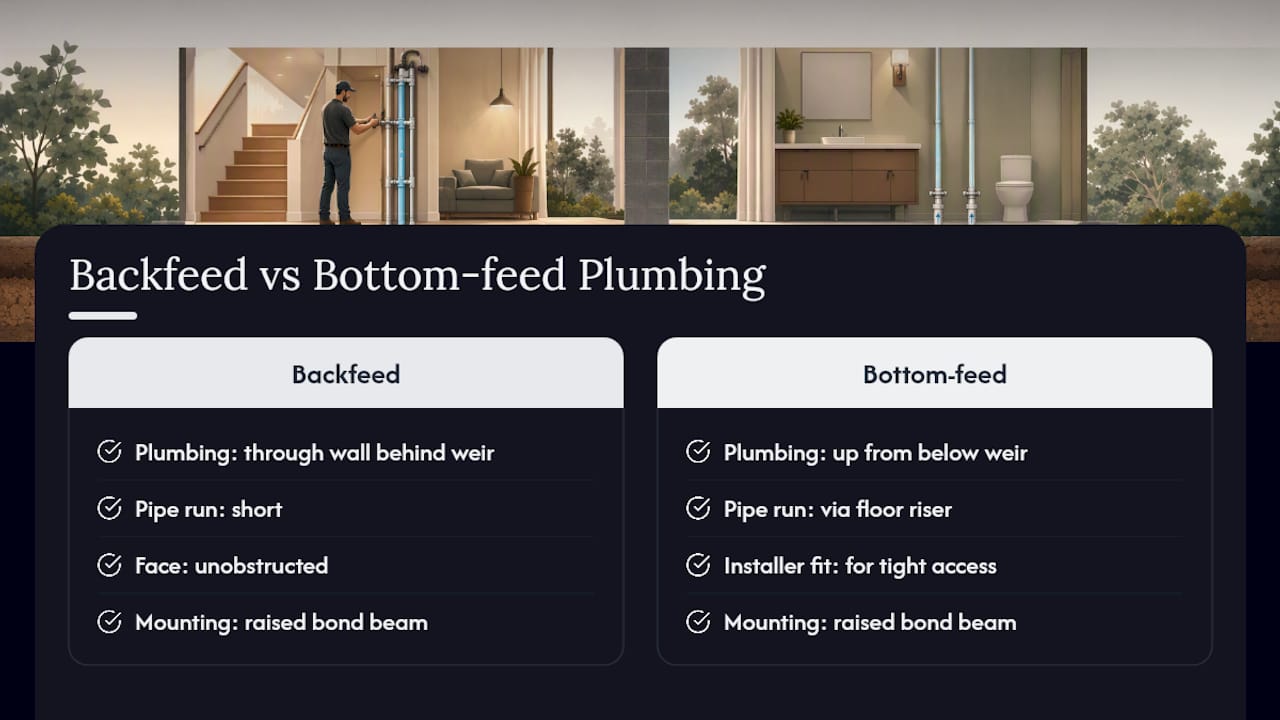
A sheer descent creates a thin, glass-like sheet of water that free-falls off a weir edge rather than tumbling over rocks. The effect depends entirely on even water distribution across the opening, which is why the plumbing feed type matters as much as the unit itself. Backfeed units route plumbing through the wall behind the weir, keeping the face clean and the pipe run short. Bottom-feed configurations push water up from below, which some installers prefer when wall access is tight.
Most sheer descents sit in a raised bond beam, a knee wall, or a spa spillover wall above the main pool. The coping and tile detail around the opening interacts directly with lip size. A generous lip creates a bold, chunky arc; a thin lip produces a tighter, more delicate curtain. Where you place the fixture determines which lip width will actually look right once water is running.
What Sizes and Lip Options Should You Choose?
Sheer descent units come in widths ranging from 8 inches to 8 feet, typically in increments that match common wall and spa spillway dimensions. Lip size is a separate decision from width, and picking the wrong one is one of the most common regrets homeowners have after installation.
- 1-inch lip: produces a tight, minimal sheet that clears shallow coping without much overhang.
- 6-inch lip: the middle ground, giving a fuller arc that suits most raised-wall installations.
- 12-inch lip: creates a dramatic, wide projection but demands more flow and a wall built to support it.
- Multiple units side by side: used to build one continuous wide sheet, often with curved end caps for a finished look.
Wider units and larger lips both raise the hydraulic demand. A 12-inch lip on an 8-foot span needs meaningfully more GPM than a 1-inch lip on a 3-foot span, so size selection and pump sizing have to happen together, not separately.
Can You Add a Sheer Descent to an Existing Pool?
Retrofitting a sheer descent into a pool that was not built for one is often possible. The feasibility mostly comes down to wall construction, plumbing capacity, and how much disruption the property can tolerate. Work through these checks in order before committing to a design.
- Confirm bond-beam access. A contractor needs to see whether the wall can be notched to the manufacturer’s specified depth without compromising structural rebar.
- Check rebar placement. Notching sometimes requires offsetting or trimming reinforcement steel, which changes the scope from cosmetic to structural.
- Test current pump flow. Measure what your existing equipment delivers against the GPM the unit requires; undersized pumps are the most frequent point of failure.
- Decide on a booster pump. Small units can sometimes share the main pump through a three-way valve, but larger or higher features usually need dedicated equipment.
- Plan for site disruption. Expect some deck cutting, tile removal around the new opening, and cosmetic plaster or Pebble Tec® restoration once plumbing is roughed in.
- Set a realistic timeline. A straightforward single unit might take a few days; a wide multi-unit wall with a new booster pump and rewired equipment pad takes longer.
What Plumbing and Pump Capacity Do You Need?
Hydraulics make or break the sheer effect, and this is the section where guessing costs you the most money. The industry design guideline calls for 5 to 15 GPM per foot of width, depending on lip size and desired sheet thickness.
Quick math: a 4-foot-wide unit with a 6-inch lip sitting in the middle of that range at 10 GPM per foot needs roughly 40 GPM total, which is a real load most single-speed pool pumps were never sized to add on top of normal filtration.
- Units over 5 feet wide typically require minimum 2-inch plumbing to avoid starving the sheet.
- Smaller units, generally under 5 feet, can often run on 1½-inch line, provided the pipe run is short.
- Long pipe runs, sharp elbows, and undersized fittings create head loss that a strong pump still can’t overcome, which is why professionals calculate hydraulic loss rather than eyeballing pump horsepower.
- A dedicated booster pump is the safer call whenever the sheer descent’s demand would push your existing pump past comfortable operating range.
- An inline filter or strainer ahead of the weir keeps debris from lodging in the opening, and manufacturer guidance also calls for anti-vortex covers and proper anti-entrapment placement whenever additional suction lines are added.
Running the waterfall also pulls from the same filtration system, so factor that draw into how long your filter cycle needs to run each day.
How Do You Install a Sheer Descent Without Ruining the Sheet Effect?
Installation is where good specs turn into a bad-looking waterfall if steps get skipped or rushed. Manufacturer manuals are specific about sequence for a reason.
- Lay out and notch the bond beam. Cut to the exact depth specified for the unit, offsetting rebar where the notch would otherwise cut through it.
- Keep the lip protector in place. Installation manuals stress leaving the protective tongue on the lip through the entire construction phase so debris and mortar don’t scar the finished edge.
- Level the unit precisely. Even a few millimeters of tilt across the opening breaks the sheet into an uneven dribble on one side, which is the single most common installation failure.
- Embed with brown coat or thin-set. Set the unit fully into the wall assembly before plaster or Pebble Tec® goes on around it.
- Purge the line of air. Before startup, run water through the plumbing to clear trapped air pockets that would otherwise sputter through the weir.
- Remove the lip tongue at the correct moment. Pull it only after lines are clear and construction debris is gone, per the manufacturer’s startup sequence.
- Open valves slowly and balance flow. Bring the pump up gradually, adjusting the regulating valve until the sheet extends cleanly and evenly to the water surface.
Pro Tip: A single speck of construction grit lodged in the lip can deflect the entire sheet sideways. Wipe the weir edge by hand right before the final startup, even if it looks clean.
What Does It Cost to Add and Maintain a Sheer Descent?
The unit itself is rarely the expensive part. A standalone sheer descent fixture often runs in the low hundreds of dollars; what drives total cost is everything around it.
- Structural work like bond-beam notching, rebar adjustment, and deck cutting typically accounts for most of the invoice.
- Plumbing and pump upgrades, including a dedicated booster pump for larger units, add both equipment and labor cost.
- Finish restoration, patching plaster or Pebble Tec® around the new opening, is easy to underestimate if you’re pricing only the water feature.
- Operating costs include the extra pump’s energy draw and higher evaporation from constant surface disturbance, especially in exposed, windy yards.
- Routine maintenance covers cleaning the weir face, servicing the inline filter or strainer, removing calcium scale buildup, and winterizing the extra plumbing line in colder climates.
What Design Choices Affect the Look of a Sheer Descent?
Drop height is the first decision, and it’s more consequential than most homeowners expect. Keeping the fall under about 36 inches preserves the clean sheet look; in exposed or windy yards, 24 to 30 inches holds up far better against wind-driven spray and splash-out. Go higher than that in an open backyard and wind will shred the sheet into mist before it reaches the water.
Backdrop finish matters almost as much as height. A darker wall or tile behind the falling water creates contrast that makes the sheet read as glassy rather than washed out, and integrated LED lighting behind or beneath the weir turns a daytime feature into an evening focal point. Seating and viewing angles deserve thought too. A sheer descent facing a spa or lounge area earns its visual weight; one tucked behind equipment or hidden by landscaping does not.
Choose a sheer descent over a rock waterfall when the goal is a modern, architectural look with quiet, consistent sound rather than the splashy, irregular tumble of natural stone. If you’re weighing hardscape and seating layout around the new feature, a landscaping project gallery can help visualize how water features integrate with patios and plantings.
What Safety and Code Requirements Apply to Sheer Descent Installations?
Local building and pool codes govern more of this project than most homeowners assume, and skipping that check is the fastest way to end up redoing work. Most jurisdictions require a permit for any modification that alters pool structure, plumbing, or electrical service, and a bond-beam notch or new equipment pad circuit both typically qualify.
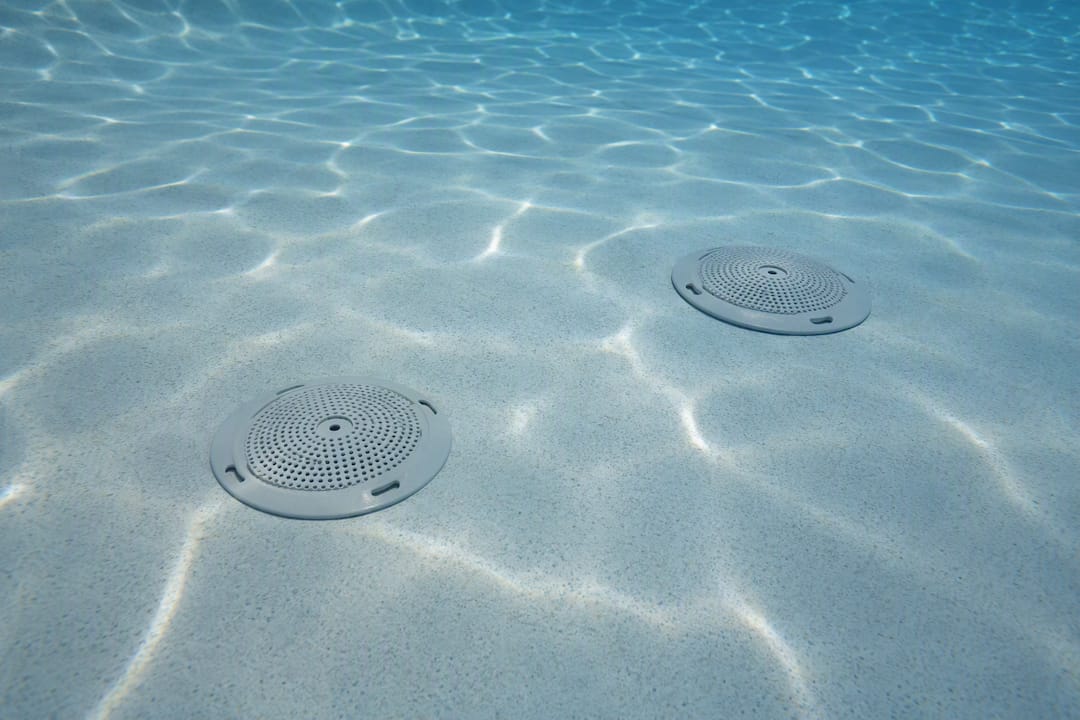
Suction entrapment is the safety issue manufacturers take most seriously. Adding a separate suction line for a booster pump means the pool needs at least two suction covers and proper anti-vortex protection rather than a single, easily blocked drain. This isn’t optional guidance; it’s a documented failure point in pools with inadequate suction coverage, and inspectors will look for it directly.
Electrical work around new pump circuits and any integrated lighting also falls under code, particularly bonding and grounding requirements near water. GFCI protection on new circuits and proper conduit runs are standard expectations, not upgrades.
Filtered water is another non-negotiable point. Manufacturer guidance specifically requires filtered water reaching the sheer descent, which is why an inline filter or strainer is standard on separate-pump setups. Skipping it lets debris reach the weir opening, where it disrupts the sheet and can damage the fixture over time.
Because these checks touch structure, electrical, and plumbing simultaneously, this is one of the clearer cases where a licensed remodeler earns their fee. A permit pulled correctly the first time avoids a failed inspection and a torn-out equipment pad later.
Why Is My Sheer Descent Not Working Right?
Most sheer descent problems trace back to one of three root causes: flow, level, or debris. Working through them in that order saves time.
A broken or dribbling sheet, rather than a clean curtain, almost always means insufficient flow for the width and lip size, or a lip that isn’t perfectly level. Check pump output against the 5 to 15 GPM per foot target before assuming the unit is defective. If flow checks out, a level confirms whether the opening has settled or shifted.
Water trickling down the wall face instead of projecting outward usually points to an undersized lip for the drop height and flow rate chosen, a mismatch that shows up months after installation as the structure settles slightly.
Uneven flow across a multi-unit wide sheet, with the center or ends running weaker than the rest, typically means unbalanced plumbing feeding the units. Multiple inlets or loop plumbing correct this; a single feed line rarely distributes evenly across a wide span.
A weakening sheet over time often signals scale buildup narrowing the weir opening or a clogged inline strainer starving flow. Both are maintenance issues, not installation failures, and both are avoidable with a seasonal cleaning routine.
Sputtering or air in the flow at startup almost always means the line wasn’t fully purged before the pump came on. Bleeding the line again usually resolves it within minutes.
Does a Sheer Descent Increase Your Energy Bill?
Running a sheer descent adds real, ongoing energy cost, and it’s worth budgeting for honestly rather than discovering it on a summer utility bill. The added pump load, whether it’s a dedicated booster or extra draw on the main pump, draws power every hour the feature runs, and most owners run these features for aesthetics far more hours than they’d run a plain filtration cycle.
A dedicated booster pump sized correctly for the unit’s GPM requirement is generally more efficient than forcing an oversized main pump to cover both filtration and waterfall demand simultaneously. Variable-speed pumps help considerably here, since they let you drop flow during off-peak viewing hours without shutting the feature off entirely.
Evaporation is the other cost that’s easy to overlook. A constantly disturbed water surface loses more water to evaporation than a still pool, which means more frequent auto-fill activity and, in areas on metered water, a higher water bill alongside the electric one. Windy sites make this worse, which loops back to why keeping drop height in the 24 to 30 inch range matters for more than just aesthetics.
The practical fix most owners land on is running the sheer descent on a timer tied to when the space actually gets used, evenings and weekends, rather than letting it run continuously alongside the filtration pump.
A Contractor’s View on When to DIY and When to Call In Help
Cutting a bond beam, rerouting rebar, and wiring a new booster pump circuit are not weekend projects, and treating them as such is where most retrofit sheer descents go wrong. A remodeler earns their fee specifically on the structural and plumbing side. Anyone can bolt a fixture to an existing ledge; far fewer people can notch a bond beam correctly, balance hydraulics across a multi-unit sheet, or get an electrical inspection passed on the first try.
Classic Marcite’s resurfacing and remodeling process tends to shorten these projects because plaster, tile, and deck restoration around a new weir opening are the same skills used on every full resurfacing job. That overlap avoids the common rework problem where a plumber installs the feature correctly but the surrounding finish doesn’t match or seals poorly.
Before hiring anyone, ask these six questions: Can you show me the bond-beam notch plan? What pump and pipe size are you specifying, and why? Is a booster pump included or optional? Who pulls the permit? What’s the finish restoration plan around the new opening? What’s the total timeline including inspection?
— Results
Add a Sheer Descent With a Team That Handles the Structural Side Too
If the checklist above has you thinking less about the water feature and more about the wall it lives in, that’s the right instinct. Experienced pool resurfacing and remodeling companies often have extensive experience with bond-beam work, plaster restoration, and finish matching a sheer descent retrofit, skills that align with those used in Pebble Tec® resurfacing jobs.

Rather than juggling a separate plumber, tile setter, and finish crew for one water feature, a single remodeling project can fold the sheer descent notch, pump upgrade, and surrounding plaster or Pebble Tec® finish into one scoped job with one timeline. That’s a real advantage over piecing the work out to separate trades who each treat the finish restoration as someone else’s problem. If your pool is due for a surface refresh anyway, this is the moment to add the feature at the same time instead of cutting into fresh plaster later.
Start with a free estimate for pool resurfacing in Orlando to get a real assessment of your bond beam, plumbing, and finish options before committing to a design.
Sources
- Sheer Descent Waterfall: Pool Cascade Waterfall | Jandy
- Jandy Sheer Descent & Sheer Rain Water Features – Comprehensive Guide
- Jandy Sheer Descent installation manual (extract)
- Zodiac Sheer Descent installation manual (extract)
- How Do I Add a Waterfall to an Existing Pool? A Practical Homeowner Guide – Mini Bucket Test