
Planning a pool renovation in Orlando or Jacksonville can feel overwhelming if you do not know where to start. For Florida homeowners, a successful remodeling project relies on a realistic look at your pool’s current condition and setting clear expectations for the results you want. With step-by-step guidance focused on durable finishes and practical planning, you can transform your backyard retreat with lasting beauty and value.
Table of Contents
- Step 1: Assess Pool Condition And Define Project Goals
- Step 2: Prepare Site And Plan Pool Remodeling Details
- Step 3: Remove Old Surface And Repair Pool Structure
- Step 4: Install New Interior Finish And Upgrade Features
- Step 5: Inspect Work And Ensure Quality Completion
Quick Summary
| Key Insight | Explanation |
|---|---|
| 1. Assess Pool Condition | Conduct a thorough evaluation of your pool’s structure and equipment to identify wear and issues before renovating. |
| 2. Define Clear Goals | Set specific objectives for functionality and aesthetics to guide your renovation strategy and budget. |
| 3. Prepare the Site | Organize necessary documents and resources, assess access points, and plan material staging to ensure a smooth project. |
| 4. Remove Surface Carefully | Follow demolition guidelines to expertly remove old surfaces while inspecting for structural damage needing repair. |
| 5. Inspect Thoroughly Post-Renovation | Conduct a final inspection covering all aspects to ensure safety, compliance, and overall quality of the renovation. |
Step 1: Assess Pool Condition and Define Project Goals
Transforming your backyard pool requires a systematic approach to evaluating its current state and establishing clear renovation objectives. Before diving into any remodeling project, you’ll need to conduct a comprehensive facilities condition assessment that provides an honest, detailed snapshot of your pool’s existing condition.
Start by thoroughly examining your pool’s critical components – structural integrity, surface condition, equipment functionality, and aesthetic appearance. Look for specific indicators of wear and potential problems:
- Visible surface cracks or chipping
- Discoloration or staining
- Uneven or deteriorating tile work
- Inefficient or outdated pool equipment
- Signs of water leakage
- Structural shifts or settling
A professional assessment can reveal hidden issues that might not be immediately apparent to the untrained eye.
Defining your project goals requires balancing practical needs with aesthetic desires. Ask yourself key questions about what you want to achieve: Are you seeking improved functionality? Enhanced visual appeal? Better energy efficiency? Creating a list of specific, measurable objectives will help guide your renovation strategy and budget planning.
Pro tip: Take detailed photographs and measurements during your initial assessment to help pool renovation professionals provide more accurate estimates and recommendations.
Step 2: Prepare Site and Plan Pool Remodeling Details
With your pool’s initial assessment complete, the next critical phase is preparing your site and meticulously planning your remodeling project. Comprehensive site plan preparation will ensure a smooth renovation process and help you avoid potential complications.
Before breaking ground, gather and organize essential documentation and resources:
- Detailed property survey with precise pool location measurements
- Current pool equipment specifications
- Proposed renovation design and layout
- Local building permit requirements
- Contractor contact information
- Budget breakdown
Thorough planning is the foundation of a successful pool remodeling project.
Your site preparation should include carefully evaluating access points, material staging areas, and potential obstacles. Consider factors like equipment delivery routes, landscape protection, and potential disruptions to your daily routine. Communicate clearly with your renovation team about access requirements, working hours, and any specific site constraints that might impact the project timeline.
Pro tip: Create a dedicated staging area for construction materials and equipment to minimize yard disruption and protect surrounding landscape during your pool remodeling project.
Step 3: Remove Old Surface and Repair Pool Structure
Removing the existing pool surface is a critical phase that requires precision and careful planning. By following demolition specifications for swimming pools, you’ll ensure a thorough and safe preparation for your pool’s transformation.
The surface removal process involves several important steps:
- Drain the pool completely
- Remove existing plaster or tile using specialized tools
- Inspect underlying concrete for structural damage
- Chip away loose or deteriorating concrete sections
- Clean surface thoroughly to remove debris and contaminants
- Repair structural cracks and imperfections
Proper surface preparation is the foundation of a successful pool renovation.
Structural repair requires meticulous attention to detail. Look for signs of structural compromise such as significant cracking, shifting, or water penetration. Use hydraulic cement for underwater repairs and consider professional assessment if you discover extensive damage. Smooth and level the surface to create an ideal foundation for the new pool finish.
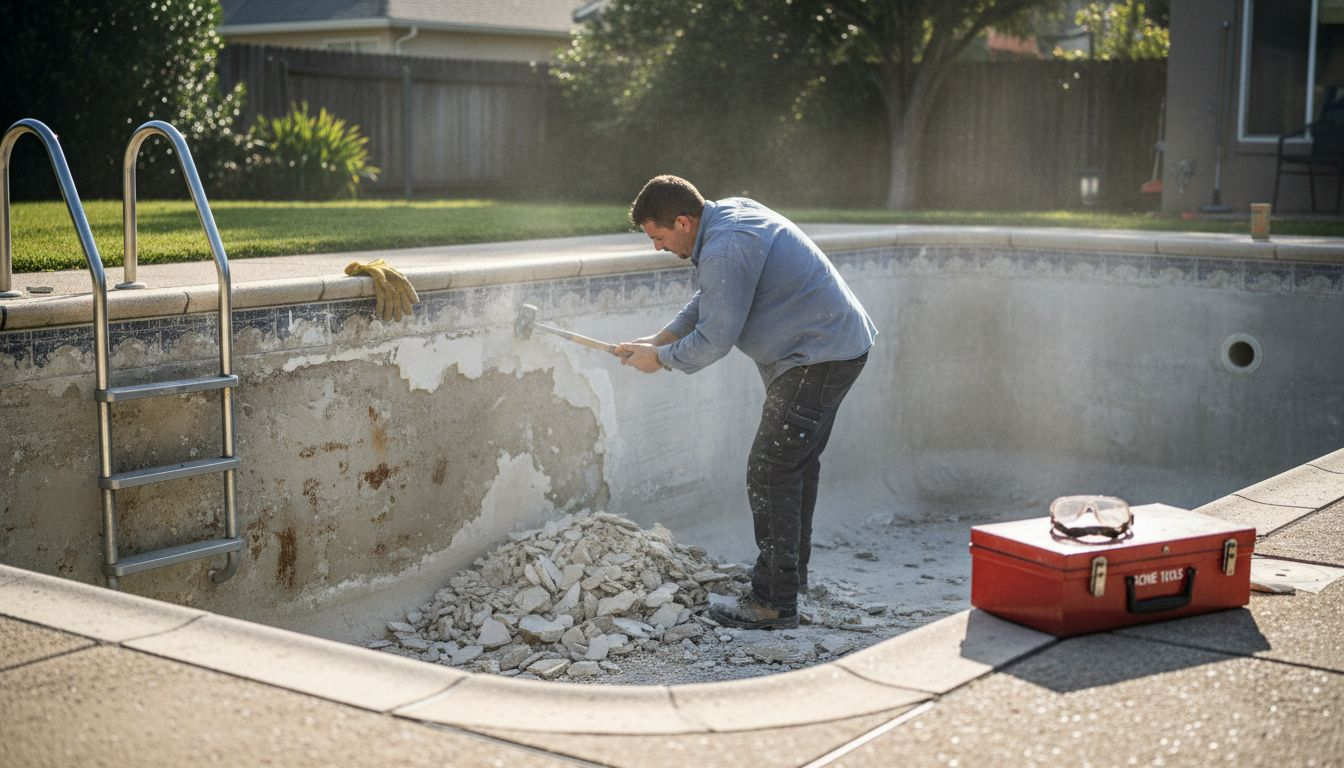
Pro tip: Invest in professional-grade protective gear like safety glasses, dust masks, and sturdy gloves when removing the old pool surface to prevent injury and minimize exposure to potentially hazardous materials.
Step 4: Install New Interior Finish and Upgrade Features
Transforming your pool involves more than just replacing the surface – it’s an opportunity to enhance functionality and aesthetics. By following sustainable interior design practices, you can create a pool environment that is both visually stunning and technologically advanced.
Key features and finishes to consider during your pool upgrade include:
- Slip-resistant interior surfaces
- Modern waterline tiles
- Energy-efficient lighting systems
- Advanced filtration technology
- Smart pool automation features
- Upgraded water circulation pumps
- Improved drainage systems
Selecting the right interior finish can dramatically enhance your pool’s durability and visual appeal.
When selecting your new interior finish, prioritize materials that offer durability, aesthetic appeal, and long-term performance. Pebble Tec® finishes provide excellent texture and longevity, while quartz-based surfaces offer superior resistance to chemical wear and staining. Consider consulting with professional pool specialists who can recommend finishes tailored to Florida’s unique climate and your specific pool usage requirements.
Here’s a summary comparing common pool interior finish options and their benefits:
| Finish Type | Durability | Maintenance Level | Aesthetic Appeal |
|---|---|---|---|
| Pebble Tec® | High, resists wear | Low, stains less often | Natural texture, upscale |
| Quartz-based | Very high, chemical resistant | Moderate, easy to clean | Bright colors, smooth |
| Plaster | Moderate, susceptible to staining | Higher, needs refurbishing | Classic look, smooth |
| Glass Tile | Extremely high, long lifespan | Low, easily cleaned | Vibrant, modern, reflective |
Pro tip: Choose light-colored interior finishes that reflect sunlight and help maintain cooler water temperatures, potentially reducing your pool’s overall energy consumption.
Step 5: Inspect Work and Ensure Quality Completion
The final stage of your pool remodeling journey demands meticulous attention to detail and comprehensive verification. Following critical pool construction inspection guidelines, you’ll systematically ensure every aspect of your renovation meets the highest standards of quality and safety.
Key inspection areas to carefully evaluate include:
- Surface smoothness and finish consistency
- Structural alignment and integrity
- Proper drainage and water flow
- Electrical and lighting installations
- Tile and waterline precision
- Equipment functionality
- Safety feature compliance
Thorough inspection is the difference between a good pool renovation and an exceptional one.
Electrical safety and structural integrity are paramount during your final review. Check for smooth transitions between new surfaces, verify that all equipment operates correctly, and confirm that electrical systems are properly grounded. Pay special attention to details like tile alignment, surface evenness, and the overall aesthetic finish. If any discrepancies are found, request immediate corrections from your pool renovation team.
This table highlights key inspection points and their impact on pool quality:
| Inspection Focus | Importance Level | Impact on Final Results |
|---|---|---|
| Surface Evenness | Critical | Prevents injuries, improves feel |
| Equipment Functionality | High | Ensures reliable operation |
| Water Flow & Drainage | Essential | Reduces risk of flooding or algae |
| Tile Alignment | Important | Enhances appearance and safety |
Pro tip: Document your final inspection with comprehensive photographs and written notes to create a clear record of the completed work and protect yourself against potential future disputes.
Elevate Your Pool Remodeling Experience with Expert Resurfacing
If you are facing common pool remodeling challenges like cracking surfaces or outdated finishes as detailed in “Step by Step Pool Remodeling: Transform Your Backyard Oasis” you understand how crucial it is to have durable and visually stunning pool surfaces. Whether you want to repair structural damage, upgrade to slip-resistant Pebble Tec® finishes, or improve energy efficiency Classic Marcite provides specialized pool resurfacing and remodeling solutions tailored for Florida climates.

Trust the industry’s leader with over 35 years of experience and 100 000+ pools resurfaced across Orlando and Jacksonville. Visit Classic Marcite today to explore our range of services including pool resurfacing, tile and equipment repairs, and custom interior finishes. Take the first step to transform your backyard oasis into a safe beautiful haven. Request your free estimate now and see the difference craftsmanship makes.
Frequently Asked Questions
How do I assess my pool’s current condition before remodeling?
To assess your pool’s current condition, thoroughly examine critical components such as the structural integrity, surface condition, equipment functionality, and aesthetic appearance. Document visible issues like cracks, discoloration, or signs of water leakage to create a comprehensive overview before planning your renovations.
What are the key goals I should define for my pool remodeling project?
Your key goals for remodeling should include both functional improvements and aesthetic enhancements. Determine specific objectives such as upgrading energy efficiency, increasing visual appeal, or enhancing safety features to tailor your renovation strategy effectively.
What steps should I take to prepare the site before starting the pool remodel?
To prepare your site, organize essential documentation like property surveys and current equipment specifications, and evaluate access points for construction materials. Create a staging area for equipment to ensure a smooth working environment and minimize disruption during the remodeling process.
What are the important phases of removing the old pool surface during renovation?
Important phases of removing the old pool surface include draining the pool, using specialized tools to remove existing plaster or tile, and inspecting the underlying concrete for structural damages. Ensure you clean the area thoroughly and repair any structural imperfections to set a solid foundation for the new surface.
How do I choose the right interior finish for my remodeled pool?
To choose the right interior finish, consider factors such as durability, maintenance requirements, and aesthetic appeal. Evaluate options, like Pebble Tec® or quartz-based surfaces, to ensure they suit Florida’s climate and your specific pool usage needs, prioritizing long-term performance and style.
What should I inspect to ensure the quality of my pool remodeling project?
During your final inspection, focus on areas such as surface smoothness, structural integrity, and equipment functionality. Document any discrepancies found and request immediate corrections to maintain high standards for safety and overall quality after your remodel.
Recommended
- DIY Pool Remodeling Guide For Stunning Results
- Remodeling Older Pools For Lasting Beauty And Durability
- Why Renovate Your Pool: Boost Beauty And Value
- 7 Steps To A Complete Pool Renovation Checklist For Homeowners
- WISA Amarante ligbad 180×80 cm wit – ooinkinstallaties
- Pool Refinishing Windermere FL
- Pool Renovation Winter Park FL
- Swimming Pool Remodeling The Villages FL
