TL;DR:
- Perform a bucket test to confirm water loss and determine if your pool is leaking before spending on repairs.
- Use dye and pressure testing to locate visible shell cracks, fittings, or underground plumbing leaks accurately.
Pool leak detection starts with the bucket test, the most reliable free method to confirm whether your pool is actually losing water before you spend a dollar on repairs. The industry term for this diagnostic process is “leak isolation,” and it follows a clear sequence: confirm the leak, locate the source, then repair. This guide covers every practical step, from the bucket test through pressure testing and professional diagnostics, so you can work through the problem systematically and avoid wasting money on guesswork.
1. How to confirm a pool leak with the bucket test
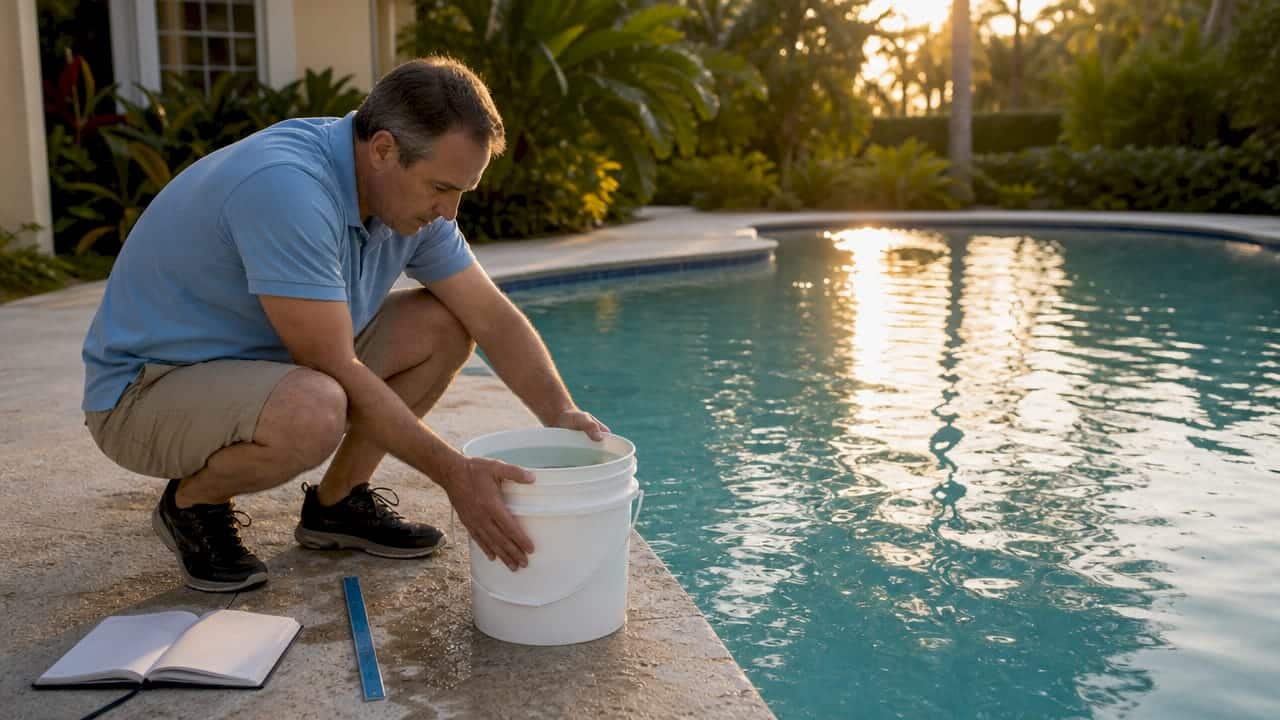
The bucket test is the correct first step in any pool leak detection effort because it separates real water loss from normal evaporation. Fill a 5-gallon bucket with pool water, place it on a pool step so it sits at the same water level as the pool, and mark both the bucket’s water line and the pool’s water line with tape or a marker. After 24 hours, compare the two drops. If the pool lost more water than the bucket, you have a leak.
Pools losing more than 2 inches per week after accounting for evaporation need immediate investigation. That threshold translates to roughly 1/4 inch per day beyond what the bucket shows, which is a meaningful signal rather than seasonal variation. Florida’s summer heat accelerates evaporation, so the bucket comparison is especially important in warm climates where owners often misread normal loss as a leak.
Running the pump ON and pump OFF variation
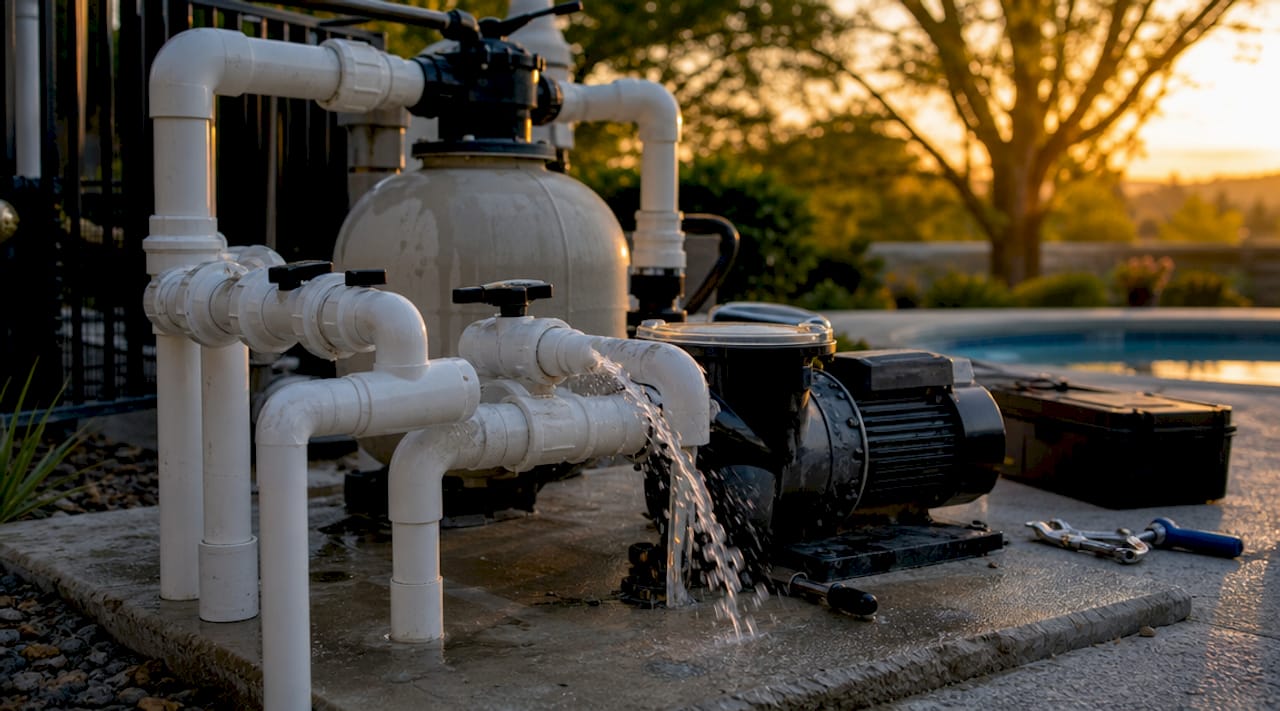
Once you confirm water loss, run the bucket test twice: once with the pump running for 24 hours, and once with the pump off for 24 hours. Pump ON vs pump OFF results tell you which part of the system is leaking. Greater loss with the pump running points to a pressure-side plumbing leak. Greater loss with the pump off suggests a suction-side or shell leak.
Pro Tip: Keep conditions identical for both test periods. No swimming, no rain, and no backwashing during either 24-hour window. Even a brief rainstorm can invalidate your results and send you chasing the wrong problem.
2. Visual inspection of the equipment pad
Before any dye or pressure test, walk your equipment pad and look for wet spots and drips around the pump, filter, heater, and chlorinator. Many leaks originate at equipment seals and fittings, and catching them visually costs nothing. A damp pad after the pump has been off overnight is a strong indicator of a seal or union failure rather than a plumbing issue.
Check these specific points during your visual scan:
- Pump lid O-ring and housing seal for moisture or mineral staining
- Filter clamp band and tank seam for hairline cracks or weeping
- Heater inlet and outlet unions for drips or corrosion rings
- Chlorinator lid and tubing connections for white residue indicating past leaks
- Backwash valve and multiport valve for bypassing water
Staining patterns matter. A white calcium ring around a fitting means water has been evaporating there repeatedly. A green or brown stain suggests algae growth from persistent moisture. Both are diagnostic clues that narrow your search before you open a single tool.
3. Dye testing for shell cracks and fitting leaks
Dye testing pinpoints visible shell leaks by drawing concentrated dye into cracks or gaps when the water is still and the pump is off. Use a pool-grade leak detection dye or plain food coloring in a syringe or squeeze bottle. Approach the suspected area slowly to avoid disturbing the water, then release a small stream of dye near the surface.
If the dye drifts toward the wall and disappears into a crack or fitting gap, you found your leak. If it disperses evenly into the water, that spot is not the source. Work through these locations in order:
- Skimmer throat and the joint where the skimmer body meets the pool shell
- Return fittings and eyeball jets for gasket wear
- Light niches and conduit entry points, which are among the most common leak sites
- Visible plaster cracks, especially in corners and along the floor-to-wall transition
- Main drain cover and surrounding grout
Pro Tip: Perform dye tests in the early morning when the water is calm and there is no wind. Any surface movement will carry the dye away from the leak before you can read the result.
4. Pressure testing for underground plumbing leaks
Pressure testing is the standard method for detecting leaks in buried plumbing lines that no visual inspection can reach. The procedure involves pressurizing isolated pipe sections to 15 to 25 psi with air or water, then monitoring the gauge for 15 to 30 minutes. A steady gauge reading means the line holds. A pressure drop indicates a leak somewhere in that section.
Key points for safe and accurate pressure testing:
- Isolate each line individually so a drop in one section does not mask a hold in another
- Use water rather than air when possible, since air pressure releases more energy if a fitting fails
- Account for thermal expansion, which can cause minor gauge movement unrelated to actual leaks on warm days
- Never exceed the rated pressure for the pipe material, particularly with older PVC lines
Advanced professional methods include acoustic sensors that detect the sound of water escaping underground, hydrogen tracer gas injected into depressurized lines and detected at the surface with a sniffer, and thermal imaging cameras that identify temperature anomalies from wet soil. These tools locate leaks under concrete without excavation, which saves significant repair cost. Acoustic detection and tracer gas are not DIY options, but knowing they exist helps you have an informed conversation with a contractor.
5. Common pool leak causes and how to prevent them
Skimmer joints, pump seals, light niches, and return fittings are the most frequent leak points in residential pools. Thermal expansion, aging gaskets, and ground movement all contribute to failures at these locations over time. Understanding the causes helps you build a maintenance routine that catches problems before they become expensive.
Practical prevention steps include:
- Maintaining pH between 7.4 and 7.6 and alkalinity between 80 and 120 ppm to prevent corrosion that degrades seals and plaster
- Applying silicone lubricant to O-rings and gaskets twice per season to reduce seal failure risk
- Inspecting skimmer weir doors and throat gaskets each spring before heavy use begins
- Checking light niche conduit seals annually, since water follows the conduit into the wall cavity if the seal fails
- Documenting your water level weekly so you catch gradual loss before it becomes a structural problem
The pool maintenance checklist for 2026 from Classic Marcite covers chemistry schedules and seasonal inspection points that reduce the likelihood of leak-related damage. Prevention costs far less than repair, and most of these steps take under 30 minutes per month.
6. DIY detection vs professional services: when to escalate
The bucket test and dye test are effective for surface leaks and equipment pad issues, and they cost nothing beyond a few dollars for dye. Their limitation is clear: neither method reaches underground plumbing. The table below compares your options by situation.
| Method | Best for | Limitation | Typical cost |
|---|---|---|---|
| Bucket test | Confirming leak exists | Does not locate source | Free |
| Dye test | Shell cracks, fittings, skimmers | Requires calm water, visible access | Under $20 |
| Pressure test (DIY) | Accessible plumbing lines | Risk of pipe damage if done incorrectly | $50 to $100 in tools |
| Professional pressure test | All buried lines | Requires scheduling a contractor | $200 to $500 |
| Acoustic or tracer gas | Deep underground leaks | Not available as DIY | $400 to $800+ |
Call a professional when the bucket test confirms a leak but dye testing finds nothing visible, when water loss continues after you have repaired all visible faults, or when loss is rapid enough to suggest a main drain or lateral line failure. The step-by-step Florida workflow from Classic Marcite outlines exactly when each escalation point applies for Florida pool owners.
Key takeaways
Effective pool leak detection follows a fixed sequence: confirm the leak with the bucket test, locate it with dye or pressure testing, then repair or escalate based on what the tests reveal.
| Point | Details |
|---|---|
| Start with the bucket test | Compare pool and bucket water loss over 24 hours to confirm a real leak before spending money. |
| Use pump ON/OFF variation | Running the test both ways tells you whether the leak is on the pressure side or the shell side. |
| Dye tests cover visible faults | Apply dye near skimmers, return fittings, light niches, and cracks with the pump off and water still. |
| Pressure testing finds buried leaks | Monitor gauge drops over 15 to 30 minutes on isolated lines to locate underground failures. |
| Prevention beats repair | Correct water chemistry and lubricated gaskets prevent most common leak causes before they start. |
What 35 years of Florida pools taught me about leak detection
The most expensive mistake homeowners make is skipping the bucket test and calling a contractor the moment they notice the water level dropping. Florida’s summer evaporation rate is high enough that a pool can lose a noticeable amount of water in a week without any leak at all. I have seen owners pay for full pressure testing and dye surveys only to find out their pool was losing exactly what the bucket showed it should lose through evaporation.
The pump ON versus pump OFF variation is the single most underused diagnostic step in residential leak detection. It takes two days and costs nothing, yet it narrows the search from the entire pool system down to one of two categories. That information alone can cut a professional’s diagnostic time in half, which directly reduces your bill.
My honest recommendation: document your water level every week, even when nothing seems wrong. A written record of normal loss rates makes it immediately obvious when something changes. When you do call a professional, that data tells them how long the problem has existed and how severe it is. Professionals work faster and more accurately when they have a baseline to compare against. Most homeowners skip this step entirely, and they pay for it in longer diagnostic sessions.
— Classic Marcite
How Classic Marcite can help after you find the leak

Finding a leak is only half the job. If your investigation points to shell cracks, plaster deterioration, or fitting failures embedded in the pool surface, the repair requires more than patching. Classic Marcite has resurfaced over 100,000 pools across Orlando and Jacksonville since 1988, and the team works specifically with Florida pool conditions where heat, humidity, and ground movement accelerate surface wear. Pool resurfacing in The Villages and across Central Florida restores shell integrity using materials like Pebble Tec® that resist future cracking and water infiltration. If your leak detection points to a surface problem, contact Classic Marcite for a free estimate and a clear repair plan.
FAQ
How do I know if my pool is leaking or just evaporating?
Run the bucket test: place a filled bucket at pool level, mark both water lines, and compare drops after 24 hours. If the pool drops more than the bucket, you have a leak rather than normal evaporation.
What is the most reliable DIY method for finding a pool leak?
Dye testing is the most reliable DIY method for locating visible leaks. Apply pool-grade dye near skimmer throats, return fittings, light niches, and visible cracks with the pump off and the water still.
When should I call a professional for pool leak detection?
Call a professional when the bucket test confirms water loss but dye testing finds no visible source, or when water loss continues after you repair all accessible faults. Underground plumbing leaks require pressure testing or acoustic detection that most homeowners cannot perform safely.
Can poor water chemistry cause pool leaks?
Yes. Water with pH below 7.4 or alkalinity outside the 80 to 120 ppm range corrodes metal fittings and degrades rubber seals, which creates leak points over time at pump connections, return fittings, and light niches.
How much water loss per day is normal for a pool?
Roughly 1/4 inch per day is the upper limit of normal evaporation in warm climates. Pools losing more than 2 inches per week, after accounting for evaporation via the bucket test, need a leak investigation.