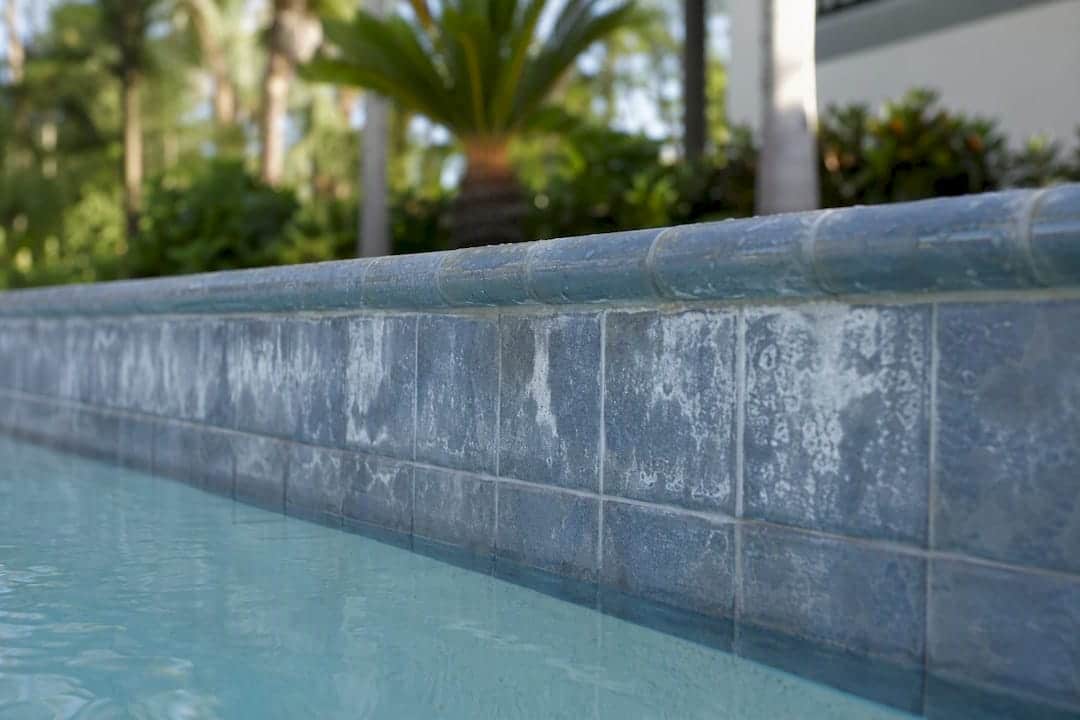
Efflorescence on pool tile is a white, powdery mineral deposit that forms when moisture carries dissolved salts through mortar or grout and leaves them behind on the surface as the water evaporates. It’s different from calcium scale, which comes from the pool water itself and hardens at the waterline instead of the grout line. If you spot chalky white buildup, brush the area, snap a photo for your records, and run a quick spot test before you reach for any cleaning product.
- Powdery and easily brushed off? Likely efflorescence.
- Hard, crusty, and stuck to the waterline? Likely calcium scale.
- Comes back within days of cleaning? Treat it as a moisture problem, not a cleaning problem.
Key Takeaways
Efflorescence is a moisture and salt migration problem at its root, and lasting fixes require correcting waterproofing, mortar coverage, and cure time rather than repeating surface cleanings.
| Point | Details |
|---|---|
| Identify before you clean | Use the scrape and vinegar tests to confirm efflorescence rather than calcium scale before choosing a treatment. |
| Clean gentle to strong | Start with a nylon brush and mild detergent; reserve diluted muriatic acid or commercial removers for stubborn buildup. |
| Never blast or pressure wash | Abrasive blasting and pressure washing can strip grout, damage tile, and void warranties. |
| Seal only after fixing the source | A penetrating sealer slows recurrence but fails if the underlying moisture path stays open. |
| Escalate fast reappearance | Deposits returning within a week or two point to a structural issue that needs professional diagnosis. |
Table of Contents
- What’s the Difference Between Efflorescence and Calcium Scale?
- What Causes Efflorescence to Form on Pool Tile?
- How Do You Safely Remove Efflorescence from Pool Tile?
- How Can You Prevent Efflorescence from Coming Back?
- When Should You Call a Professional for Pool Tile Efflorescence?
- What the Research on Efflorescence Actually Tells Homeowners
- Sources
What’s the Difference Between Efflorescence and Calcium Scale?
Location tells you most of what you need to know. Efflorescence tends to show up on raised tile walls, in grout joints, and just below the coping, places where moisture has a path out of the masonry. Calcium scale, by contrast, forms a horizontal ring right at the waterline because it’s a byproduct of imbalanced pool water, not construction moisture, as Clearer by Design explains.
Two DIY tests settle most disputes:
- Scrape test: A putty knife or fingernail should crumble efflorescence into powder. Calcium scale resists and feels gritty or glassy.
- Vinegar spot test: Dab diluted white vinegar on the deposit. Efflorescence usually fizzes lightly and starts dissolving. Calcium scale reacts more slowly and needs a stronger acid to budge.
- Reappearance check: Clean a small patch and watch it for a week. If the white residue returns fast, especially after rain, that’s a strong sign moisture is migrating from behind the tile, not just sitting on top of it.
Streaking patterns, stalactite-like drips at grout lines, or deposits that reappear within days despite thorough cleaning point to a source problem, according to Clearer by Design’s diagnostic guidance.
Pro Tip: Keep a dated photo log every time you clean a suspect area. If the same spot “relapses” three times in a season, you’re not looking at a cosmetic issue anymore, you’re looking at a construction one.
What Causes Efflorescence to Form on Pool Tile?
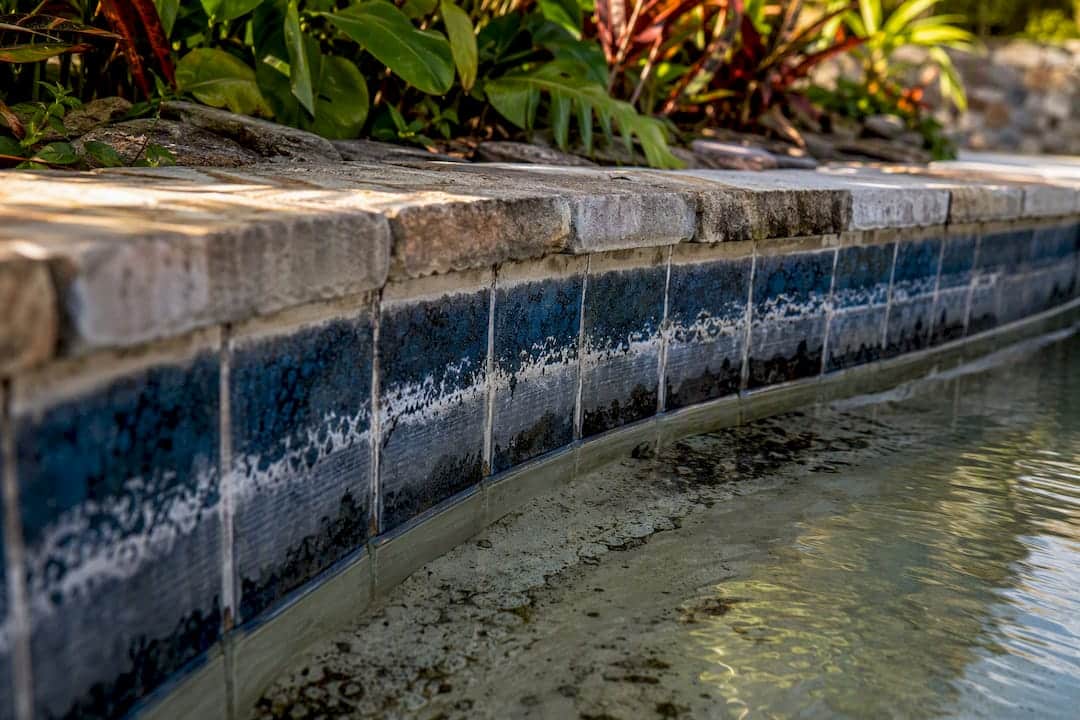
Efflorescence needs three things working together: moisture, soluble salts, and a path for that moisture to travel to the surface. Water moves through porous mortar and grout by capillary action, picks up salts as it goes, and leaves those salts behind once it evaporates at the surface, a process J Designs details in its work on pool deposits.
Several conditions make this worse:
- Moisture trapped behind tile during construction, with nowhere to escape but through the grout.
- Waterproofing membranes that were skipped, damaged, or installed incorrectly.
- Concrete that didn’t get the proper cure time before tiling, trapping excess moisture inside the shell.
- Heavy rainfall, irrigation overspray, or groundwater pushing moisture toward the pool structure from outside, a factor Arrowhead Deck & Pools also flags.
- Highly porous cement-based grout and mortar, which wick moisture more readily than dense materials like porcelain or glass tile.
That last point matters for renovation decisions. Low-porosity tile resists the problem better, but the mortar bed underneath still determines whether salts have a route to the surface in the first place.
How Do You Safely Remove Efflorescence from Pool Tile?
Start dry, not wet. Efflorescence removal works best when you tackle it in stages, moving from gentle to stronger only if the milder step fails.
- Brush it off first. A stiff nylon brush knocks loose the bulk of the powder without introducing more moisture. Photograph the area before and after.
- Try water and mild detergent. Many light deposits rinse away completely with a scrub brush and warm, soapy water.
- Step up to diluted white vinegar for stubborn spots. Apply, let it sit briefly, scrub, then rinse thoroughly. Efflorescence is generally soluble enough that mild acids handle it, which is exactly why Clearer by Design recommends starting here before anything stronger.
- Move to diluted muriatic acid or a commercial efflorescence remover only for heavy buildup. If you go this route, mix acid into water (never water into acid), wear goggles and gloves, work in ventilated conditions, spot test a hidden tile first, and neutralize with a baking soda rinse afterward. Never let acid sit longer than the label allows; extended contact etches grout and dulls tile glaze.
- Rinse completely and let the area dry before deciding on next steps.
What to avoid matters just as much as what to do. Pressure washing and abrasive blasting methods, including sand or glass bead blasting, are discouraged because they can strip grout, damage tile finishes, and void manufacturer warranties. It’s a common shortcut homeowners reach for because it feels thorough, but it often trades a cosmetic problem for a structural one.
If a properly cleaned area shows white powder again within a week or two, cleaning alone isn’t going to solve it. That’s your cue to move from treatment to diagnosis. Our guide on restoring faded pool tiles covers additional gentle techniques for mineral buildup that overlaps with efflorescence cleanup.
How Can You Prevent Efflorescence from Coming Back?
Cleaning treats the symptom. Preventing recurrence means addressing where the moisture comes from and where it’s going.
On the homeowner side, a few habits make a real difference:
- Regrade the deck and surrounding landscape so runoff drains away from the pool shell instead of pooling against it.
- Redirect irrigation heads and sprinklers away from tile and coping.
- Let grout dry fully before applying any sealer, since sealing over trapped moisture just relocates the problem.
- Apply a penetrating masonry sealer after cleaning to slow capillary movement, but only once the actual moisture source is resolved. A sealer applied over an unresolved leak buys you a few extra weeks of clean tile at best.
On the construction side, the fixes run deeper. A properly installed waterproofing membrane behind the tile, full mortar coverage with no voids, epoxy grout in high-moisture zones, and adequate concrete cure time before tile setting all address the root mechanics rather than the surface result.
Efflorescence is frequently a construction and moisture-management issue rather than a routine pool chemistry problem, which is why prevention depends on getting membrane installation, mortar coverage, and cure timing right the first time.
That distinction shapes the cost conversation too. A simple clean-and-seal job might run into the low hundreds of dollars for a small area. Once the fix requires partial tear-out, membrane repair, or regrouting, you’re looking at a broader renovation scope, and repeated cleaning on a structural problem usually ends up costing more over time than addressing it once. For grout specifically, our regrouting workflow guide walks through what that process involves.
When Should You Call a Professional for Pool Tile Efflorescence?
Some signs mean it’s time to stop scrubbing and start calling. Recurring white deposits despite repeated cleaning, visible dampness around the shell, tiles that are popping or loosening, staining across a large section, or any hint of cracks in the pool shell all point to something beyond a weekend project.
A professional remediation typically follows a set sequence:
- Moisture mapping and inspection to pinpoint exactly where water is entering the structure.
- Source repair, which usually means addressing or replacing the waterproofing membrane.
- Partial tear-out with re-mortaring or regrouting in the affected zone.
- Resealing or, in more extensive cases, resurfacing the area once the underlying issue is fixed.
Professionals typically frame estimates by scope, small spot repair versus full-section retile versus shell resurfacing, rather than a flat per-linear-foot number, since moisture damage rarely follows a straight line. A site visit is how a contractor determines which category your pool falls into.
Pro Tip: Ask any contractor you’re evaluating how they diagnose the moisture source before quoting a fix. If the answer skips straight to “we’ll clean and reseal,” that’s a sign the diagnosis step got skipped too.
Classicmarcite has resurfaced more than 100,000 pools across Central Florida since 1988 and holds the largest Pebble Tec® applicator role in the region, working through exactly this kind of moisture-driven tile failure on a regular basis. If your pool’s efflorescence keeps returning after cleaning, a professional assessment through pool resurfacing services in Orlando can confirm whether you’re dealing with a simple grout repair or a shell issue that calls for a full resurface.
What the Research on Efflorescence Actually Tells Homeowners
Most advice on pool tile stains treats cleaning as the whole story. It isn’t. The research here points somewhere less convenient: the white powder is usually a messenger, not the actual problem. Scrubbing it away without asking why it showed up in the first place is like repainting over a water stain on a ceiling and calling the roof fixed.
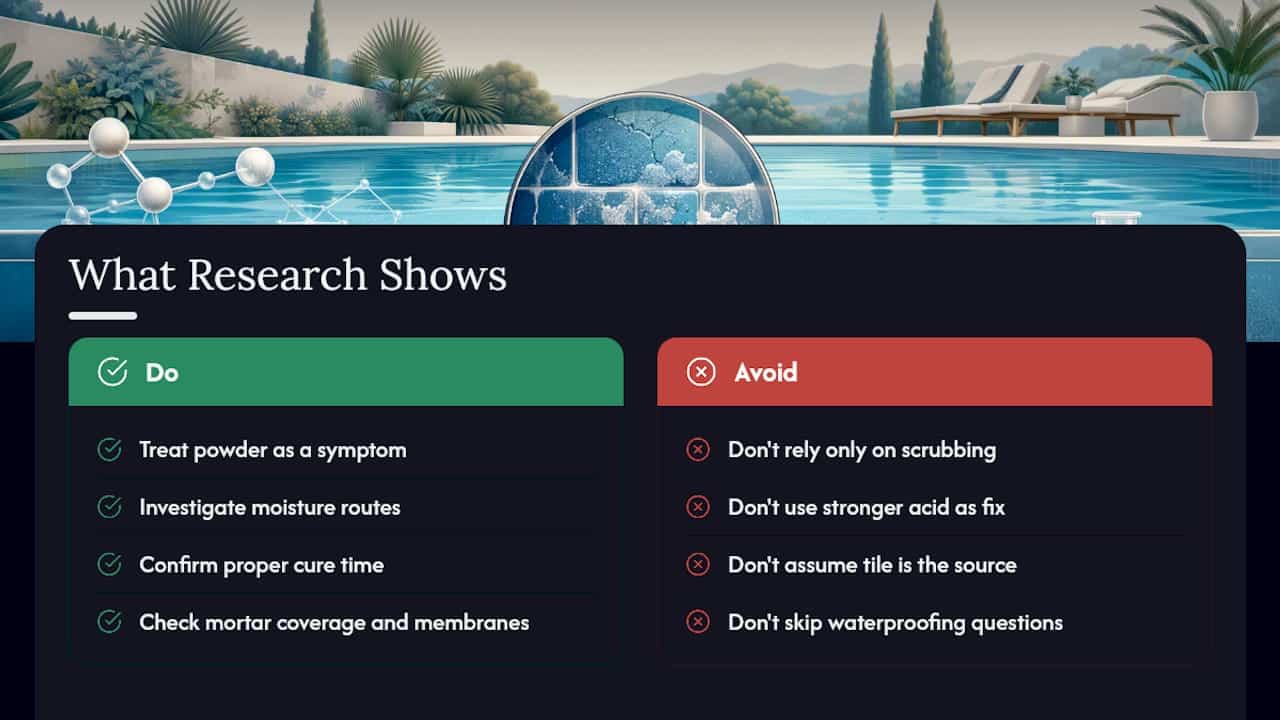
Where conventional advice falls short is in stopping at the vinegar-and-brush step. That’s a fine first move, but treating recurrence as “just needing a stronger acid” ignores what the pattern is telling you: moisture has a route through your mortar, and no amount of scrubbing closes that route.
What deserves more attention than it gets is cure time. It’s not glamorous, and it happened months or years before you ever noticed a stain, but rushed curing during original construction is one of the more common root causes builders quietly skip. If you’re renovating rather than patching, ask pointed questions about waterproofing membranes and mortar coverage before tile selection even comes up. The tile is the last decision that matters, not the first.
— Results
Sources
- Understanding Calcium And Efflorescence Deposits In Swimming Pools
- What is Efflorescence? Clean Pool Tiles | Clearer By Design
- Why Pools Fail: Efflorescence, Cure Time, and the Details Most Builders Rush
- Why Are My Pool Tiles Turning White? Find Out The Truth Now 2026